How To Use Iron-On/ Heat Transfer Vinyl on Shirts

How To Use Iron-On/ Heat Transfer Vinyl on Shirts

This post and the photos within it may contain Amazon or other affiliate links. If you purchase something through the link, I may receive a small commission at no extra charge to you.

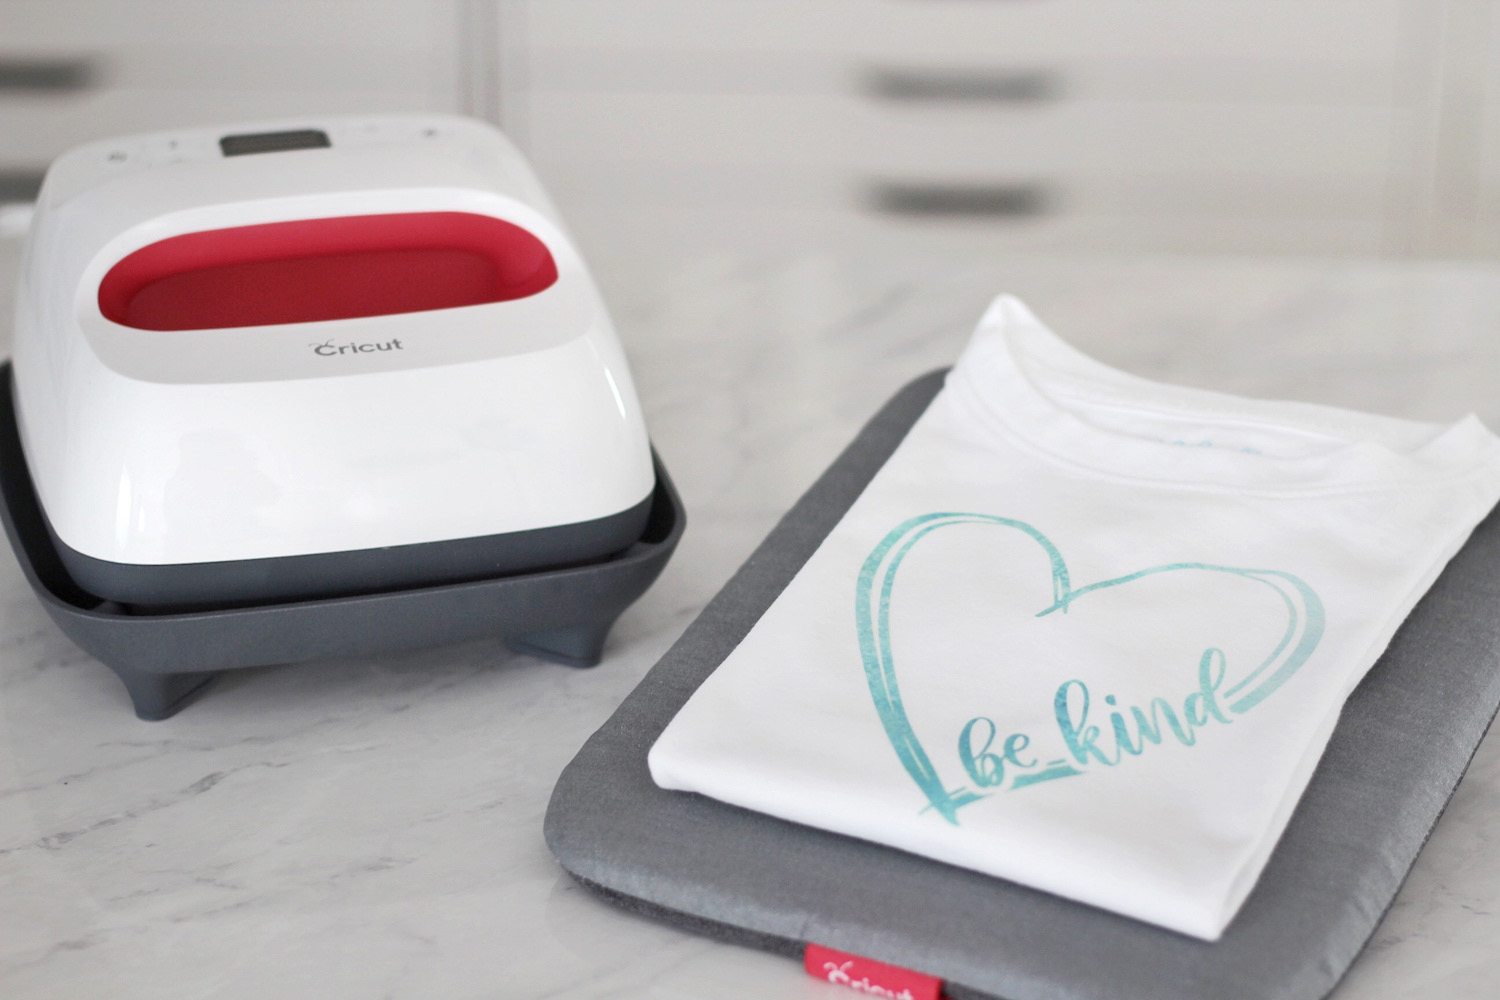
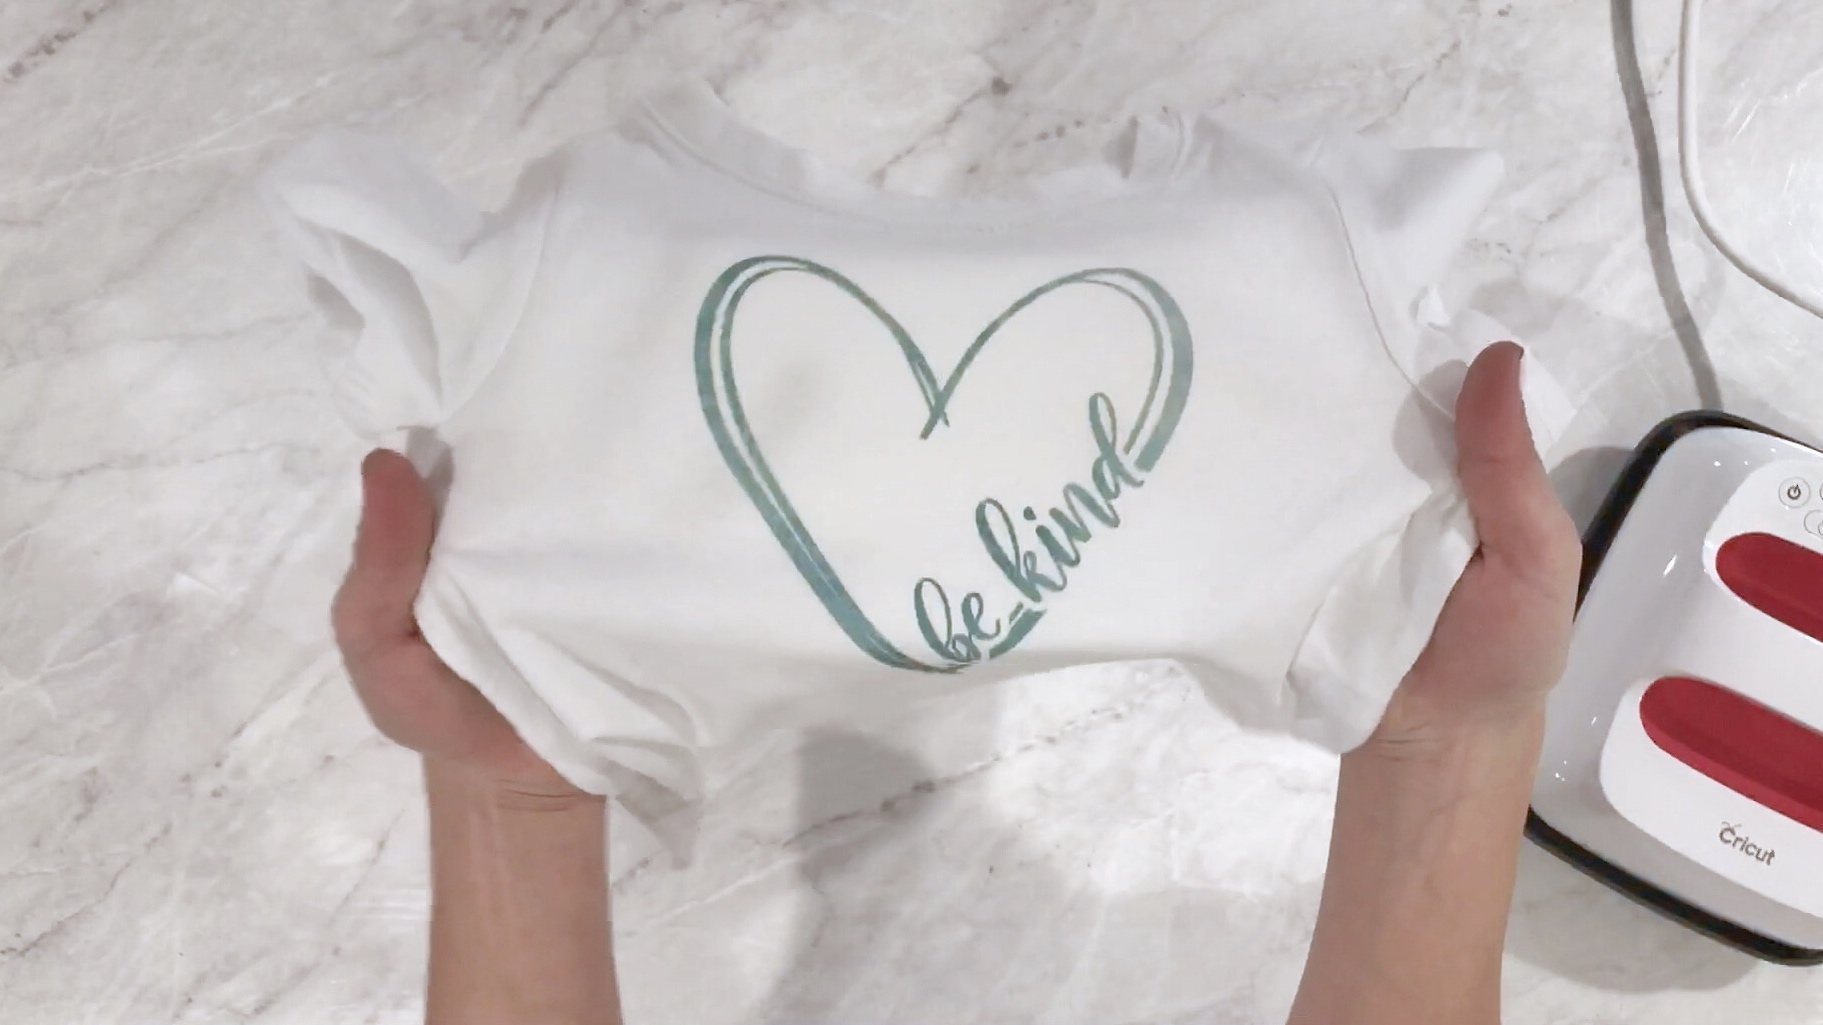
It took me a little while to pull the trigger and purchase my first roll of heat transfer vinyl (HTV) or as Cricut calls it, “iron-on.” The price tag scared me and I didn’t feel confident using the material without ruining it! To my surprise, it wasn’t as hard as I thought it would be. There are just a few things you need to remember to do. I’ll walk you through a beginner project so you feel confident tackling all of your HTV projects in the future. 

Here’s what we need to get this craft party started:

To access the design I used for this project click here!

If at any point during this tutorial you get lost or confused, click the image and it’ll take you to that exact moment in a full how-to video tutorial. The video will show you everything you need to know about cutting, weeding, and applying iron-on using Cricut Design Space.

Design and MIRROR your image

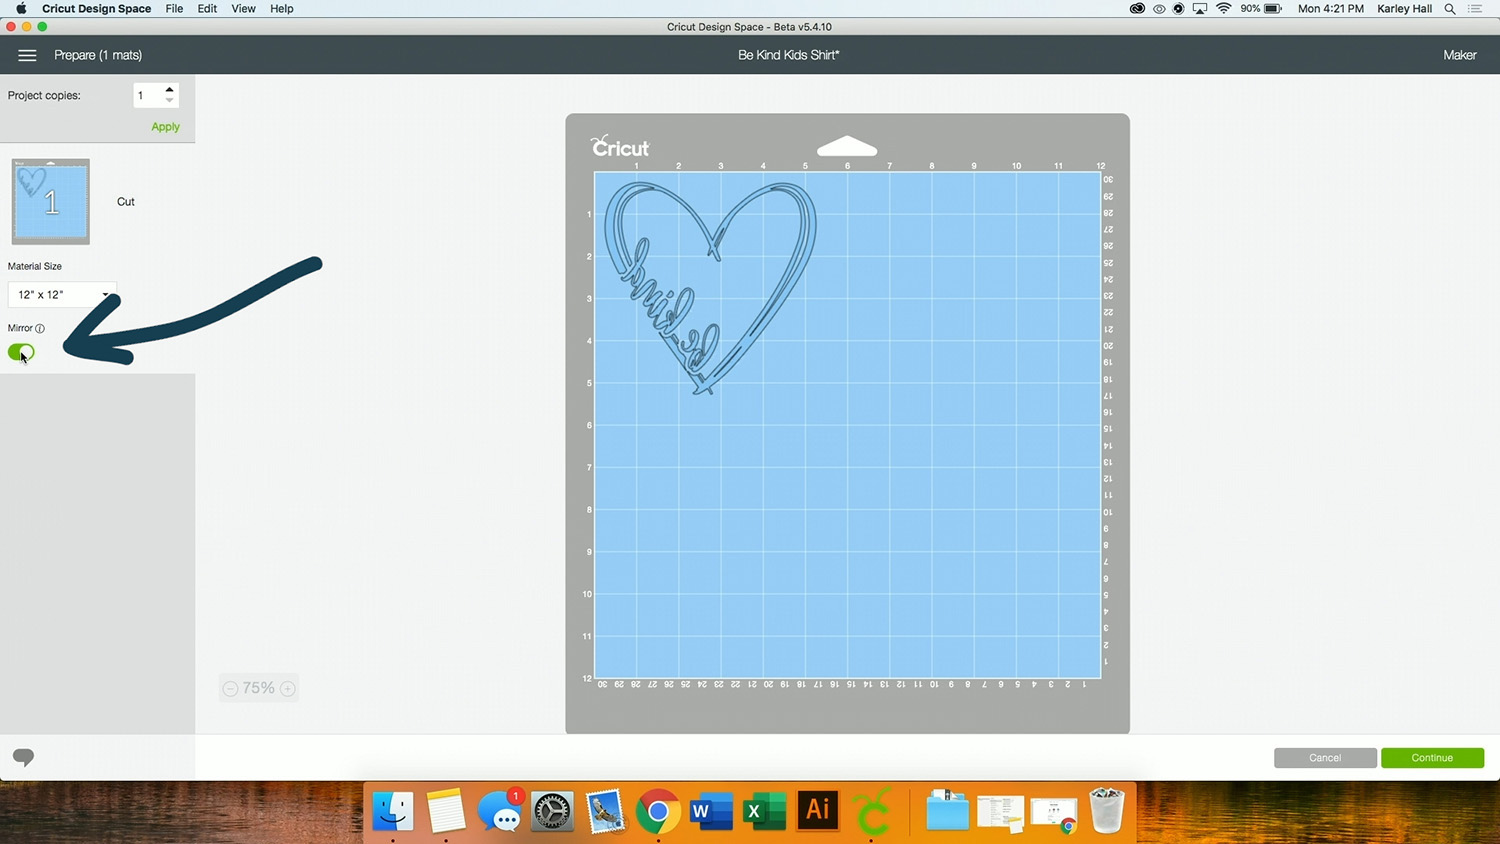
To keep this tutorial a manageable length, I skipped over choosing my design in Cricut Design Space! I am making a child’s shirt so I resized my image to be about 5″ wide and let the height resize proportionately. After you click “Make It” you will land on this screen. This is the “Mat Preview Screen” and this step is VERY important! There are a few things that can ruin an iron-on/ heat transfer vinyl (HTV) project and forgetting to mirror your image is one of them! To mirror your image, toggle on the mirror slider on the left hand side of your screen. If you are using a device or phone, you may have to turn your device horizontally so that you can see this option.  

Set your material in Design Space

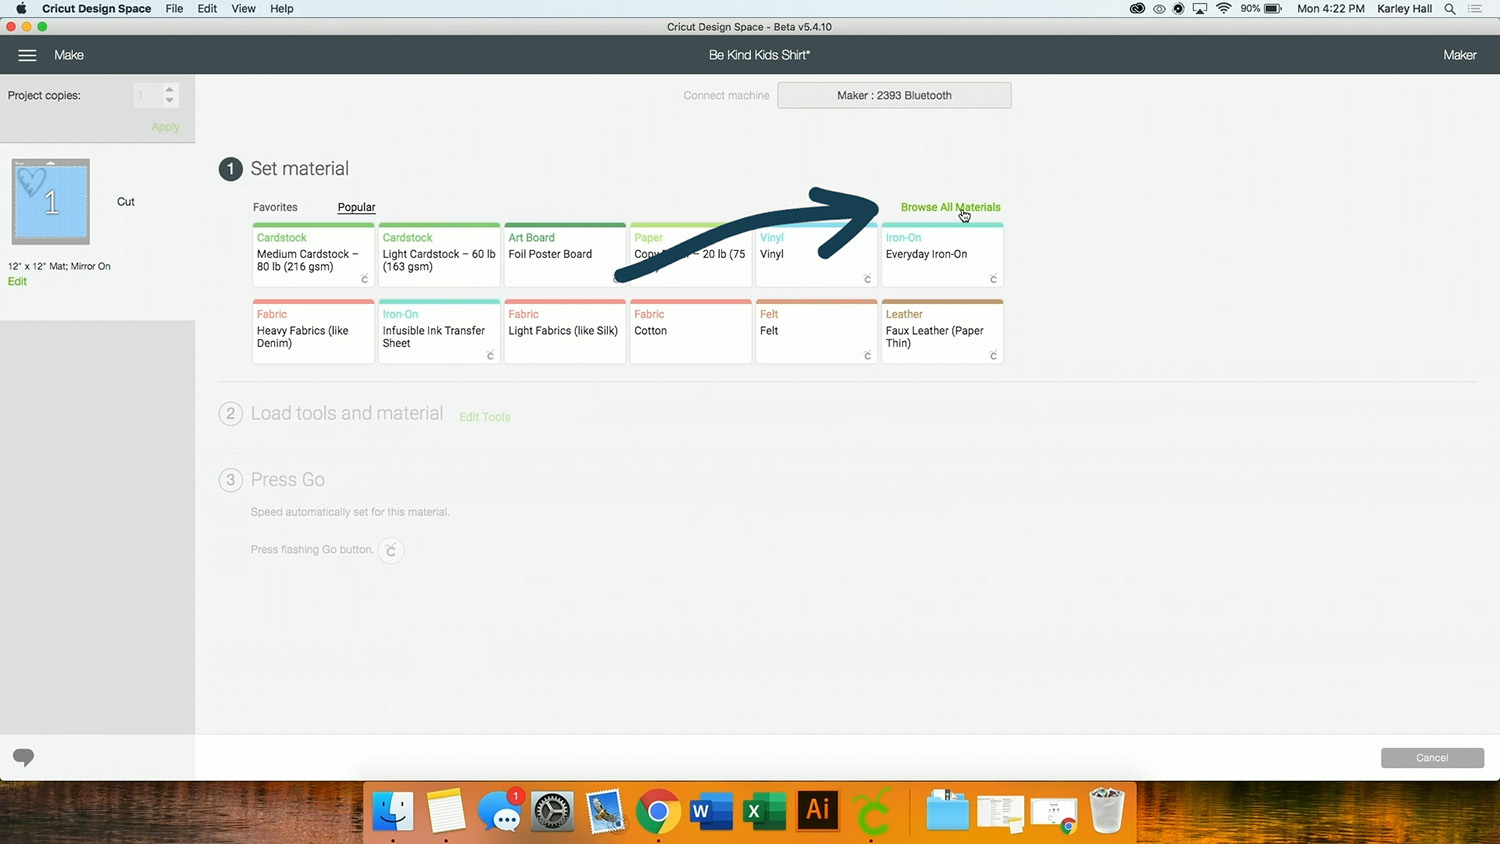
If you are not using a Cricut material, I would recommend doing a small test cut before you cut your entire image. Since iron-on/ heat transfer vinyl (HTV) is expensive, cutting a small 1/4″ circle or square will save you from ruining an entire sheet. Since I am using a Cricut product, I am going to set my material using their recommended settings. On a Maker, click “Browse All Materials” to see the entire list of products Cricut offers. I did a quick search for “Pattern” to find the setting I needed- Patterned Iron-On. If you are using a Cricut Explore Air 2, turn your dial to “custom” and then you can browse all materials too!   

Load the Iron-On (HTV) on Your Mat

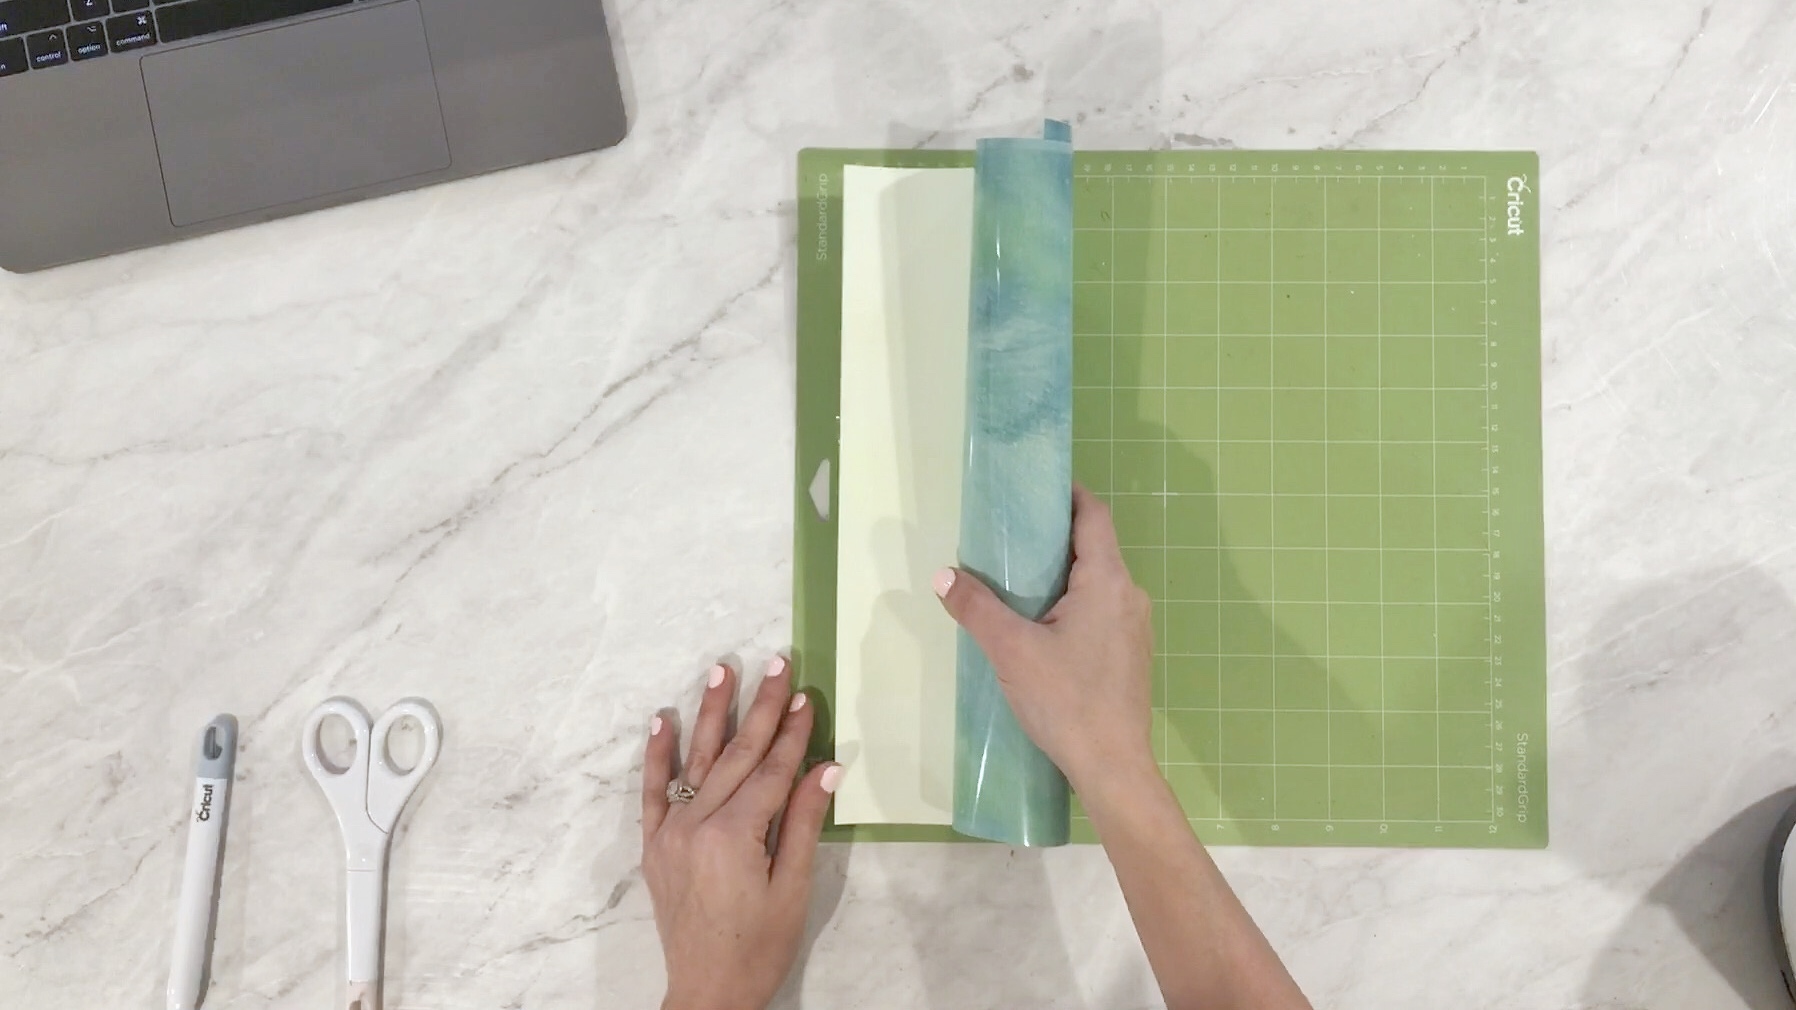
Loading iron-on/ heat transfer vinyl (HTV) onto your machine cutting mat can get a little confusing. I almost always use a StandardGrip Mat (the green one) when cutting HTV. Some iron-on/ heat transfer vinyls (HTV) are really slippery. If my iron-on doesn’t stick down, I will try using a StrongGrip Mat (the purple one) or use some masking tape to tape it down along the edges. For this project, the StandardGrip Mat works great. 

Place your iron-on/ heat transfer vinyl (HTV) shiny side down on the mat. The adhesive will be facing up. Once it’s loaded on your mat, load it into your machine, and cut it! Click the photo below if you want to check out the video for more guidance.  

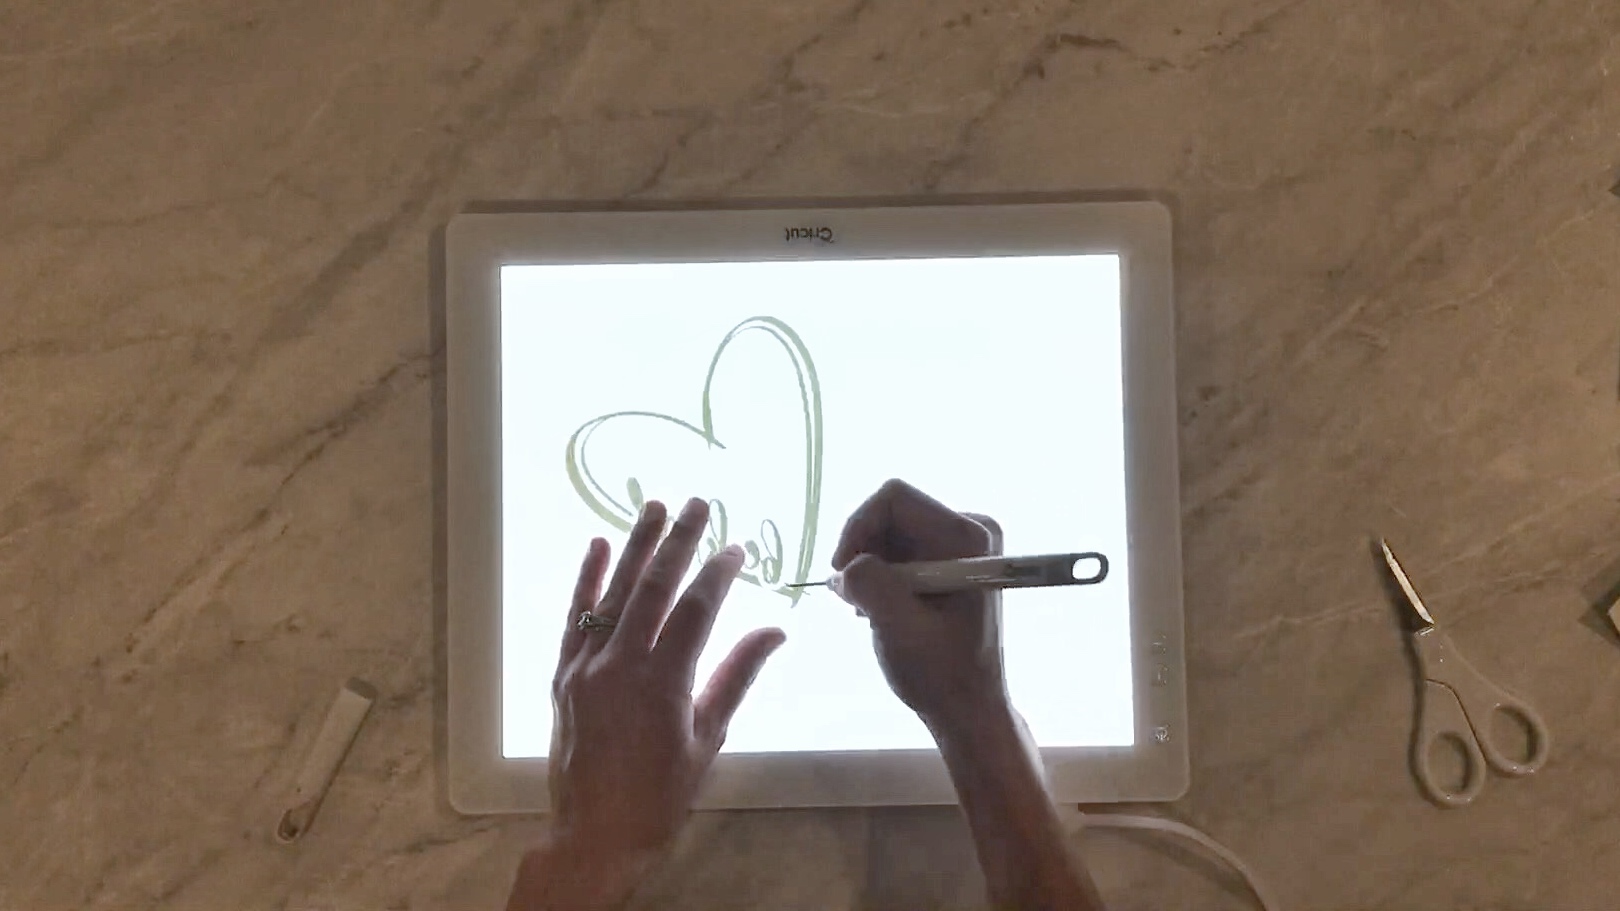
Use a BrightPad or Light Pad to Weed Your Design

When I pulled my iron-on (HTV) off my mat, I was surprised how hard it was to see my cut lines. At first I didn’t even think it cut. So I grabbed my BrightPad to see if it would help. I powered it on to the highest setting and I could see lines perfectly. When your iron-on (HTV) comes out of your machine, it will not be ready to apply. You have to “weed” your image. Weeding is the process of pulling away the negative pieces (the pieces you don’t want) from your project. Then your left with a mirrored image of your design.     

Heat Up Your EasyPress, Heat Press, or Iron 

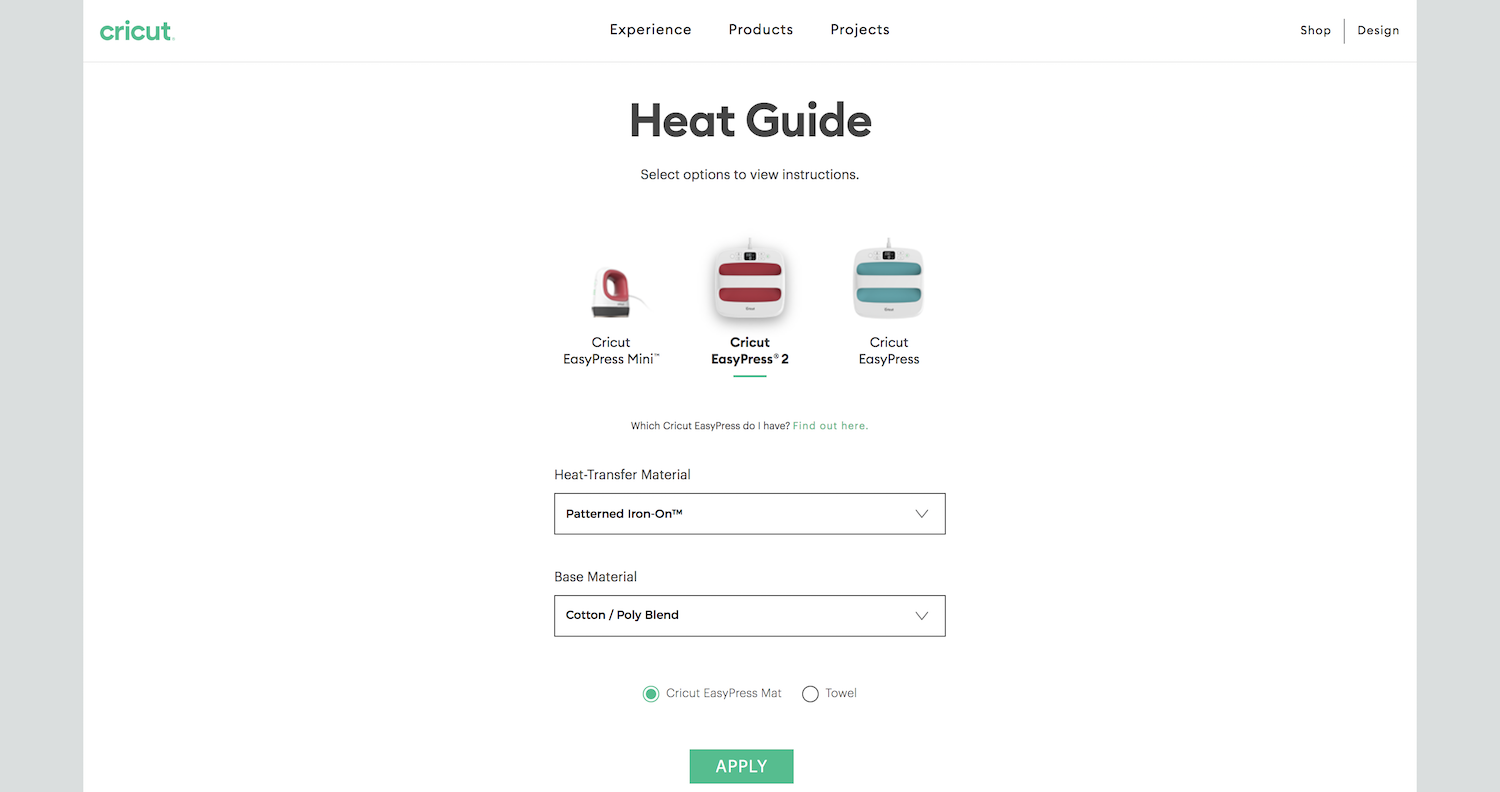
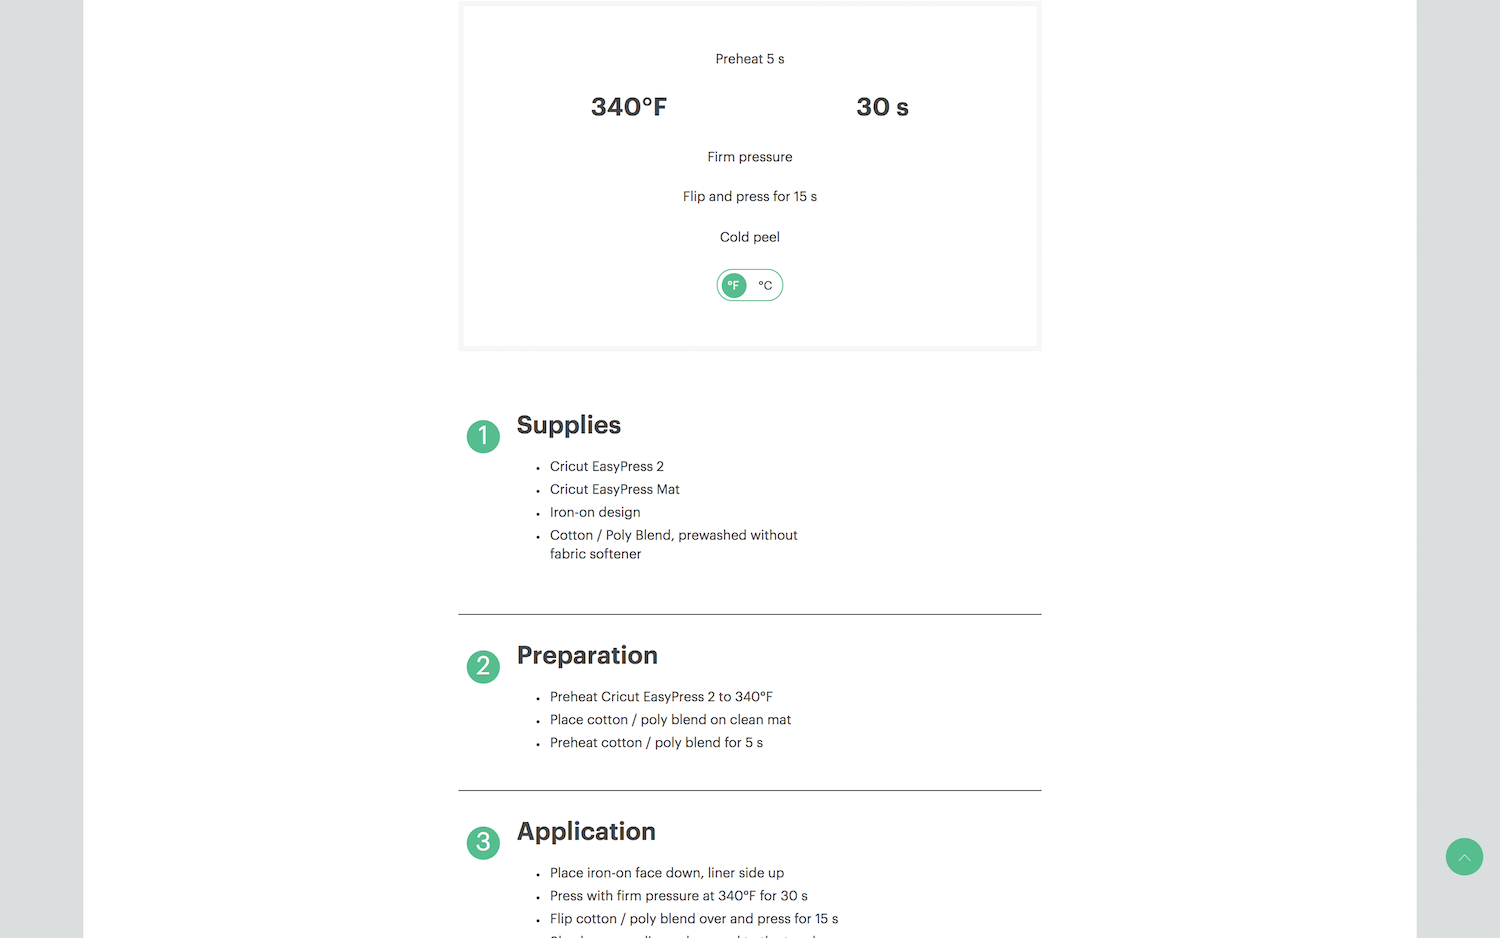
Since I am using an EasyPress, I am going to use the Cricut Heat Guide to determine the settings and application instructions I need to follow for this project. All you have to do is select the material you are using and the base material you are applying it to. The Heat Guide will then spit out all of the instructions you need to follow.  

Applying Your Design

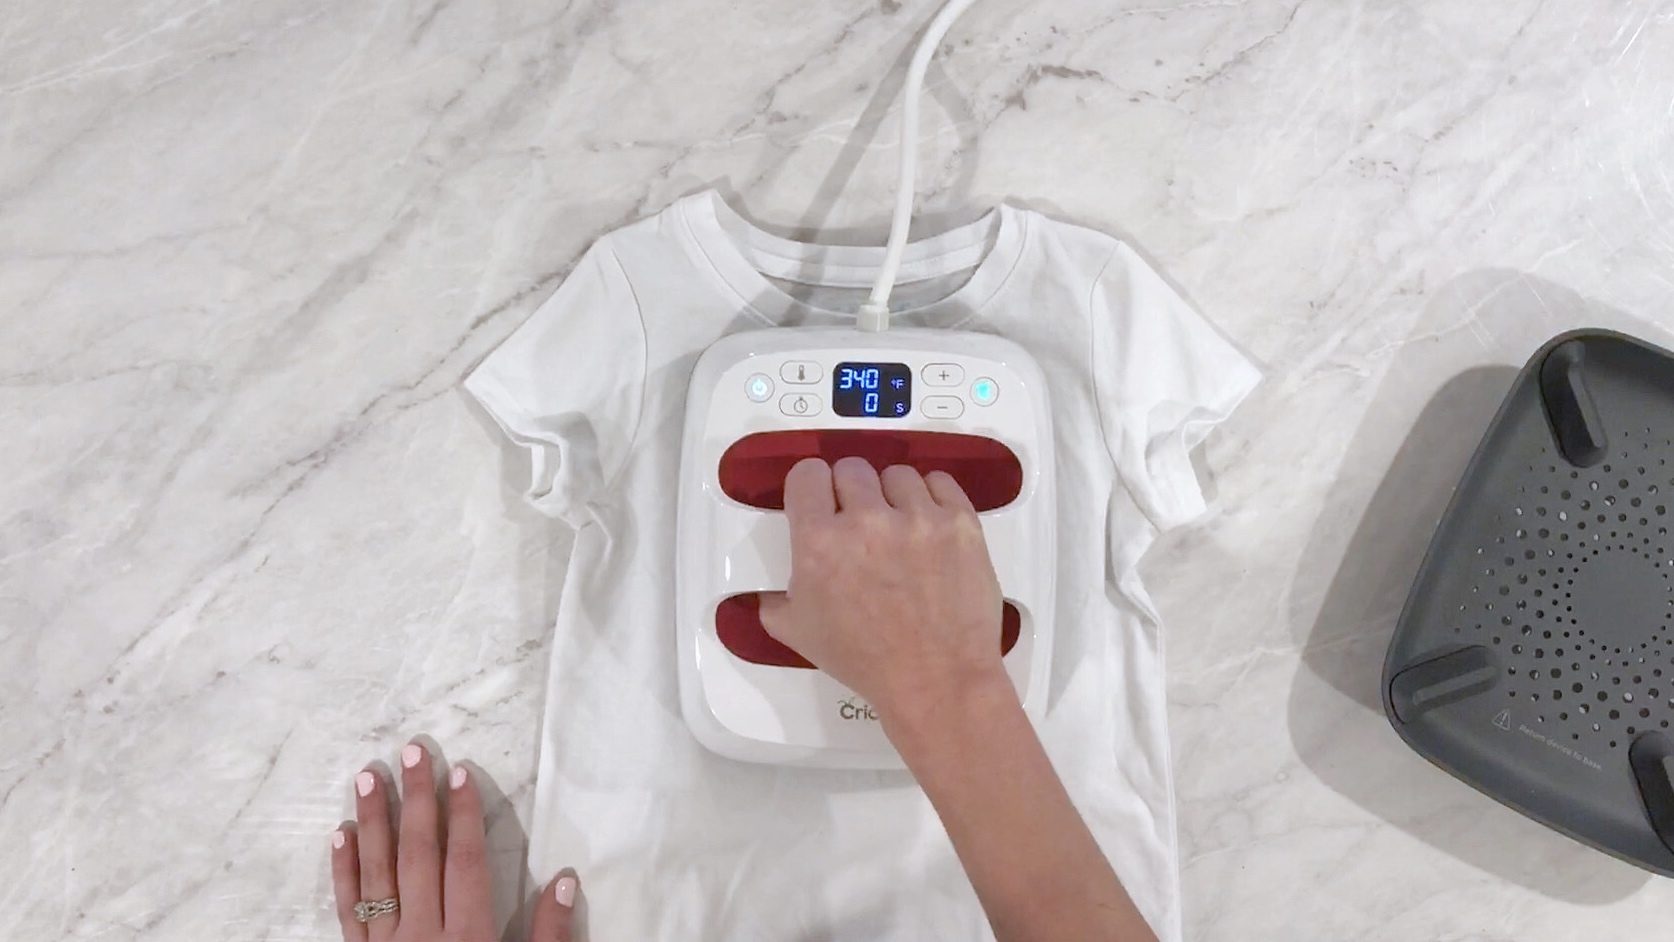
After your heating device is hot, you are going to apply the design to your shirt. Follow the instructions found on the Cricut Heat Guide to ensure a flawless transfer!

Here are some extra tips:

  • Don’t forget to preheat your material. Preheating will take out any moisture in your garment and will help the glue adhere better to your fibers.
  • If you are using an EasyPress, press on an EasyPress Mat. It really makes a difference.
  • Avoid using an ironing board under your EasyPress. I recommend pressing on a table that is heat resistant and about waist height.
  • Avoid pressing on any seams. You want whatever heat plate you are using to come in direct contact with your surface. If the object you are pressing has a lot of seams or bulk, use a towel or mat inside to elevate the area you are pressing on.
  • Don’t forget to heat up the back of your project.

Peel Away The Liner

Remember to follow the instructions recommended by the iron-on (HTV) company. For Cricut’s Patterned Iron-On, Cricut recommends a cold peel. After you press your design, left your design cool completely before peeling away the liner. 

Care Instructions

Please allow your iron-on (HTV) to cure for 24 hours before washing your project. Wash and tumble dry inside out and do not use bleach.

Additional Resources

lf you want to see the entire tutorial, check it out below! 

Ready to try it out?

Here are the links to the products used in this tutorial!

Looking for a discount code to use on Cricut’s shop? Since my code changes each quarter, make sure you join my Facebook Group to get the most up to date code! The code will save you 10% and give you free shipping on orders over $50! Not on Facebook? No problem, send me an email to Karley@karleyhall.com or leave a comment below!

Have Questions or want to connect!?

Happy Crafting,

Karley
Hello

I’m Karley
Welcome to my blog! A place where I can share my love for all things crafting with you! If you are obsessed with your Cricut… I’m sorry to inform you that your obsession will only get worse while you’re here! I will teach you everything you need to know to get up and crafting with your Cricut. I am here to help! To reach me, use any of the social links below! 

Have specific Cricut questions?  Join Our Facebook Group!

Easy DIY Craft Organization & Labels

Easy DIY Craft Organization & Labels

This post and the photos within it may contain Amazon or other affiliate links. If you purchase something through the link, I may receive a small commission at no extra charge to you.

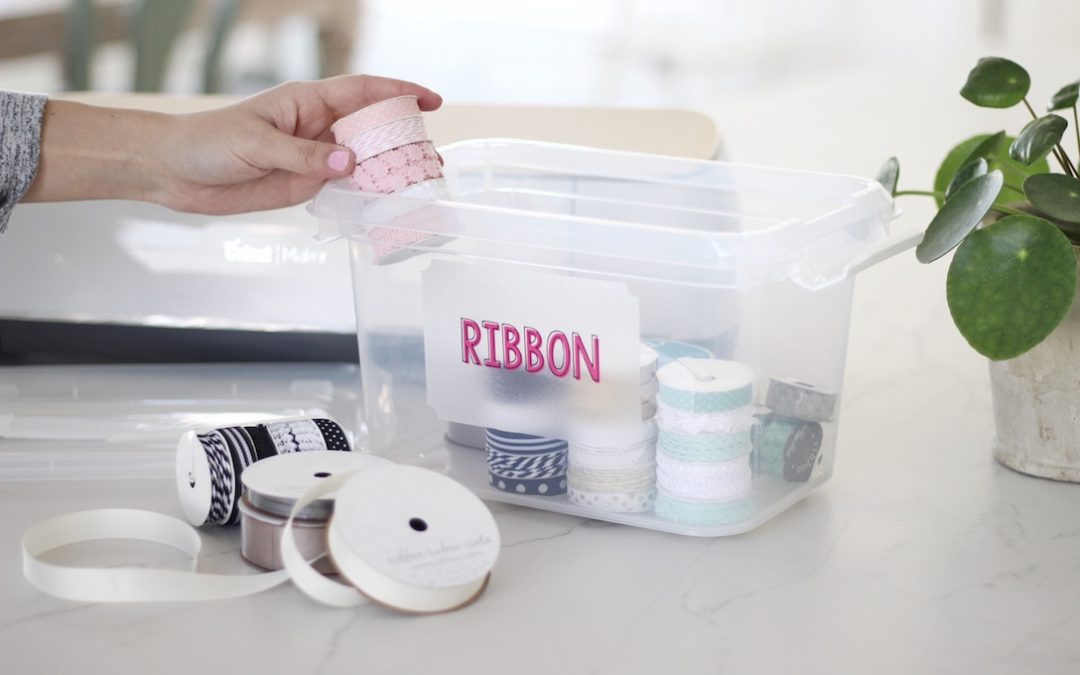
If you know me, you know I love craft organization as much as I love crafting! I was dying to find a way to organize all of my supplies and I am happy to report that I loving this storage solution from Michaels! 

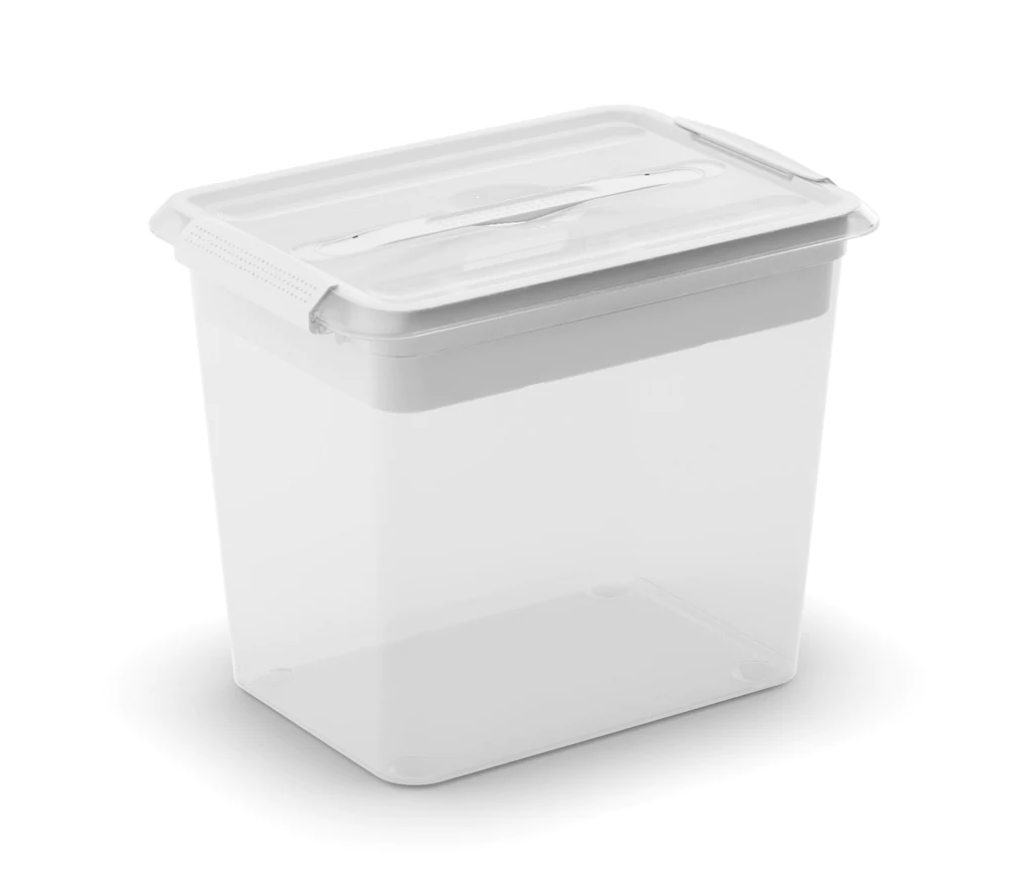
These Latchmate bins from Michaels fit 33 rolls of Cricut vinyl or iron-on and 24 boxes of Infusible Ink! Check out the video below to see just how much material each bin can hold! I will also teach you step by step how to label them using window cling and vinyl!

Ready to try it out?

Ready To Craft:

Shop Materials in This Video:

*Disclaimer:  Some links above are affiliate links.  By clicking on these links I may earn a small commission at no cost to you.  Some products may have been provided to me by vendors, however, all opinions and reviews are strictly my own.

Shop Michaels Latchmate Bins:

Looking for a discount code for Cricut’s website? Since my code changes each quarter, make sure you join my Facebook Group to get the most up to date code! The code will save you 10% and give you free shipping on orders over $50! Not on Facebook? No problem, send me an email to Karley@karleyhall.com or leave a comment below! 

Have Questions or want to connect!?

Happy Crafting,

Karley
Hello

I’m Karley
Welcome to my blog! A place where I can share my love for all things crafting with you! If you are obsessed with your Cricut… I’m sorry to inform you that your obsession will only get worse while you’re here! I will teach you everything you need to know to get up and crafting with your Cricut. I am here to help! To reach me, use any of the social links below! 

Have specific Cricut questions?  Join Our Facebook Group!

Glowforge Laser Engraved Santa Trays

Glowforge Laser Engraved Santa Trays

Karley Hall Engraved Santa Tray using Glowforge Laser Engraver
This post and the photos within it may contain Amazon or other affiliate links. If you purchase something through the link, I may receive a small commission at no extra charge to you.

Each year I try to create a neighbor gift that won’t end up in the trash… well won’t end up in the trash immediately. Last year I made Santa Cams (I promise they were fake cameras– I was not spying on my neighbors) and they were a big hit with the kids! You can find that tutorial here
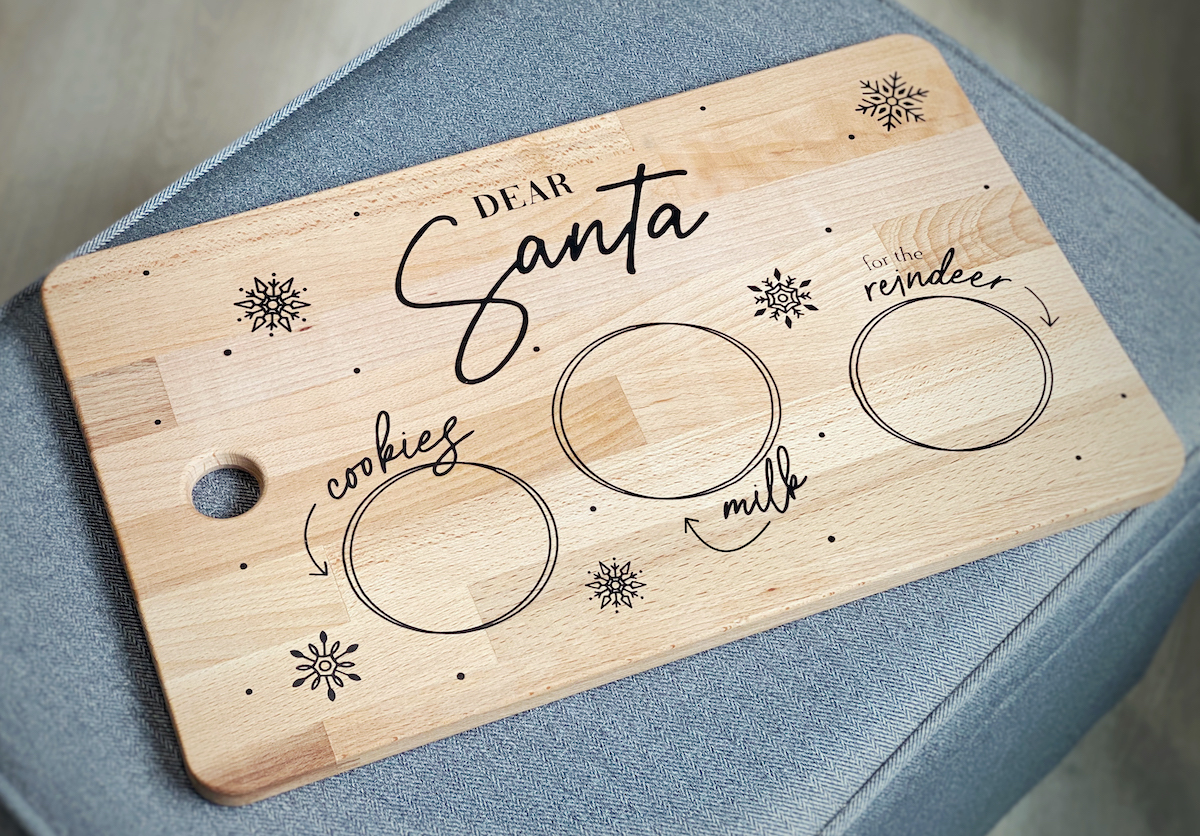
I have seen Santa Trays popping up all over the internet and wanted to create my own! Instead of using my Cricut for this project, I decided to use my Glowforge so I could laser engrave the design on to a cutting board! If you don’t know what a Glowforge is, check out their website! By shopping through my referral link you can save up to $500! I’ve had mine since January 2019 and have no regrets pulling the $5k trigger. I’ve waited to share about my Glowforge because I wanted to make sure that it was a good as it seems and was really worth the investment– even for us hobby crafters! But after almost a year, I can wholeheartedly say I love my “Glowie” and recommend investing in a laser if your budget allows! But don’t worry– if you don’t have a laser, you can make this project using heat transfer vinyl or permanent vinyl and your cutting machine!

Since there are so many variations of this idea on Pinterest, I wanted to create a free file that you can download and use for personal use!  You can use this same image and upload it to Cricut Design Space too and cut it using your Cricut Machine! If this all sounds like a foreign language– check out this video! Agree to the “terms and conditions” and download your free file below 🙂

Santa Tray File
TERMS AND CONDITIONS
By entering your email you will be subscribed to Karley Hall's email list and can INSTANTLY download this file. Your email will only be subscribed once and you may unsubscribe at any time. Image rights: For personal use only! You can create projects using this image for any individual, organization, or event so long as it is not with the intent of resale or other commercial purposes. Under no circumstances are you permitted to resell, give-away, or otherwise distribute any actual files associated with digital designs offered on KarleyHall.com. If you want to share the file, please direct them here! If you are looking for the commercial license, please visit my Etsy Shop: https://www.etsy.com/shop/KarleyHallDesignCo Privacy Policy: We hate spam and promise to keep your email address safe. For questions, email karley@karleyhall.com

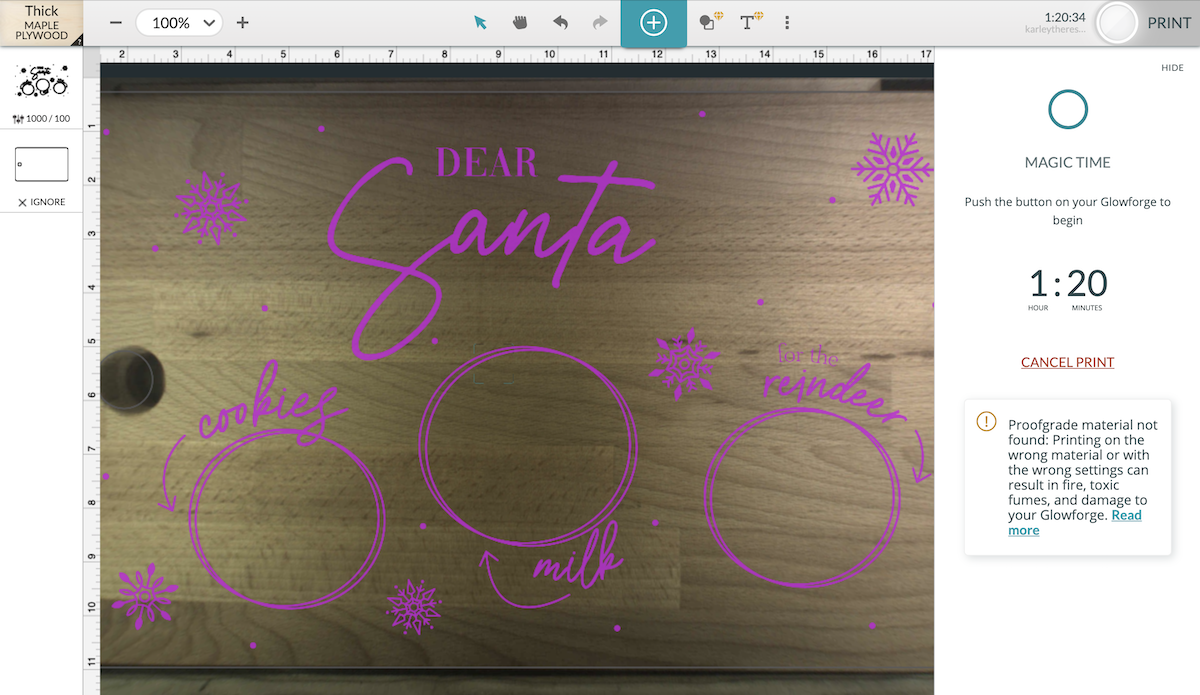
Resize the design to fit whatever board you’d like to use! I used an IKEA cutting board and then uploaded it to my Glowforge App!

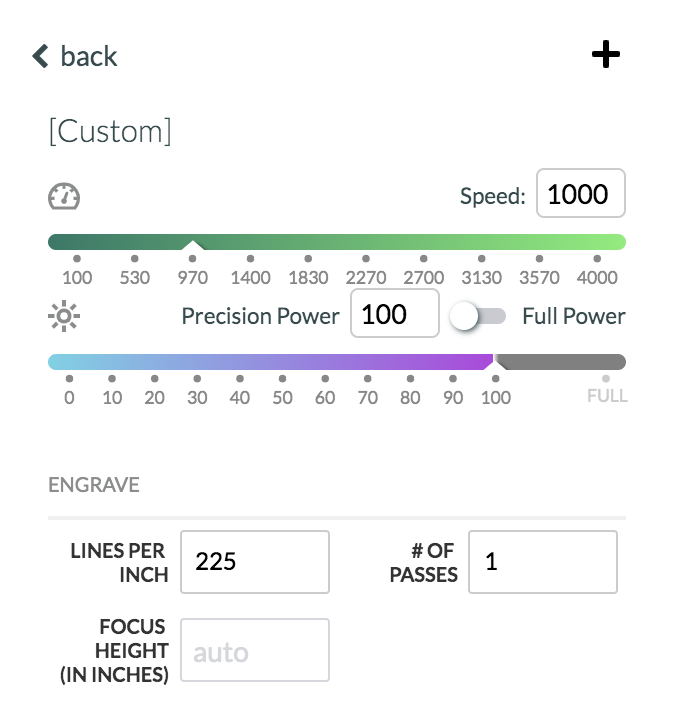
For all my Glowforge owners– I used the following settings:

Speed: 1000, Precision Power: 100, Lines Per Inch: 225 and I used the “set focus” tool to adjust my laser’s focus. This will give you a super rich engrave, however, you can speed it up if you want to cut down on the engraving time.

*Note: depending on the thickness of your cutting board, you may have to remove your crumb tray. I removed mine and used a piece of 3/4″ plywood to elevate my board.

Santa-Tray-with-Karley-Hall-Glowforge-and-Cricut

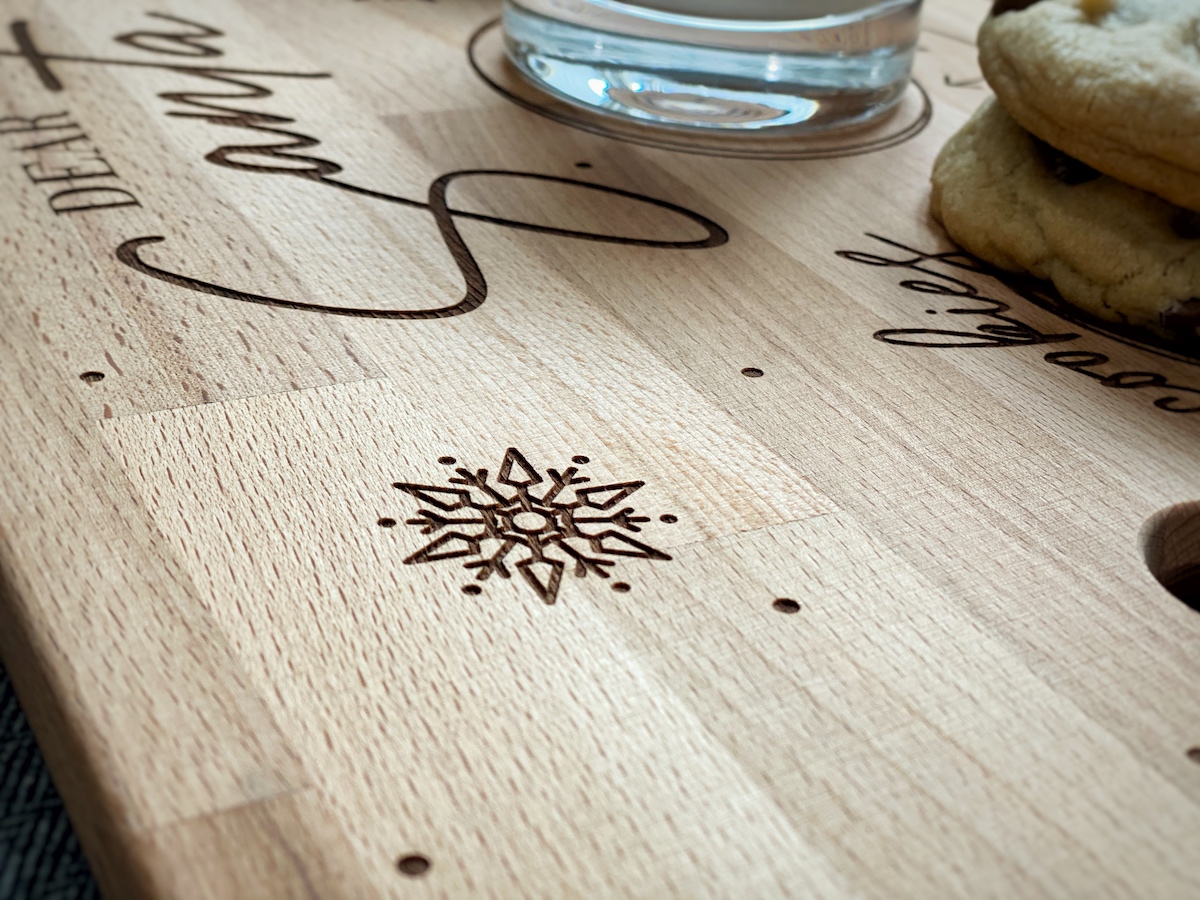
Once your design is lined up, it’s ready to hit the magic button on your Glowforge and your laser will do the rest! For this design, it took about an hour and twenty minutes to engrave. Of course, you could change the line density and increase your speed to decrease your time, but since I wasn’t worried about the time, I left my settings as is since I had previously tested them and loved the results.

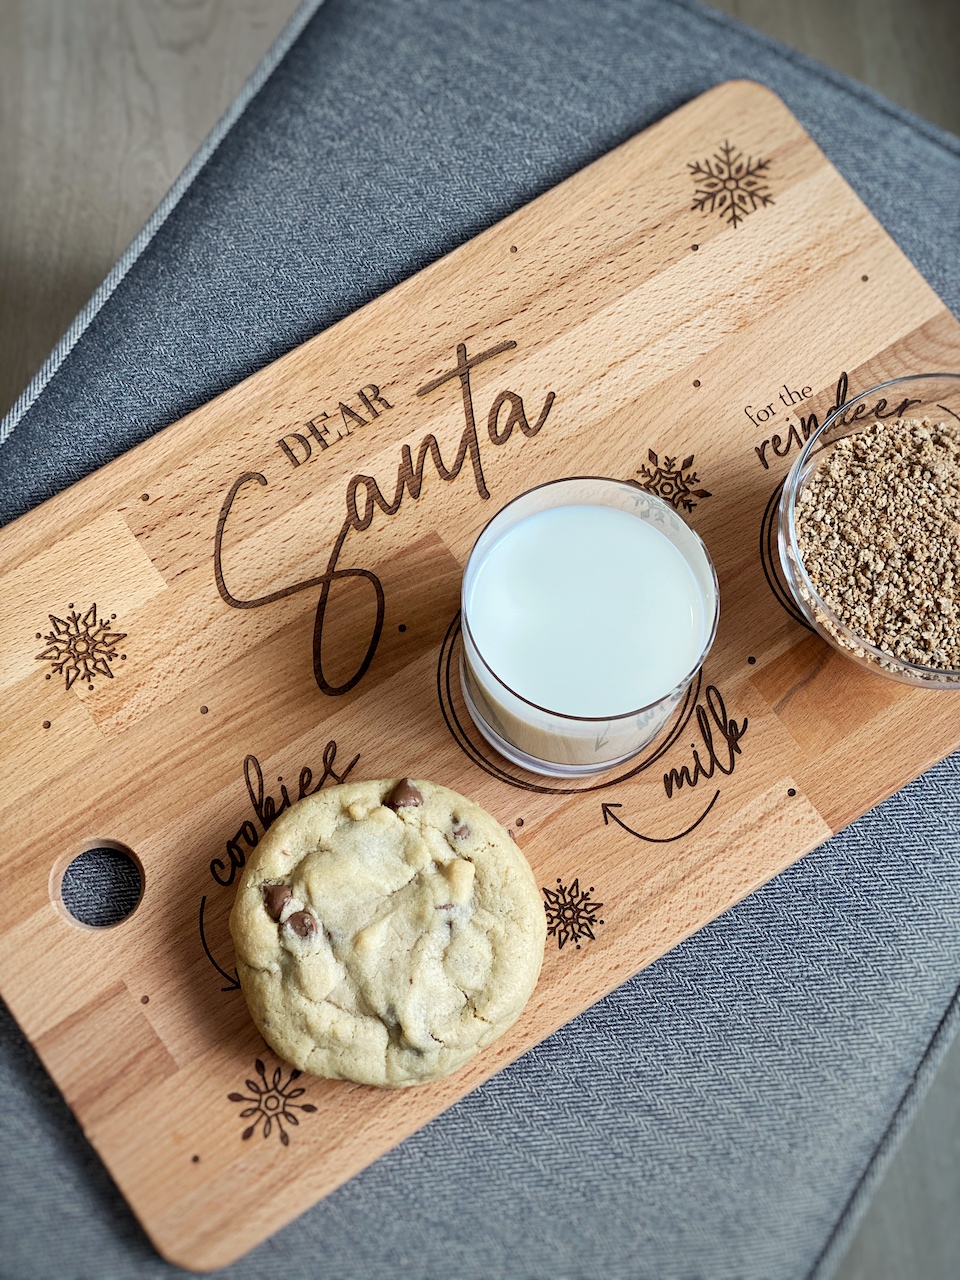
Karley Hall Holiday Santa Tray Engraved with Glowforge
Karley Hall Santa Engraved Tray using Glowforge

I am so excited about how these boards turned out! After they were done being engraved, I wiped them down with some mineral oil and they were good to go! Let me know if you end up making some of your own!

If you don’t have a Glowforge (yet!), you can cut the SVG file out of heat transfer vinyl or permanent vinyl. If you want to use vinyl, I’d recommend sealing your board first. I didn’t want to seal mine, so I used heat transfer vinyl and my EasyPress.

Cricut Santa Tray Board with Karley Hall Free SVG

Ready to try it out?

Here are the links to the products used in this tutorial!

Or if you are using a Cricut Machine:

Looking for a discount code to use on Cricut’s shop? Since my code changes each quarter, make sure you join my Facebook Group to get the most up to date code! The code will save you 10% and give you free shipping on orders over $50! Not on Facebook? No problem, send me an email to Karley@karleyhall.com or leave a comment below!

Have Questions or want to connect!?

Happy Crafting,

Karley

Hello

I’m Karley

Welcome to my blog! A place where I can share my love for all things crafting with you! If you are obsessed with your Cricut… I’m sorry to inform you that your obsession will only get worse while you’re here! I will teach you everything you need to know to get up and crafting with your Cricut. I am here to help! To reach me, use any of the social links below! 

Have specific Cricut questions?  Join Our Facebook Group!

Using the Xyron Glaminator to Create Snowflake Ornaments!

Using the Xyron Glaminator to Create Snowflake Ornaments!

This post and the photos within it may contain Amazon or other affiliate links. If you purchase something through the link, I may receive a small commission at no extra charge to you.

I love setting a table where my placecards can double as a little take-home gift. These snowflake ornaments are so easy to make. If you haven’t tried Cricut’s Print then Cut, get excited! And as if that is not enough, then we are going to foil our prints using the Xyron Glamintor!!! No transfer tape, vinyl, weeding… just cover it and run it through. It sounds too good to be true, but I promise you it’s even easier than that sounds!   

Here’s what we need to get this craft party started:

If at any point during this tutorial you get lost or confused, click the image and it’ll take you to that exact moment in a full how-to video tutorial. The video will show you everything you need to know about printing on transparency film, using your Cricut machine, and Xyron Glaminator!


Design & print your image

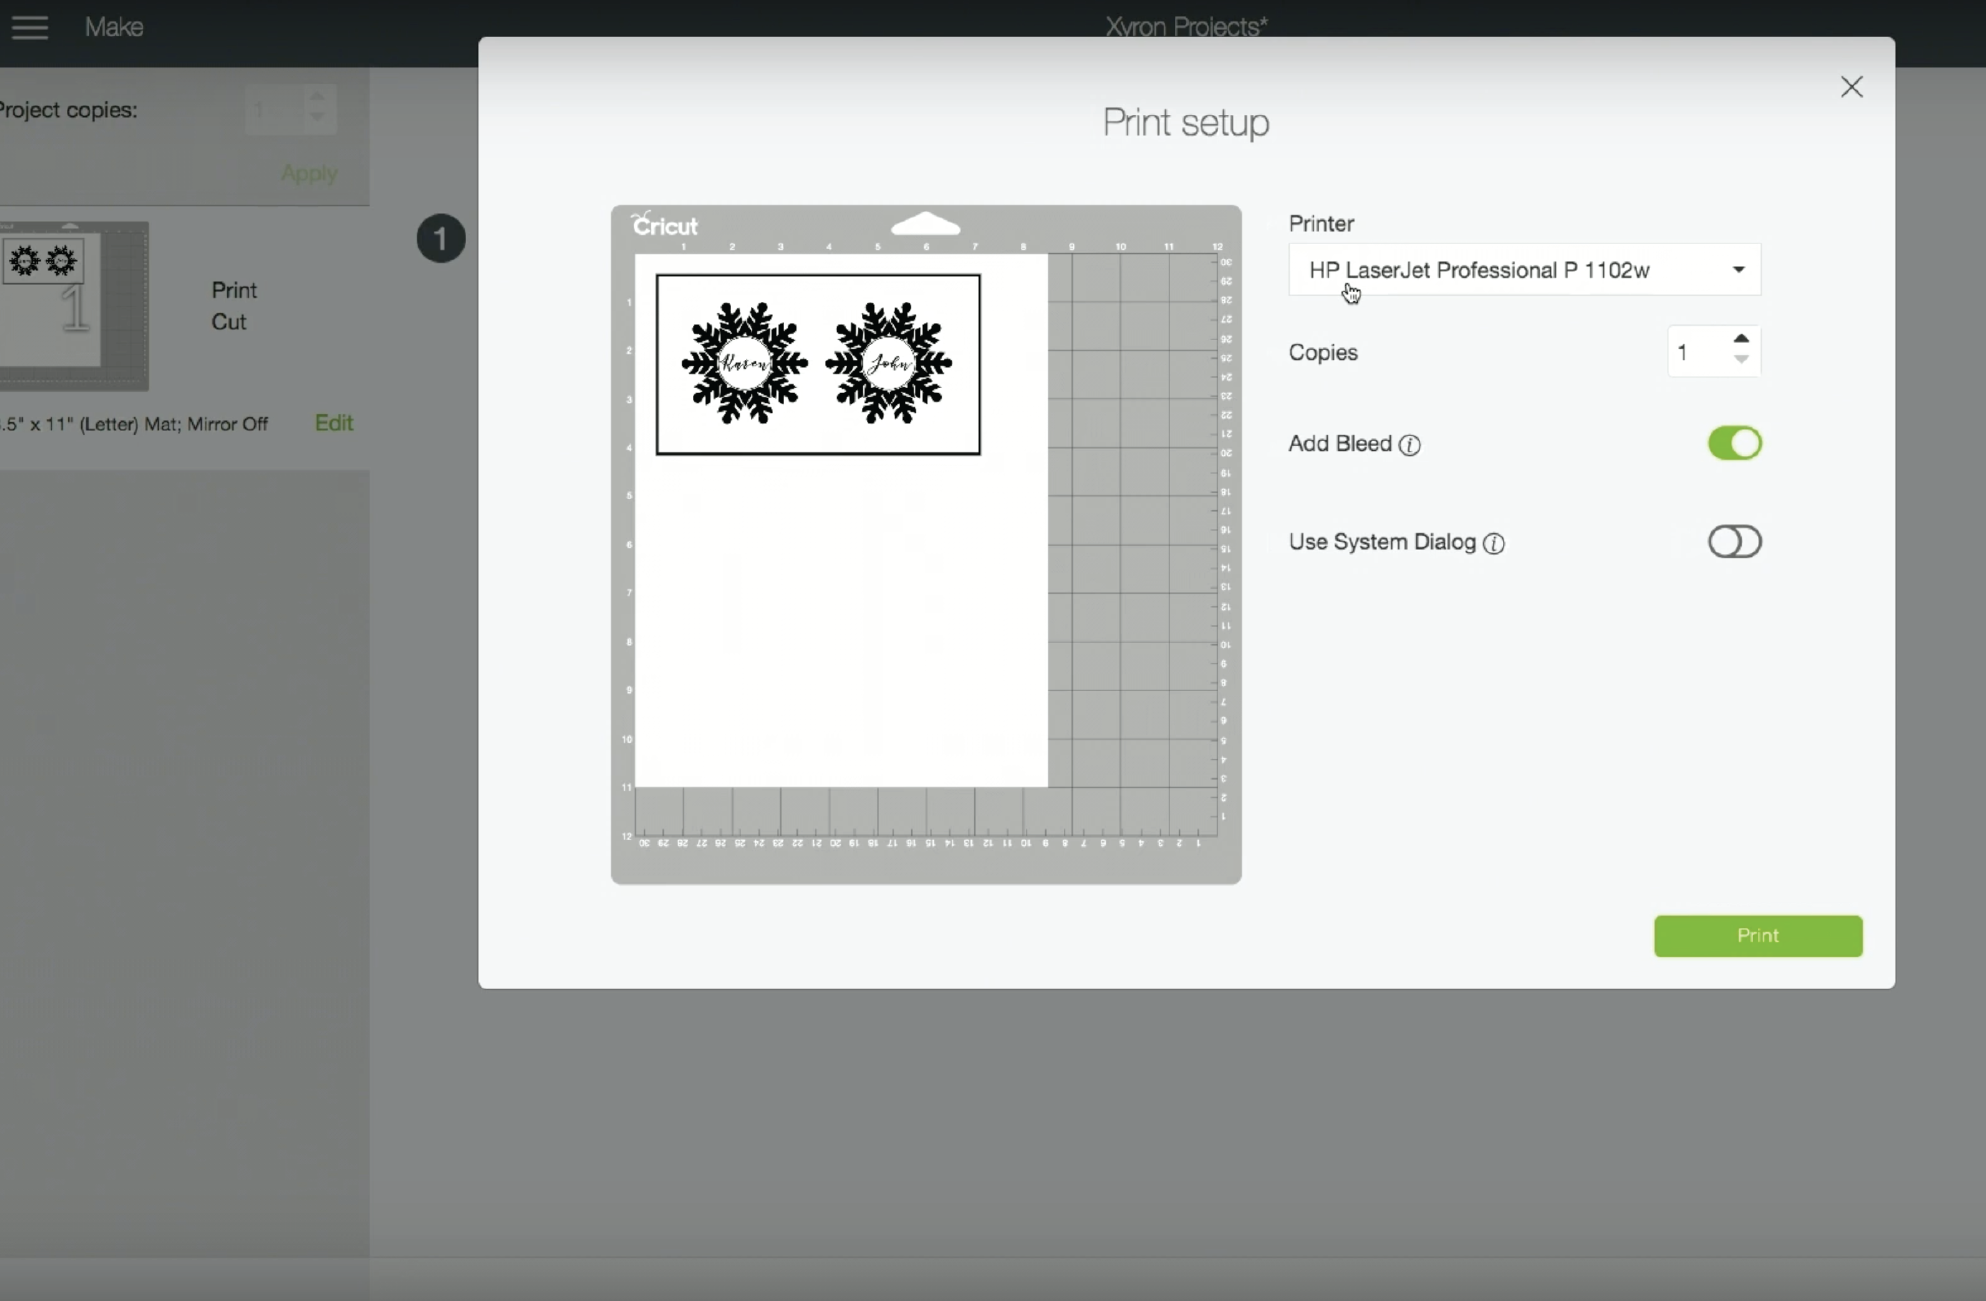
To keep this tutorial a manageable length, I skipped over the Cricut Design Space portion! If you need help designing the ornament and using the custom settings to print it on laser transparency film, click the image above to watch the video tutorial! Here’s the jist– design your image, flatten it to turn it into a printable image, and then use the custom settings to print it using a laser printer. Here is a link to the exact canvas I used in Design Space. In order to use the Xyron Glaminator, you need to use a laser printer to print your design because the foil adheres to the toner and will not work on ink printed by an inkjet printer.   

Cut your transparency film using scissors or cutting machine 

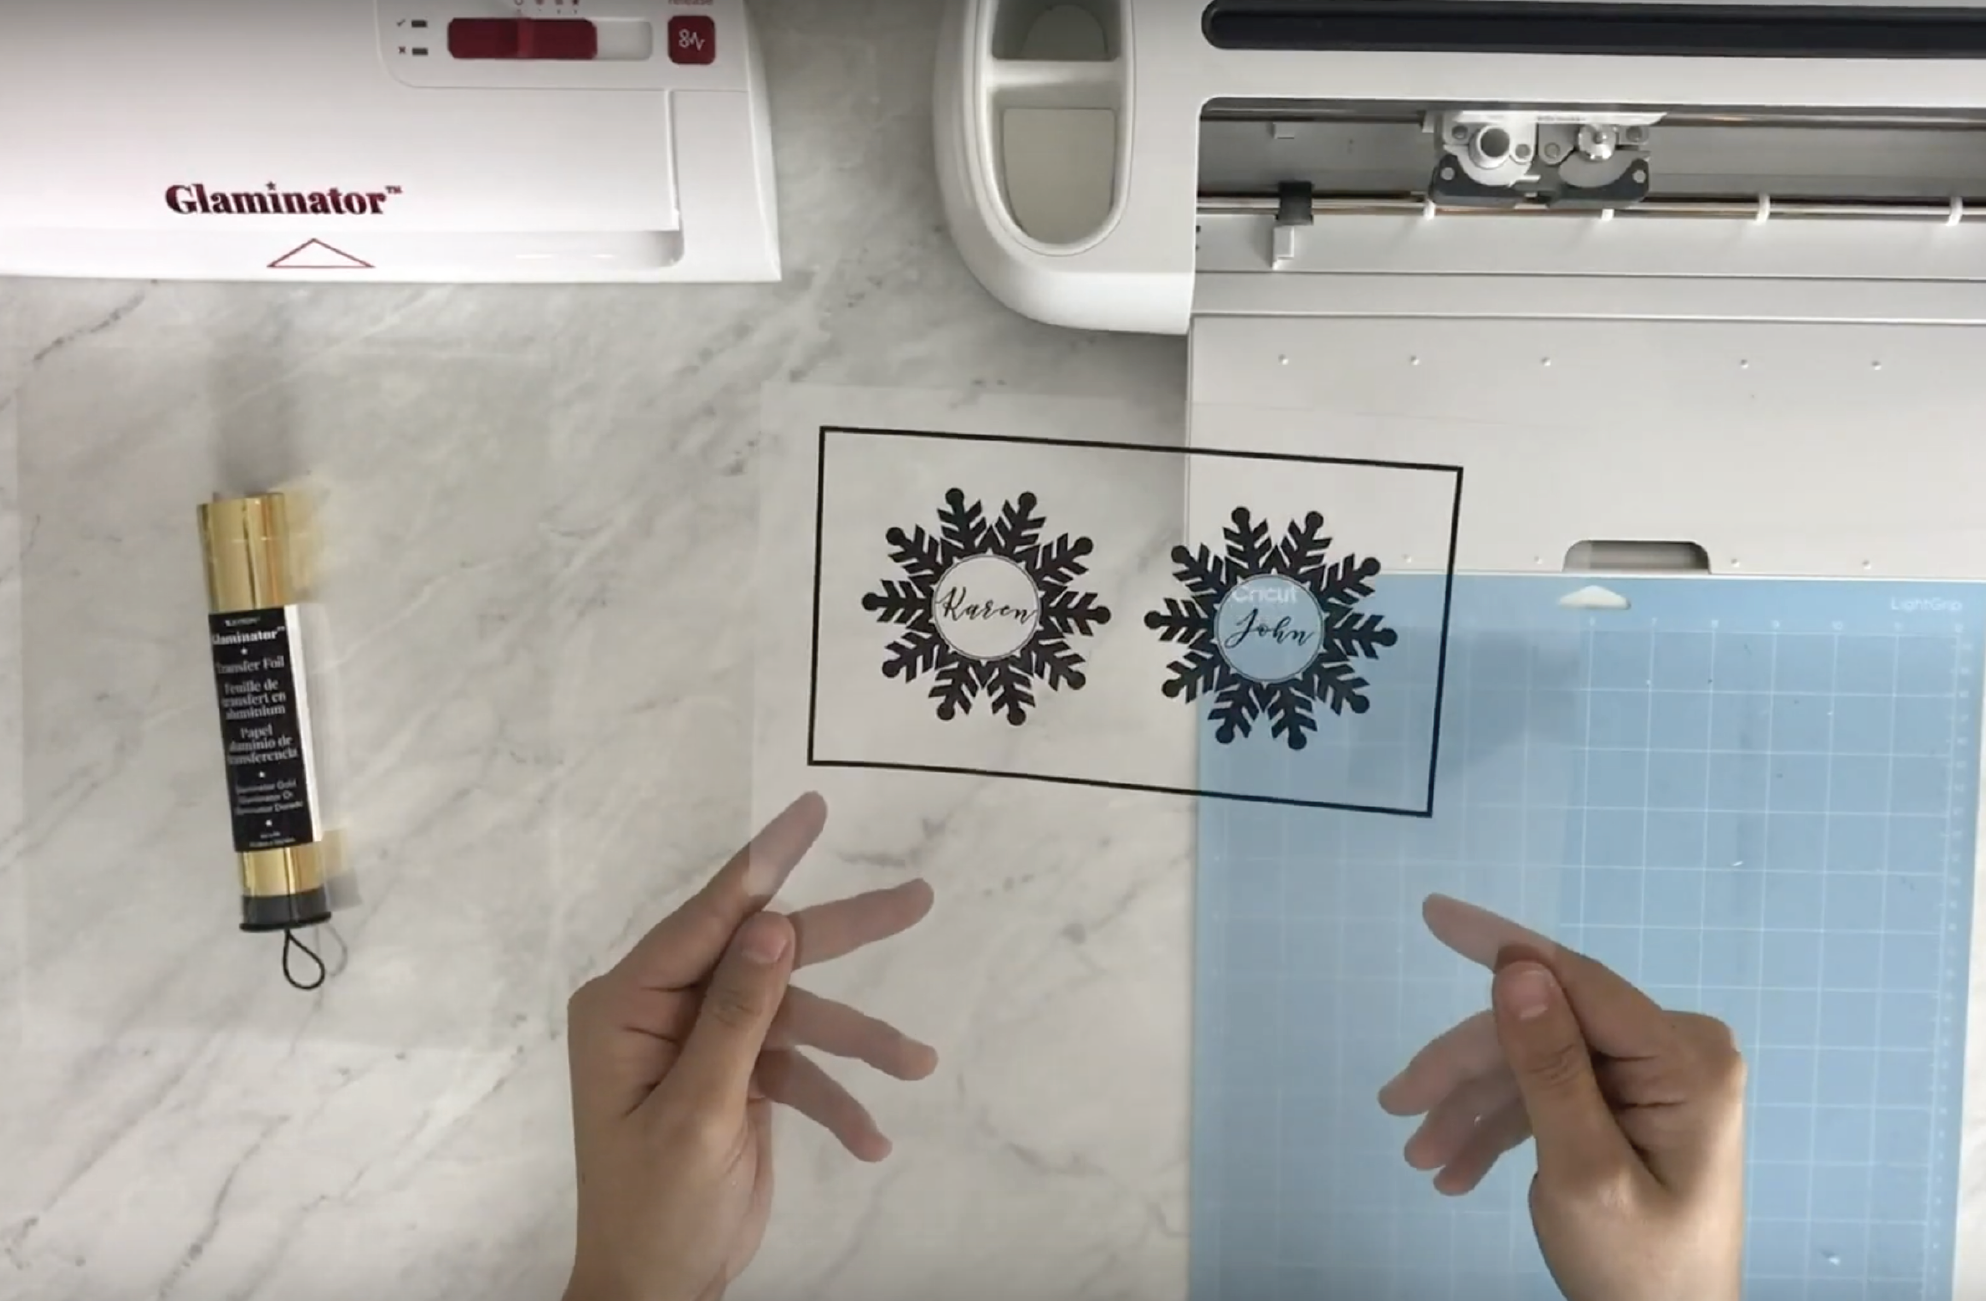
After your design has been printed, you can hand cut it, or if you used Cricut Design Space, you can use your Cricut Machine to read the design and then cut it. If you are using a Cricut Maker, choose “Transparency” as your material. If you are on an Explore Family Machine, turn your dial to “custom” and then choose “Transparency.” The Cricut will know where to cut based on the position of the black rectangle seen above. Load your transparency print on a LightGrip Mat and watch as your perfect circles are cut! 

Cover your image with the foil shiny side up

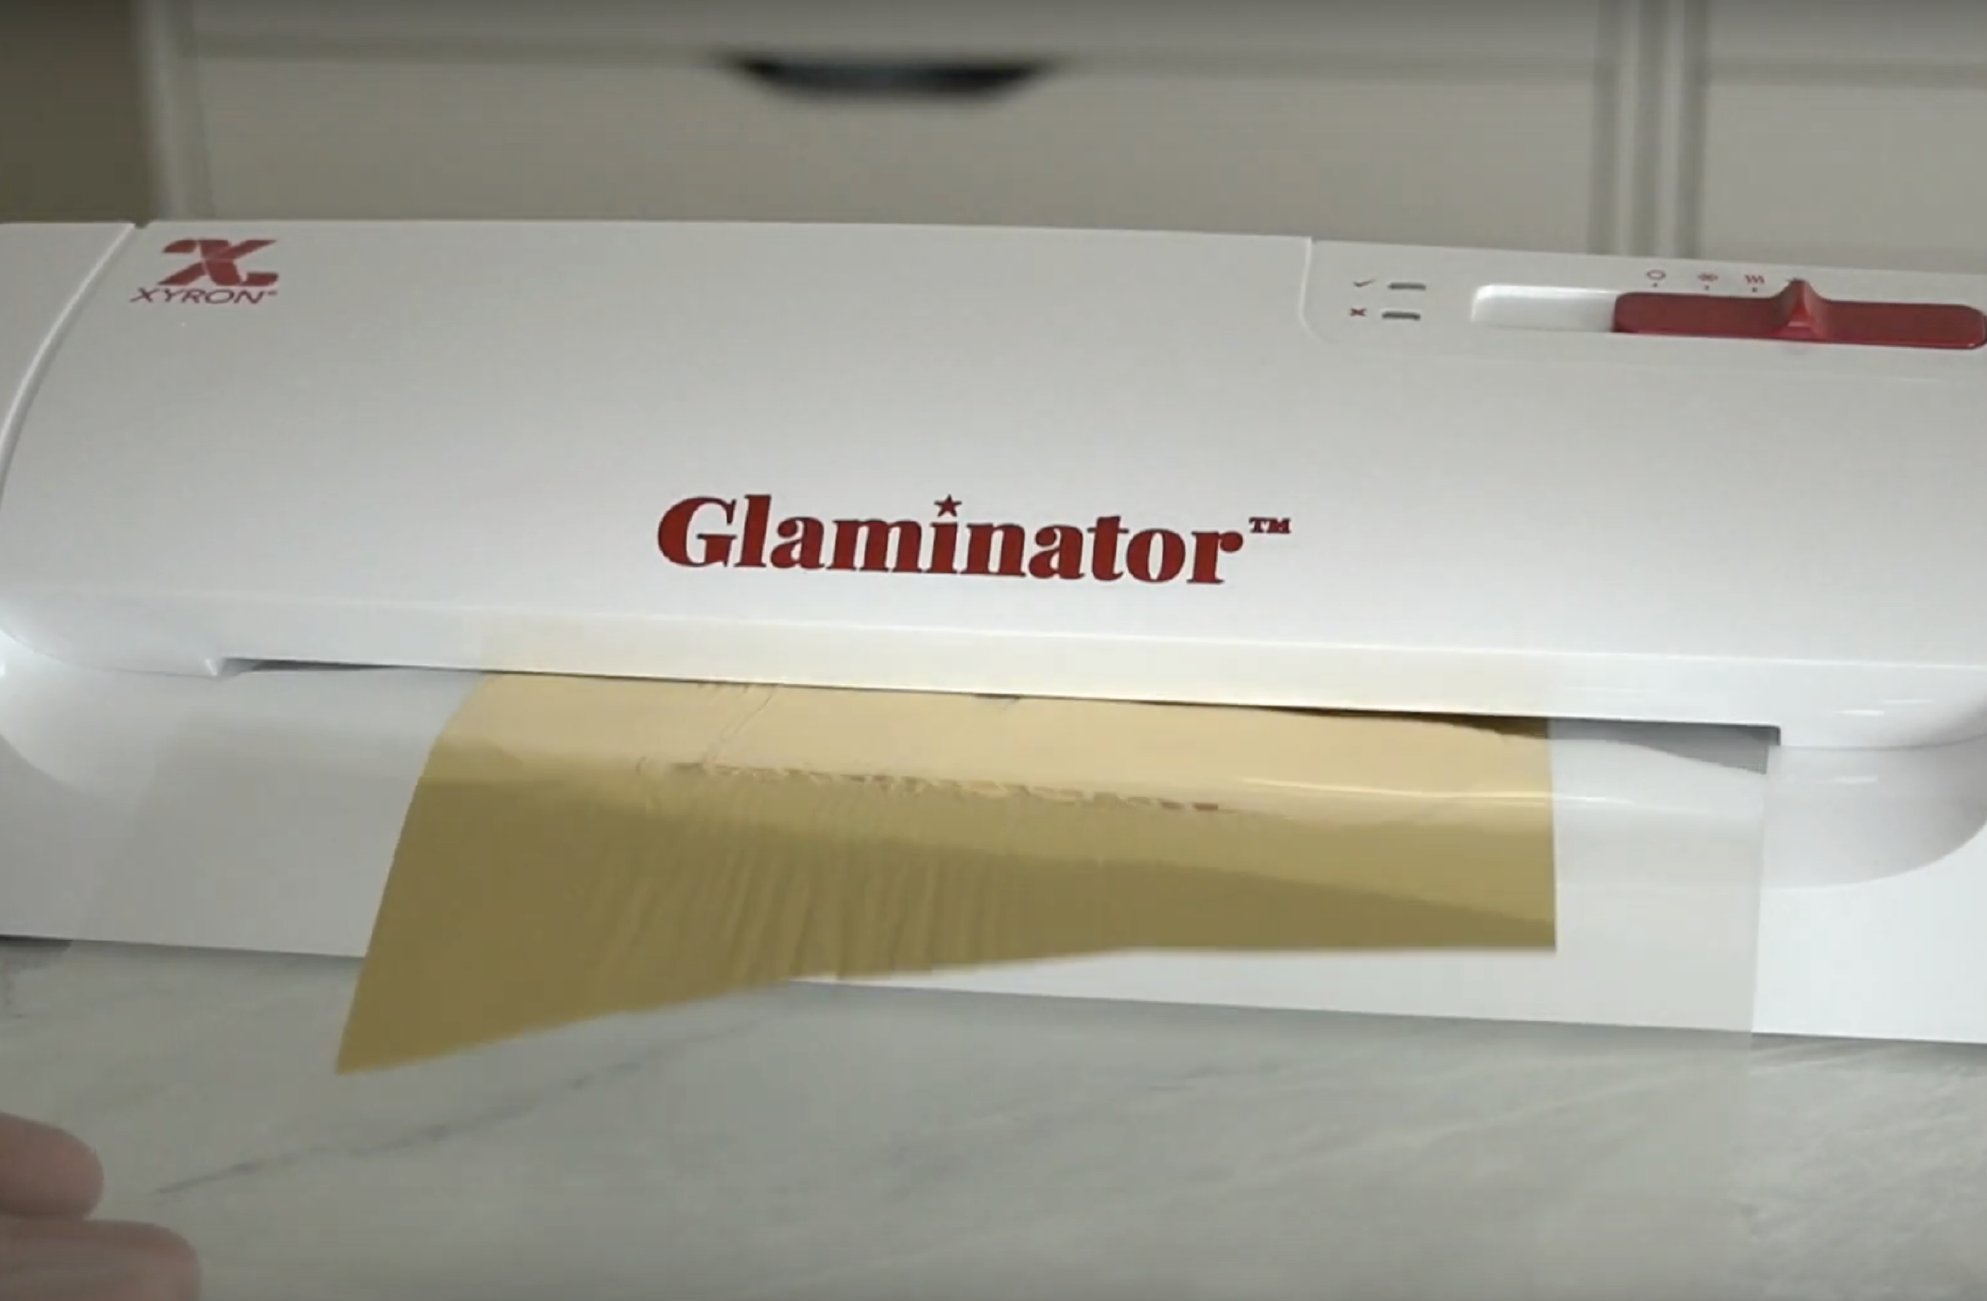
Place your image inside the Glaminator’s clear carrier with the black design facing you. Then cover the design with the foil, shiny side up. Close the carrier and ensure your foil completely covers the portion of the design you’d like to foil. 

Run your design through the Xyron Glaminator

Turn your Glaminator on to the foil setting by sliding the switch to the star icon. It takes a few minutes to heat up, so wait until the indicator light (next to the check mark) turns green. Once it’s ready, insert your carrier sheet (folded side first) into the Glaminator. The Glaminator will automatically pull the carrier sheet through.   

Peel away the foil and roll it up

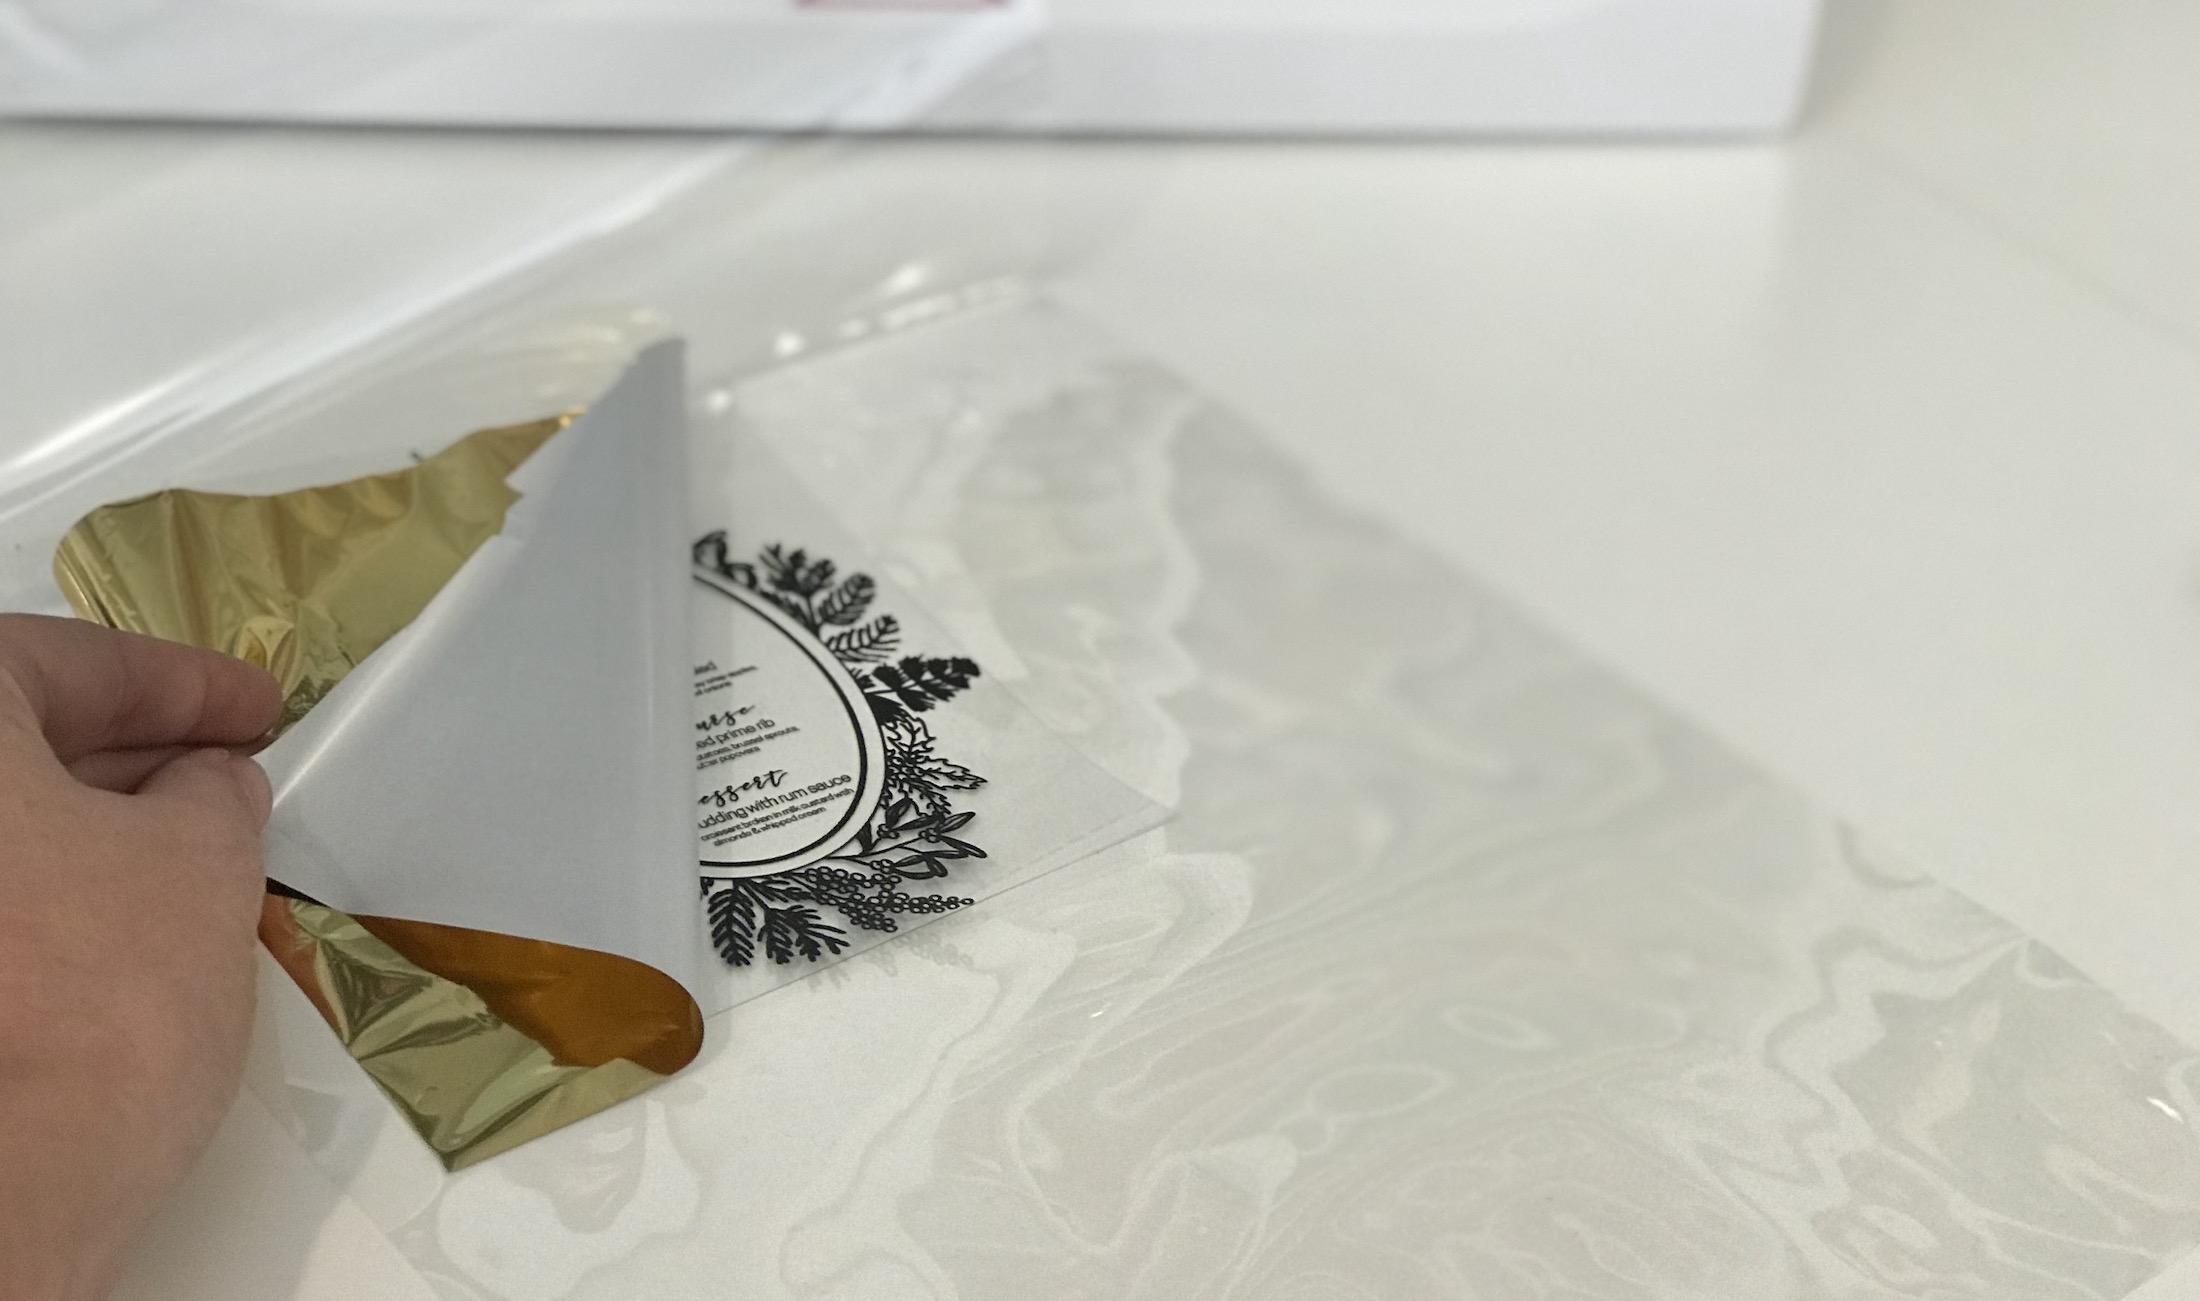
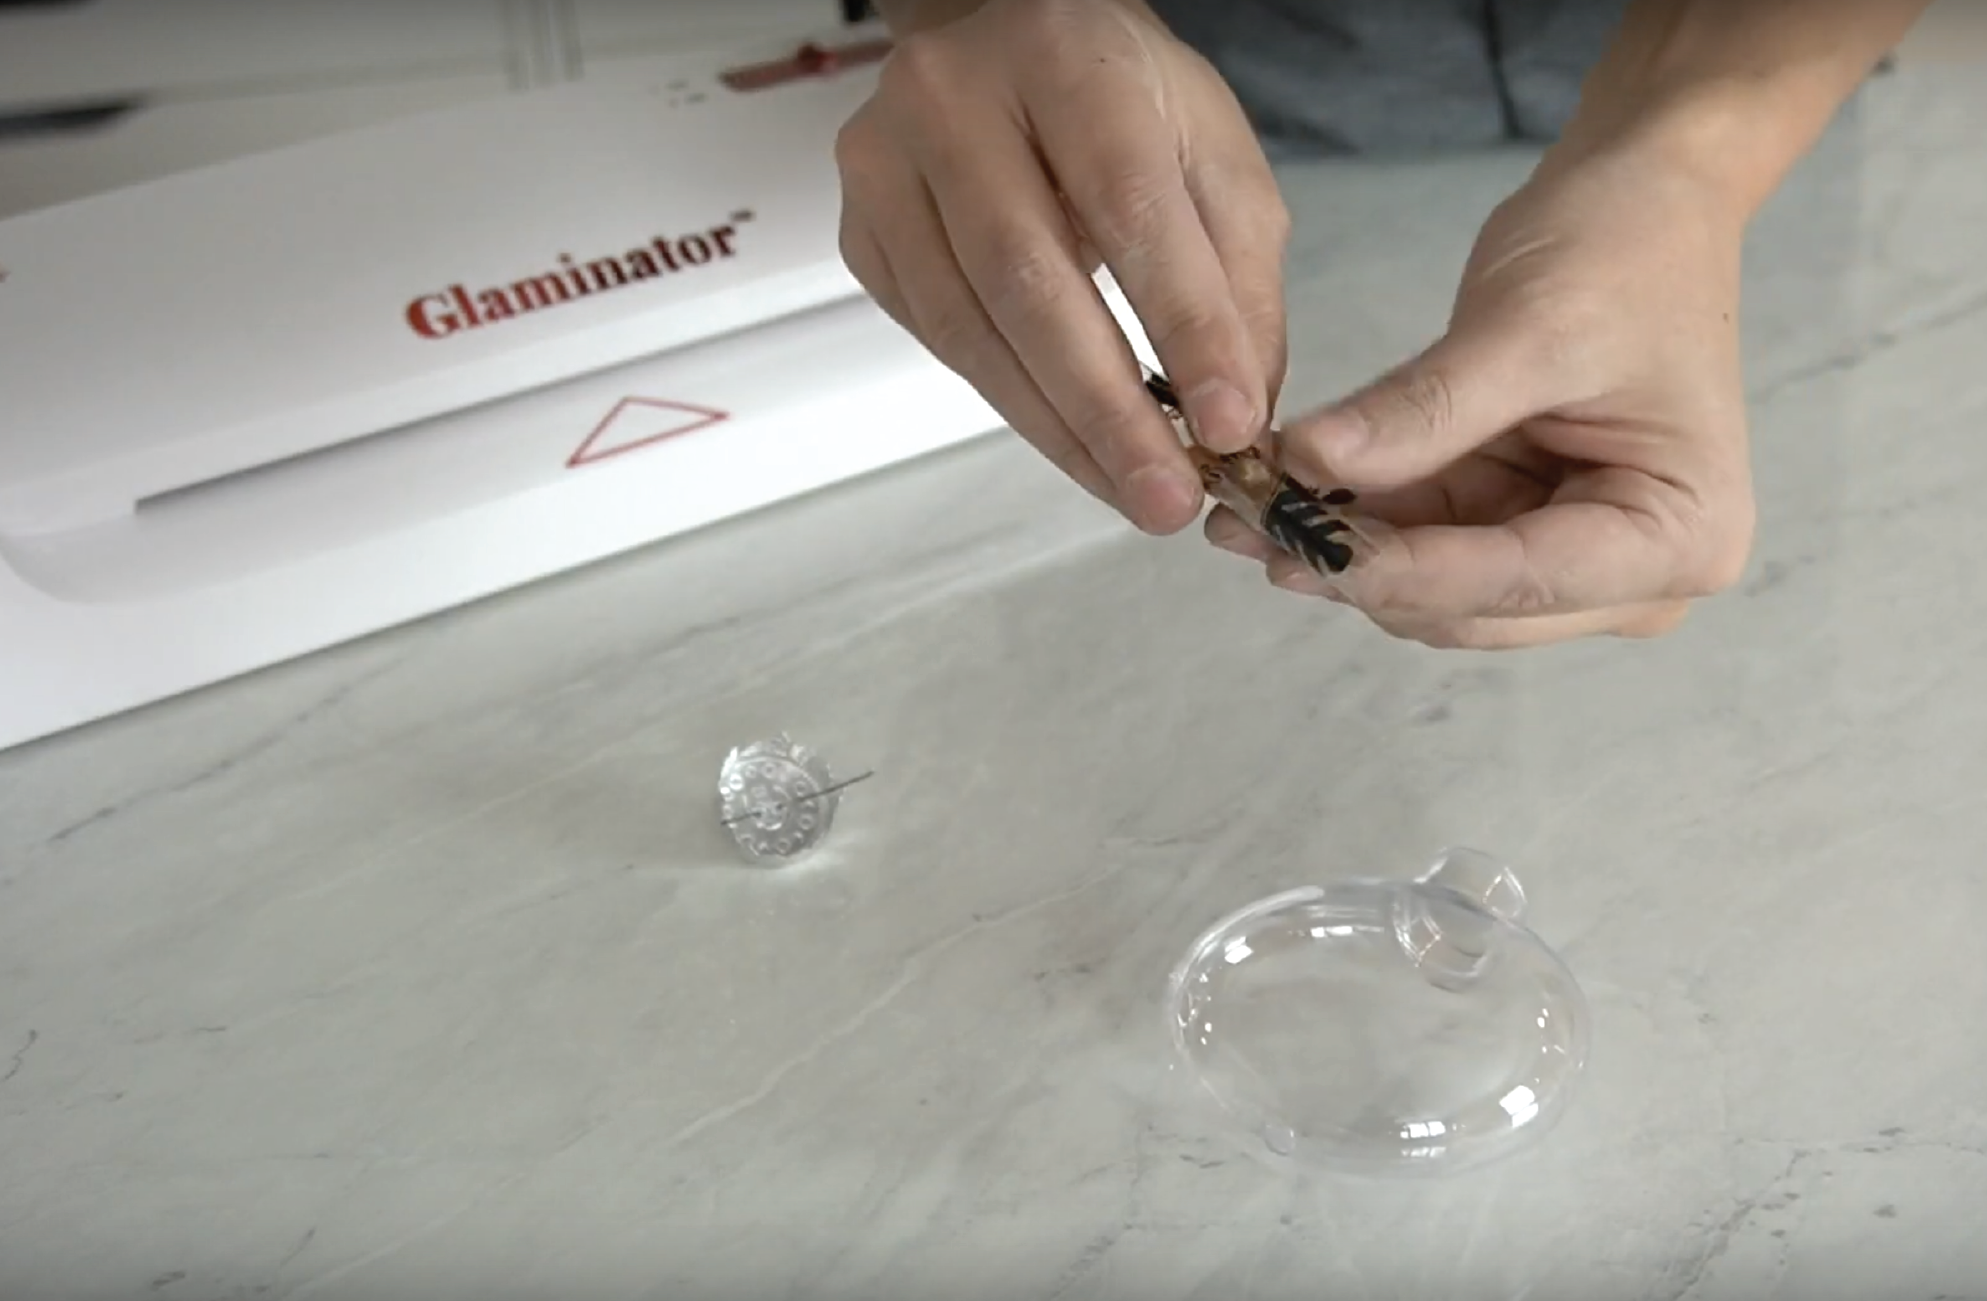
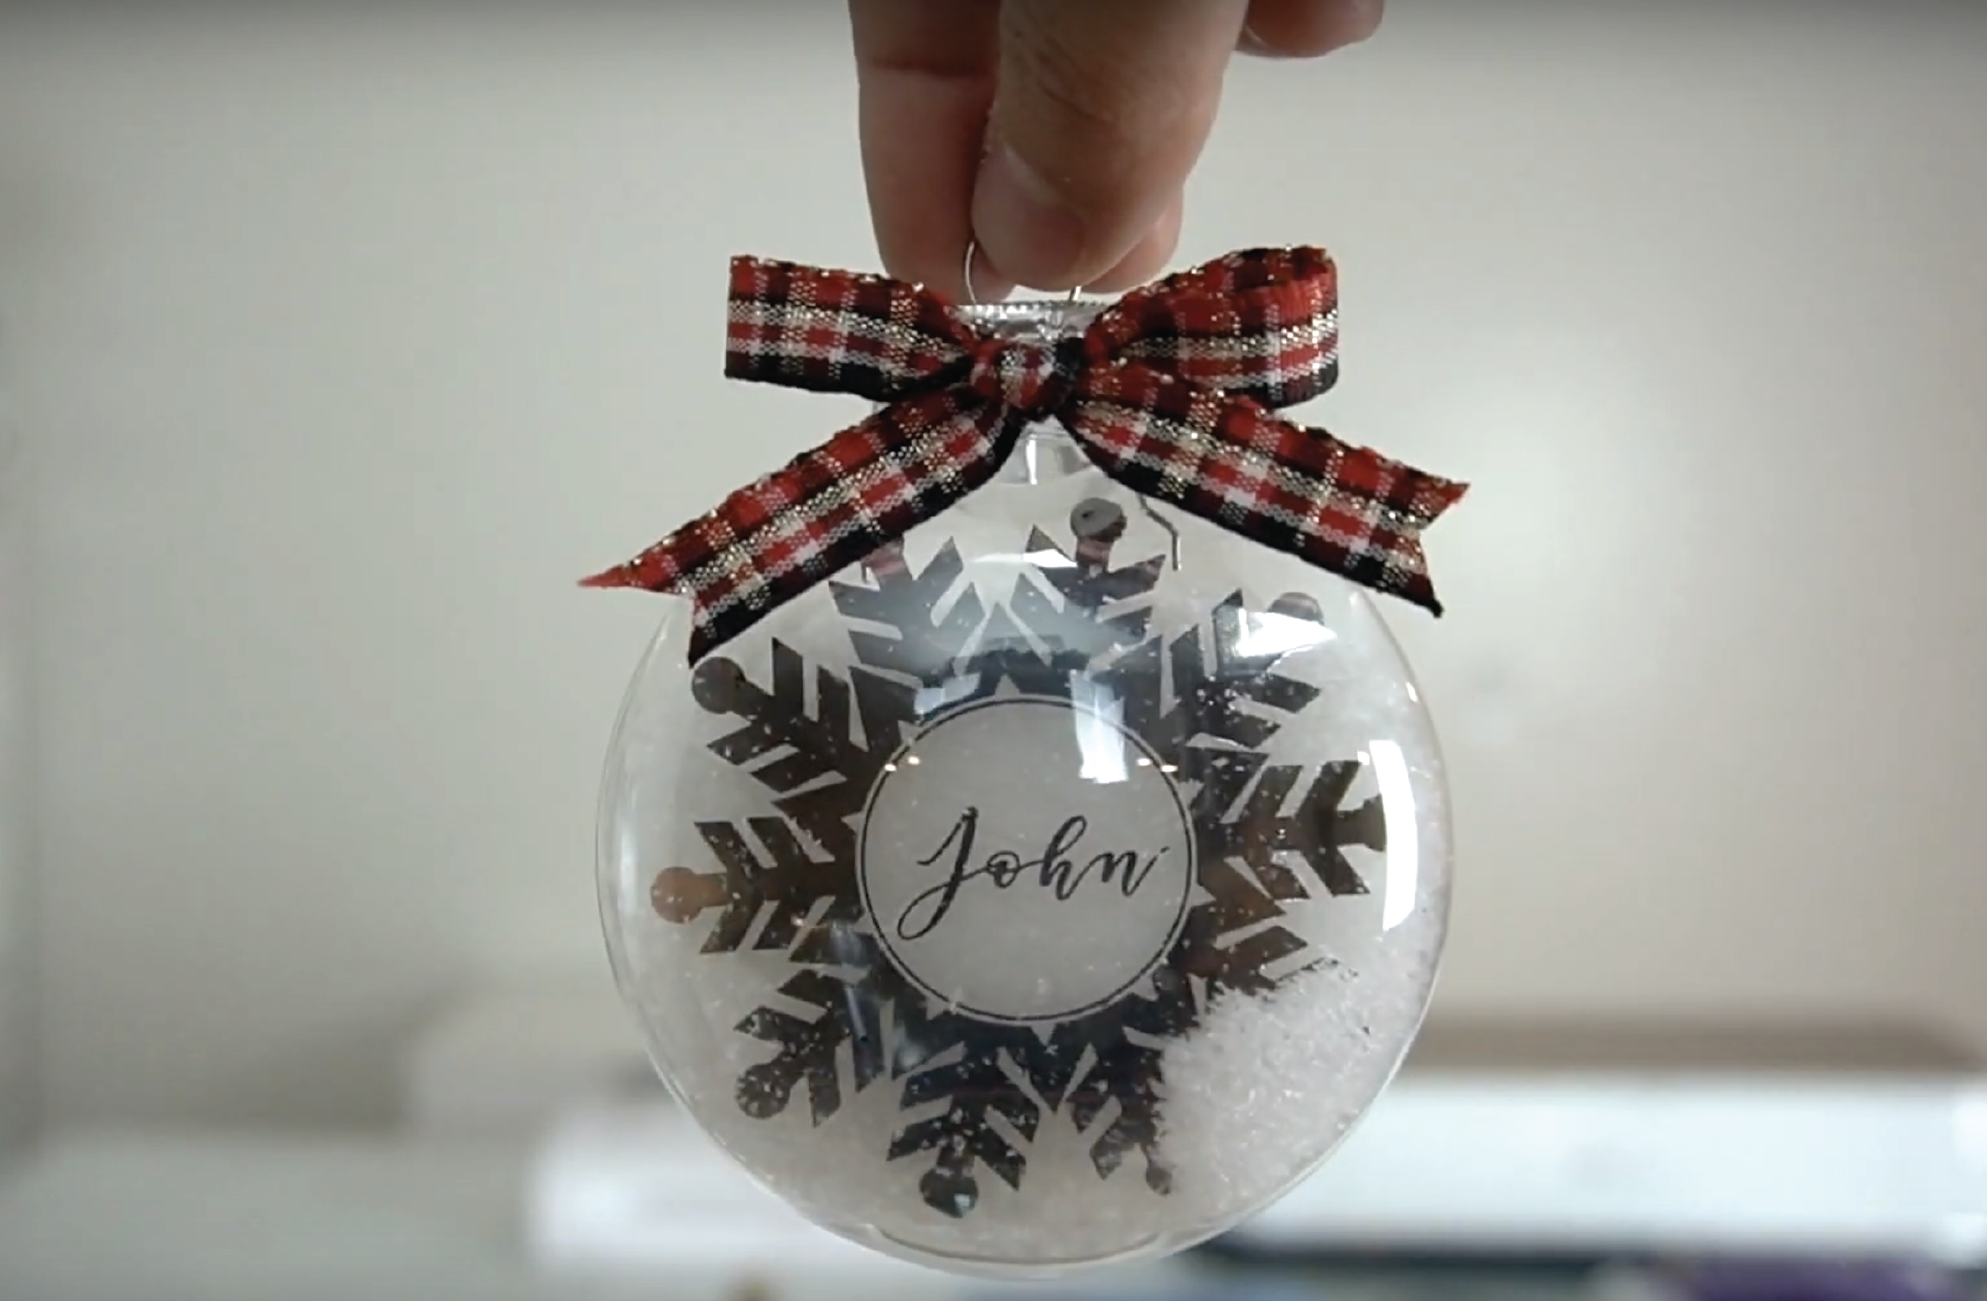
Once your design runs through the Glaminator, peel away the foil to reveal your beautifully foiled design. Roll up your design and slip in into your ornament.   

Create a funnel and fill your ornament with snow

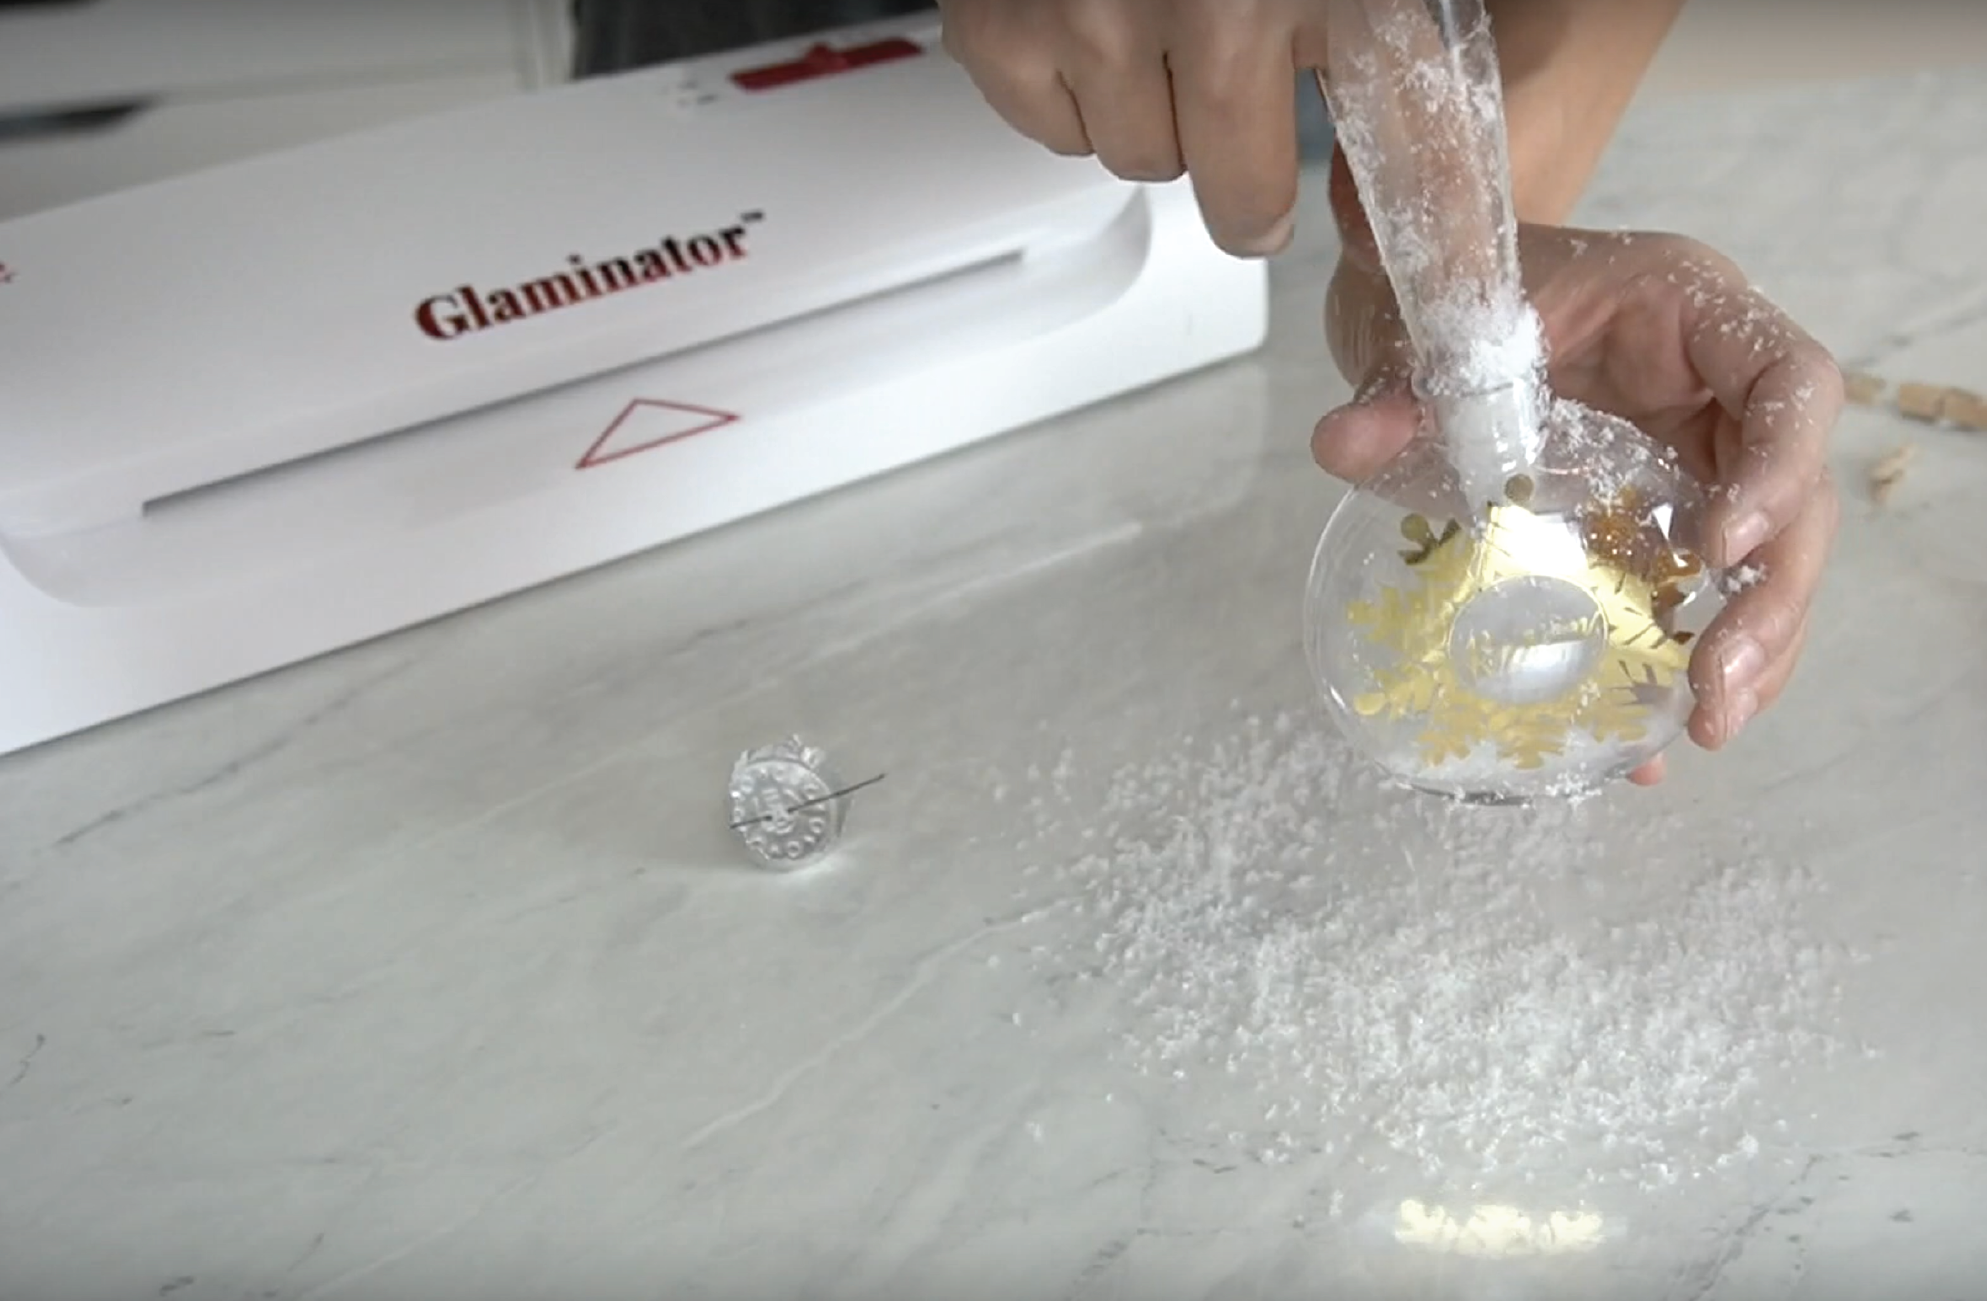
In the video tutorial, I had a left over piece of transparency film, so I used that to create a funnel. However, when I made my test ornament, I used a piece of copy paper. The copy paper was much easier to use since the “snow” didn’t stick to it. So I recommend using a piece of copy paper to create a funnel. Stick it behind your design and then fill your ornament with the snow.  

Embellish

Using a small piece of ribbon, I tied a bow and adhered it to the front of my ornament with a dot of hot glue.    

Add it to your table!

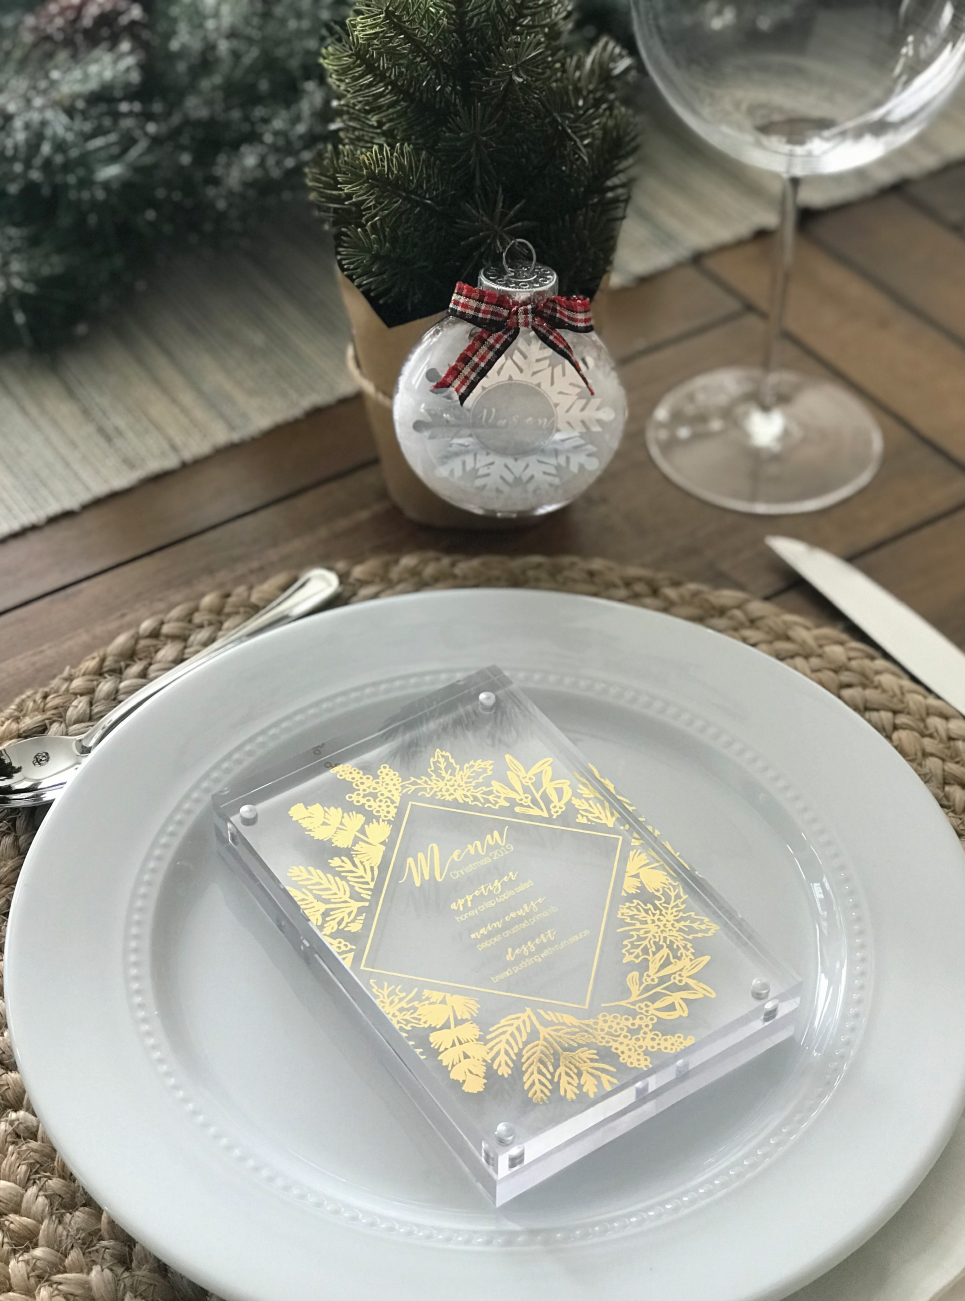
I tied my ornaments on to little Christmas trees I found at Target. I also created some foiled menu’s and framed them in 4 x 6″ acrylic frames to add a little bit of a wow factor to my table. I love the way it turned out!     

Additional Resources

lf you want to see the entire tutorial, check it out below! 

Ready to try it out?

Here are the links to the products used in this tutorial!

Looking for a discount code to use on Cricut’s shop? Since my code changes each quarter, make sure you join my Facebook Group to get the most up to date code! The code will save you 10% and give you free shipping on orders over $50! Not on Facebook? No problem, send me an email to Karley@karleyhall.com or leave a comment below!

Have Questions or want to connect!?

Happy Crafting,

Karley

Hello

I’m Karley

Welcome to my blog! A place where I can share my love for all things crafting with you! If you are obsessed with your Cricut… I’m sorry to inform you that your obsession will only get worse while you’re here! I will teach you everything you need to know to get up and crafting with your Cricut. I am here to help! To reach me, use any of the social links below! 

Have specific Cricut questions?  Join Our Facebook Group!

The EASIEST Way to Apply Any Type of Vinyl on ANY Surface!

The EASIEST Way to Apply Any Type of Vinyl on ANY Surface!


This post and the photos within it may contain Amazon or other affiliate links. If you purchase something through the link, I may receive a small commission at no extra charge to you.

My #1 question is always how do you apply vinyl!? I have been using the “hinge method” even before I knew it had that name. This technique is super popular in the sign making world and it lends itself perfectly to crafting. 

Here’s what we need to get this craft party started:

If at any point during this tutorial you get lost or confused, click the image and it’ll take you to that exact moment in a full how-to video tutorial. The video will show you everything you need to know about the hinge method! 


Cut and weed your image

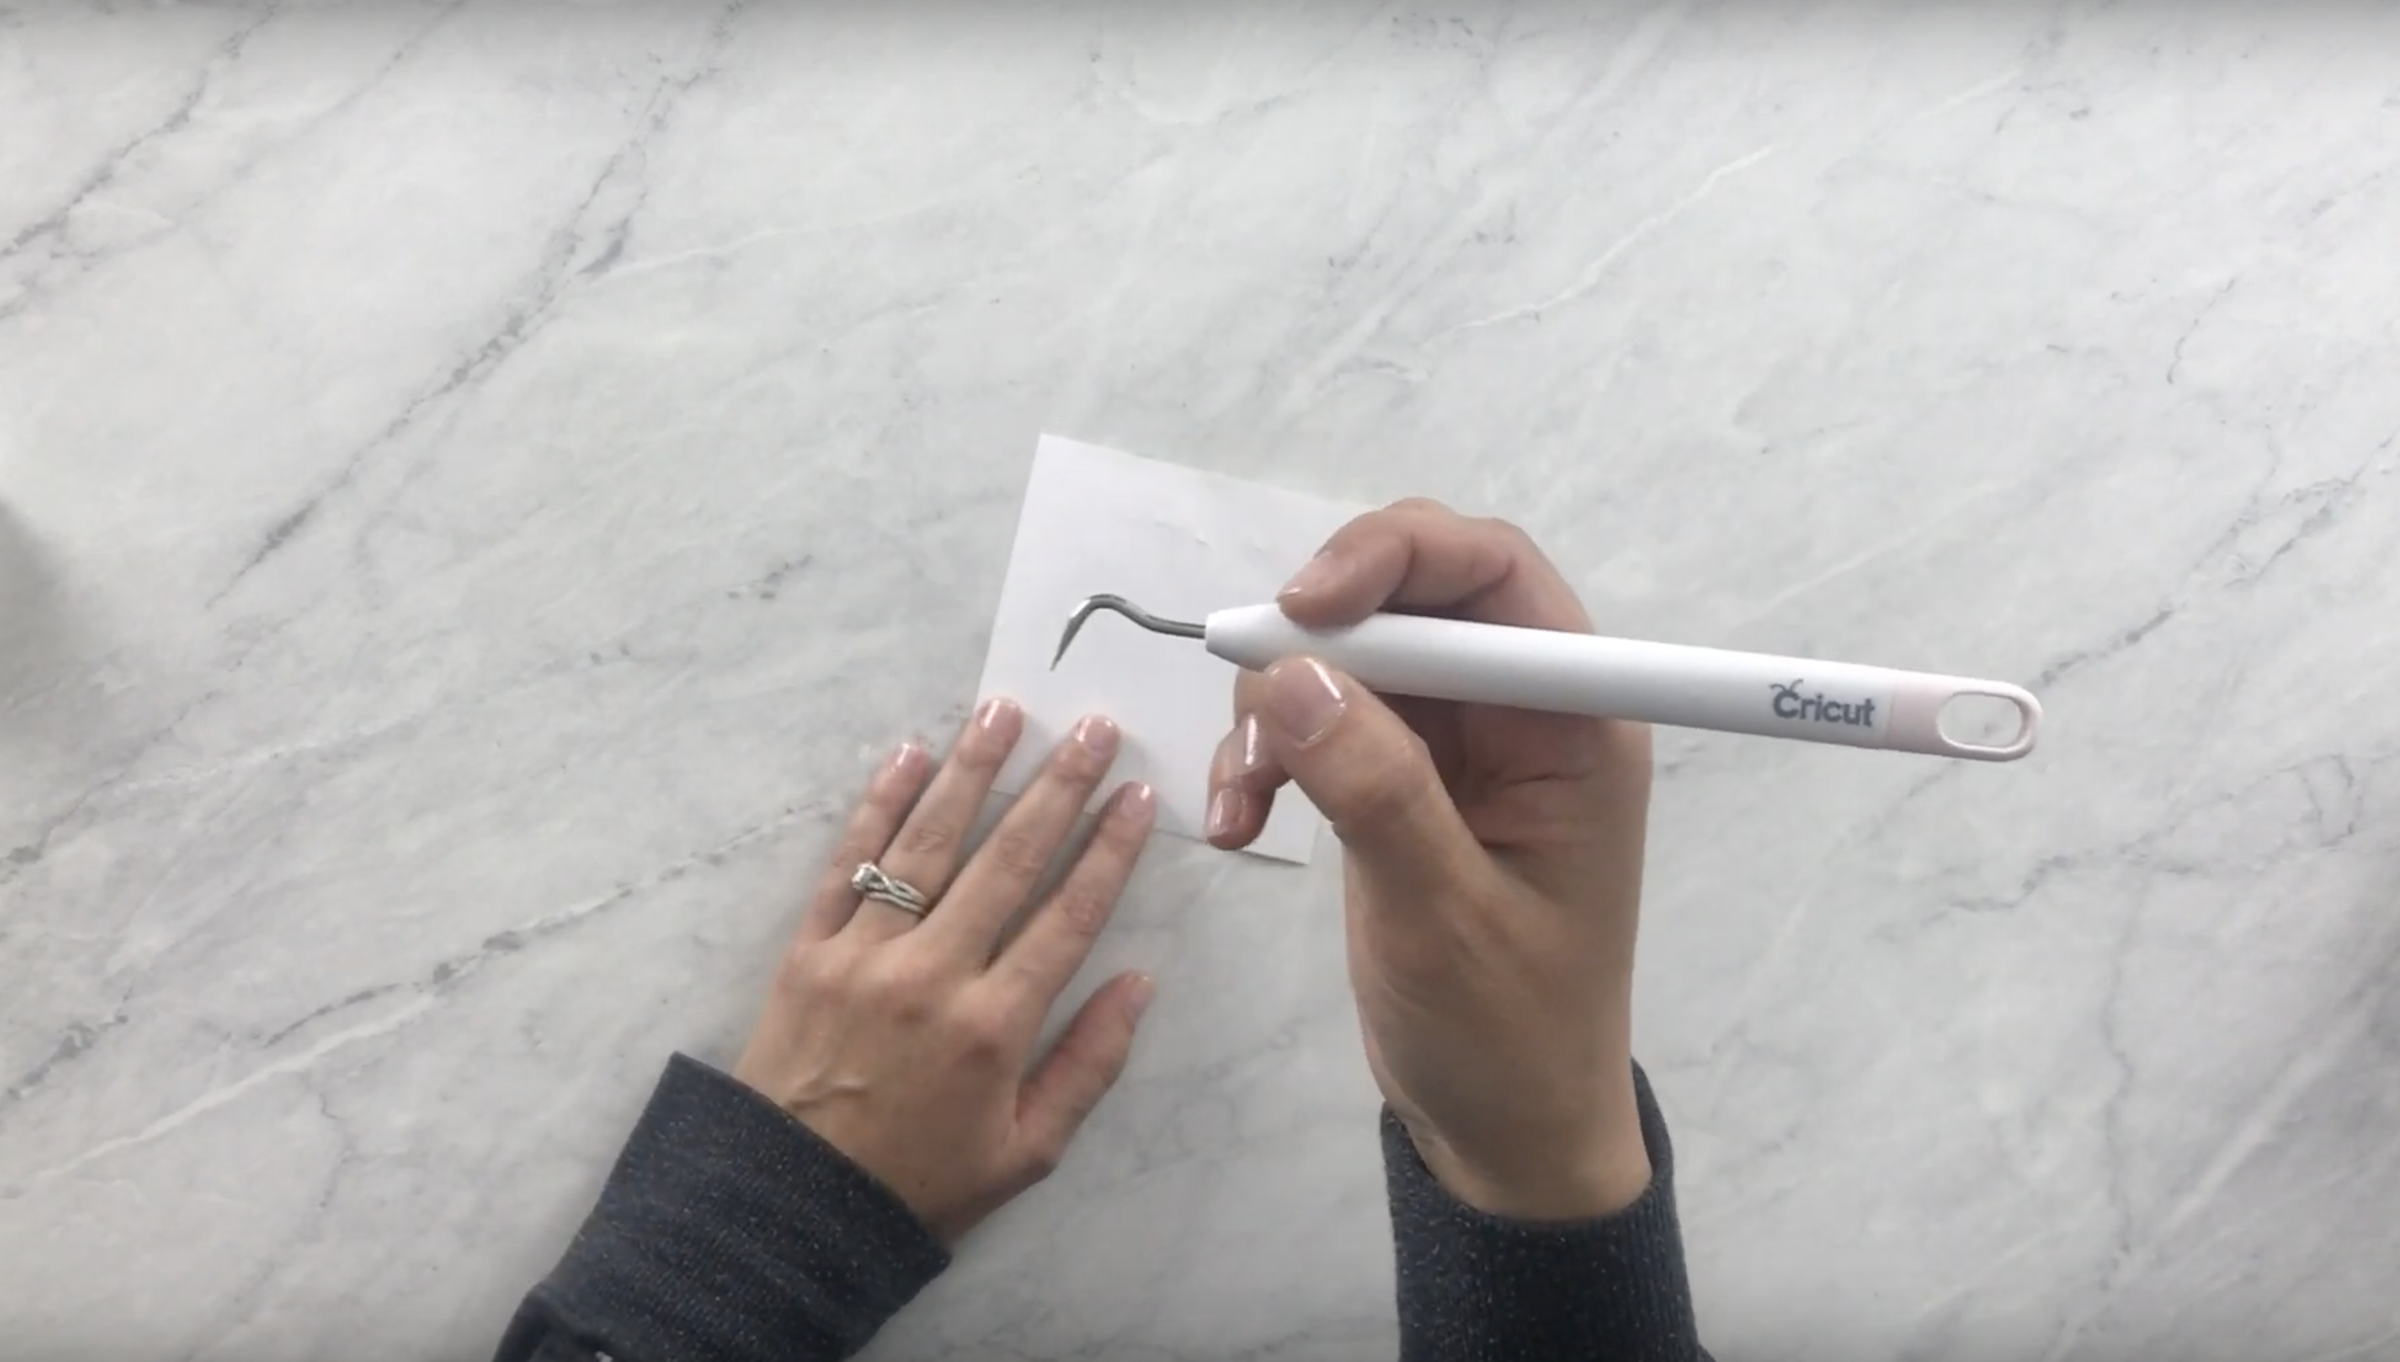
To keep this tutorial a manageable length, I skipped over the cutting portion! If you need help with cutting your vinyl using your Cricut machine, click the image above to watch the video tutorial! After your image is cut, you will need to weed away your excess vinyl. Using a weeding tool pull away all of the parts that do not belong on your image. Don’t forget to weed away the insides of each letter. 

Place transfer tape over image

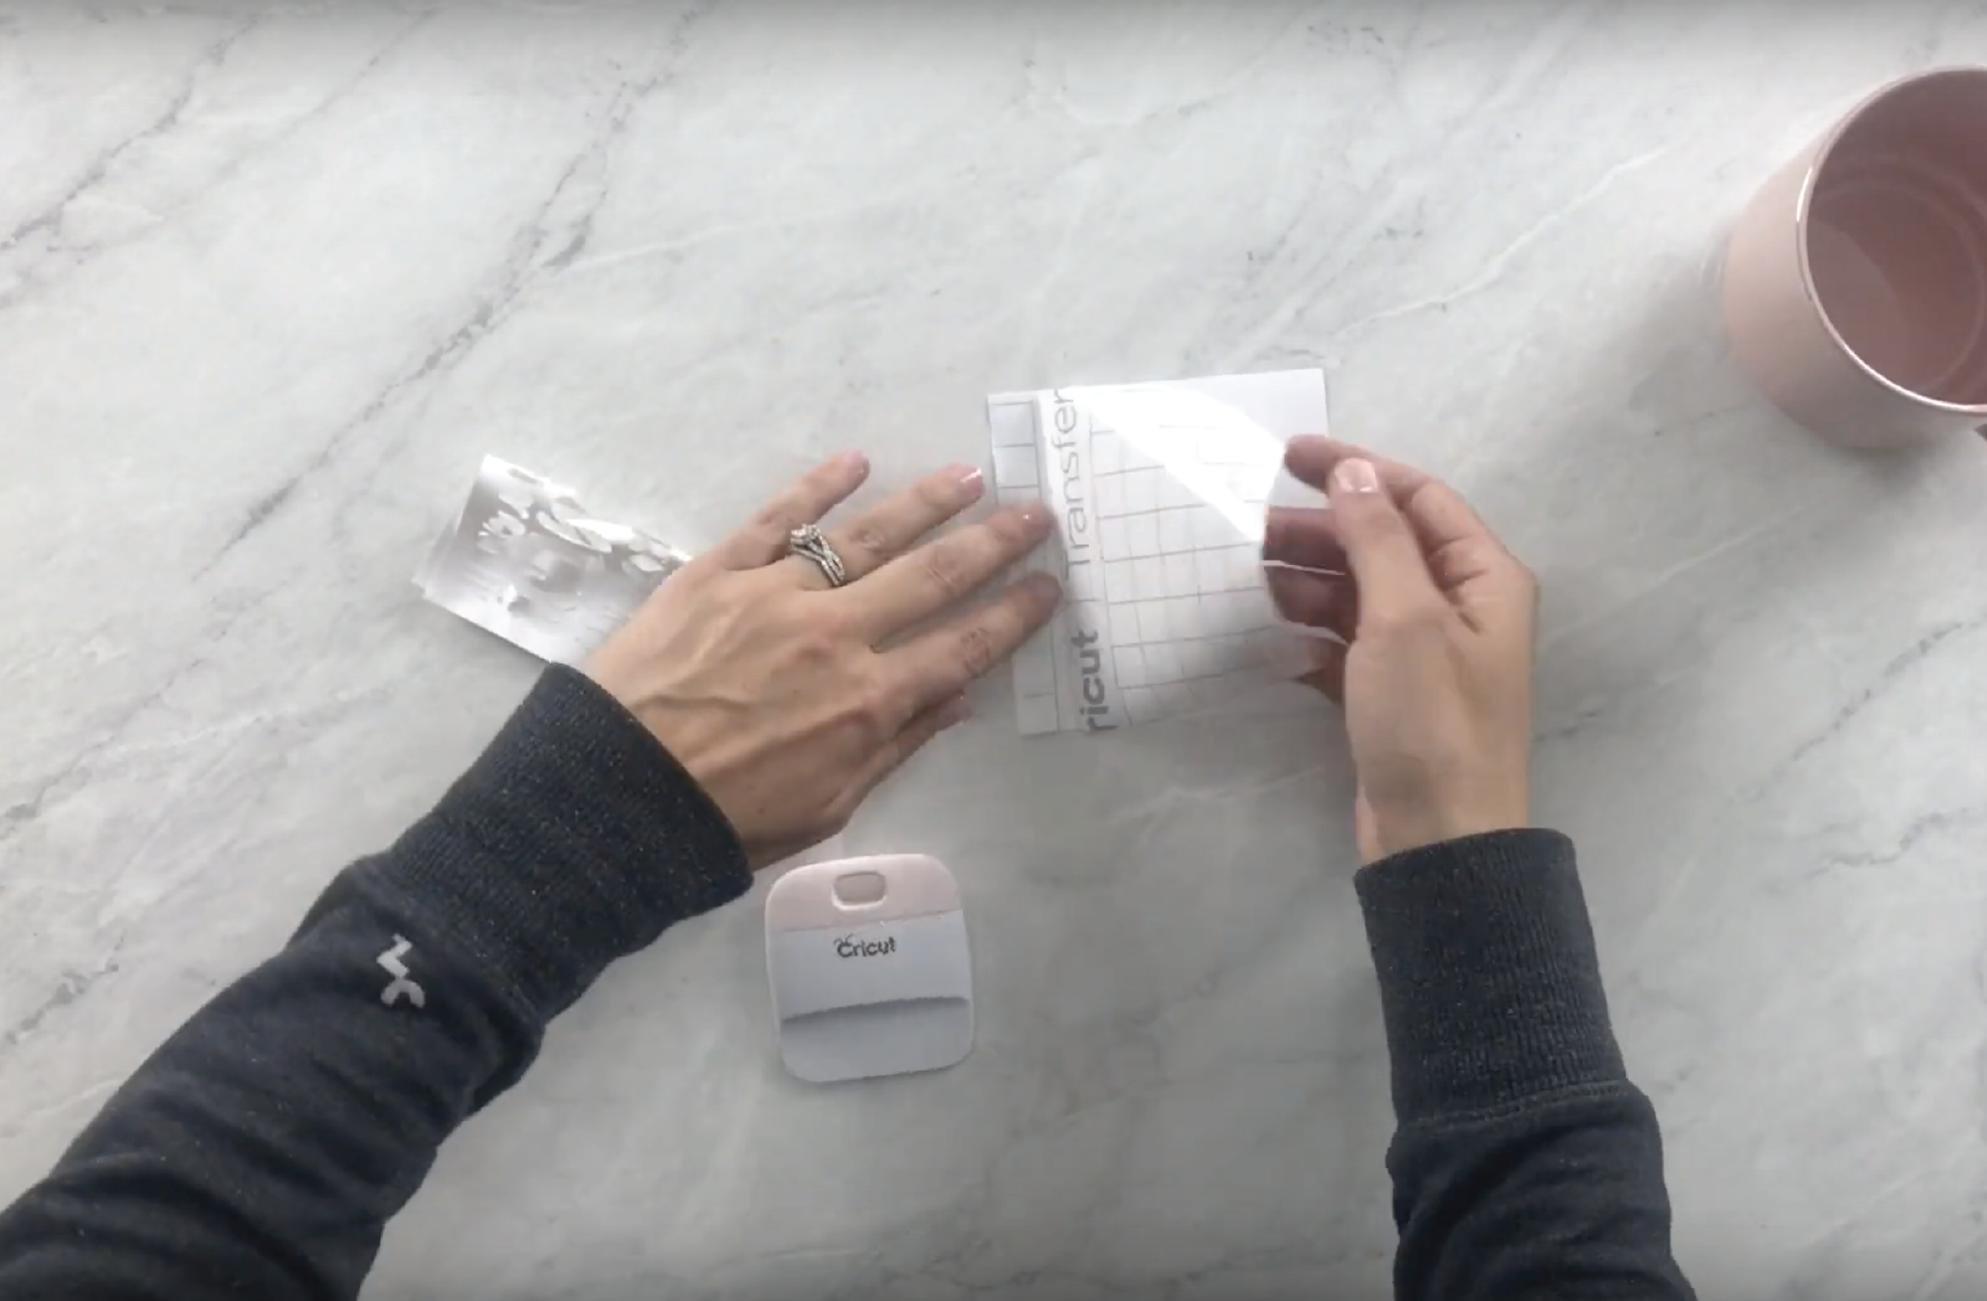
Using a piece of transfer tape cover your entire image. Burnish down the transfer tape using your scraper.

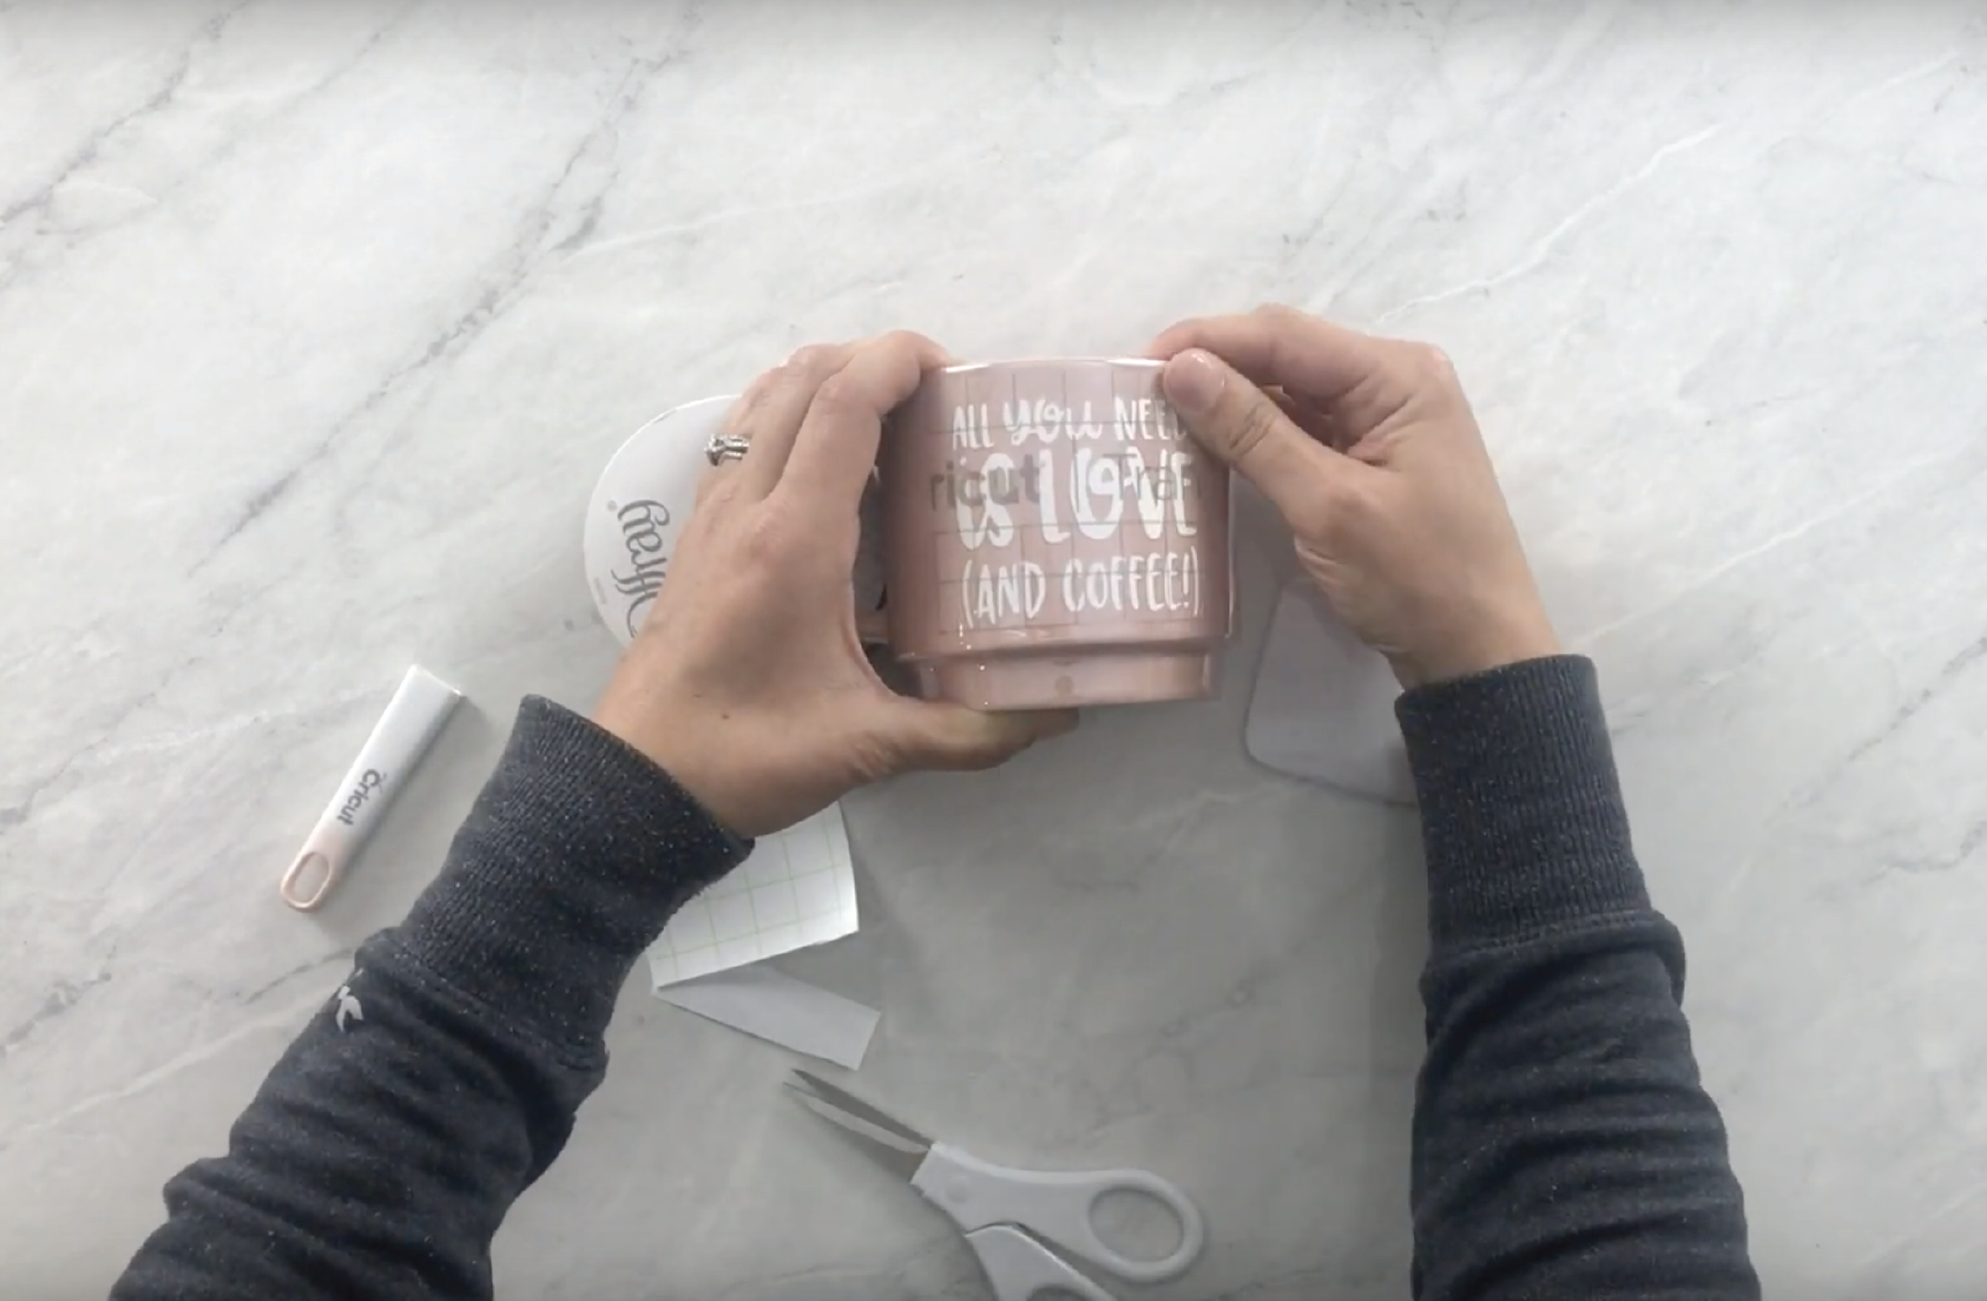
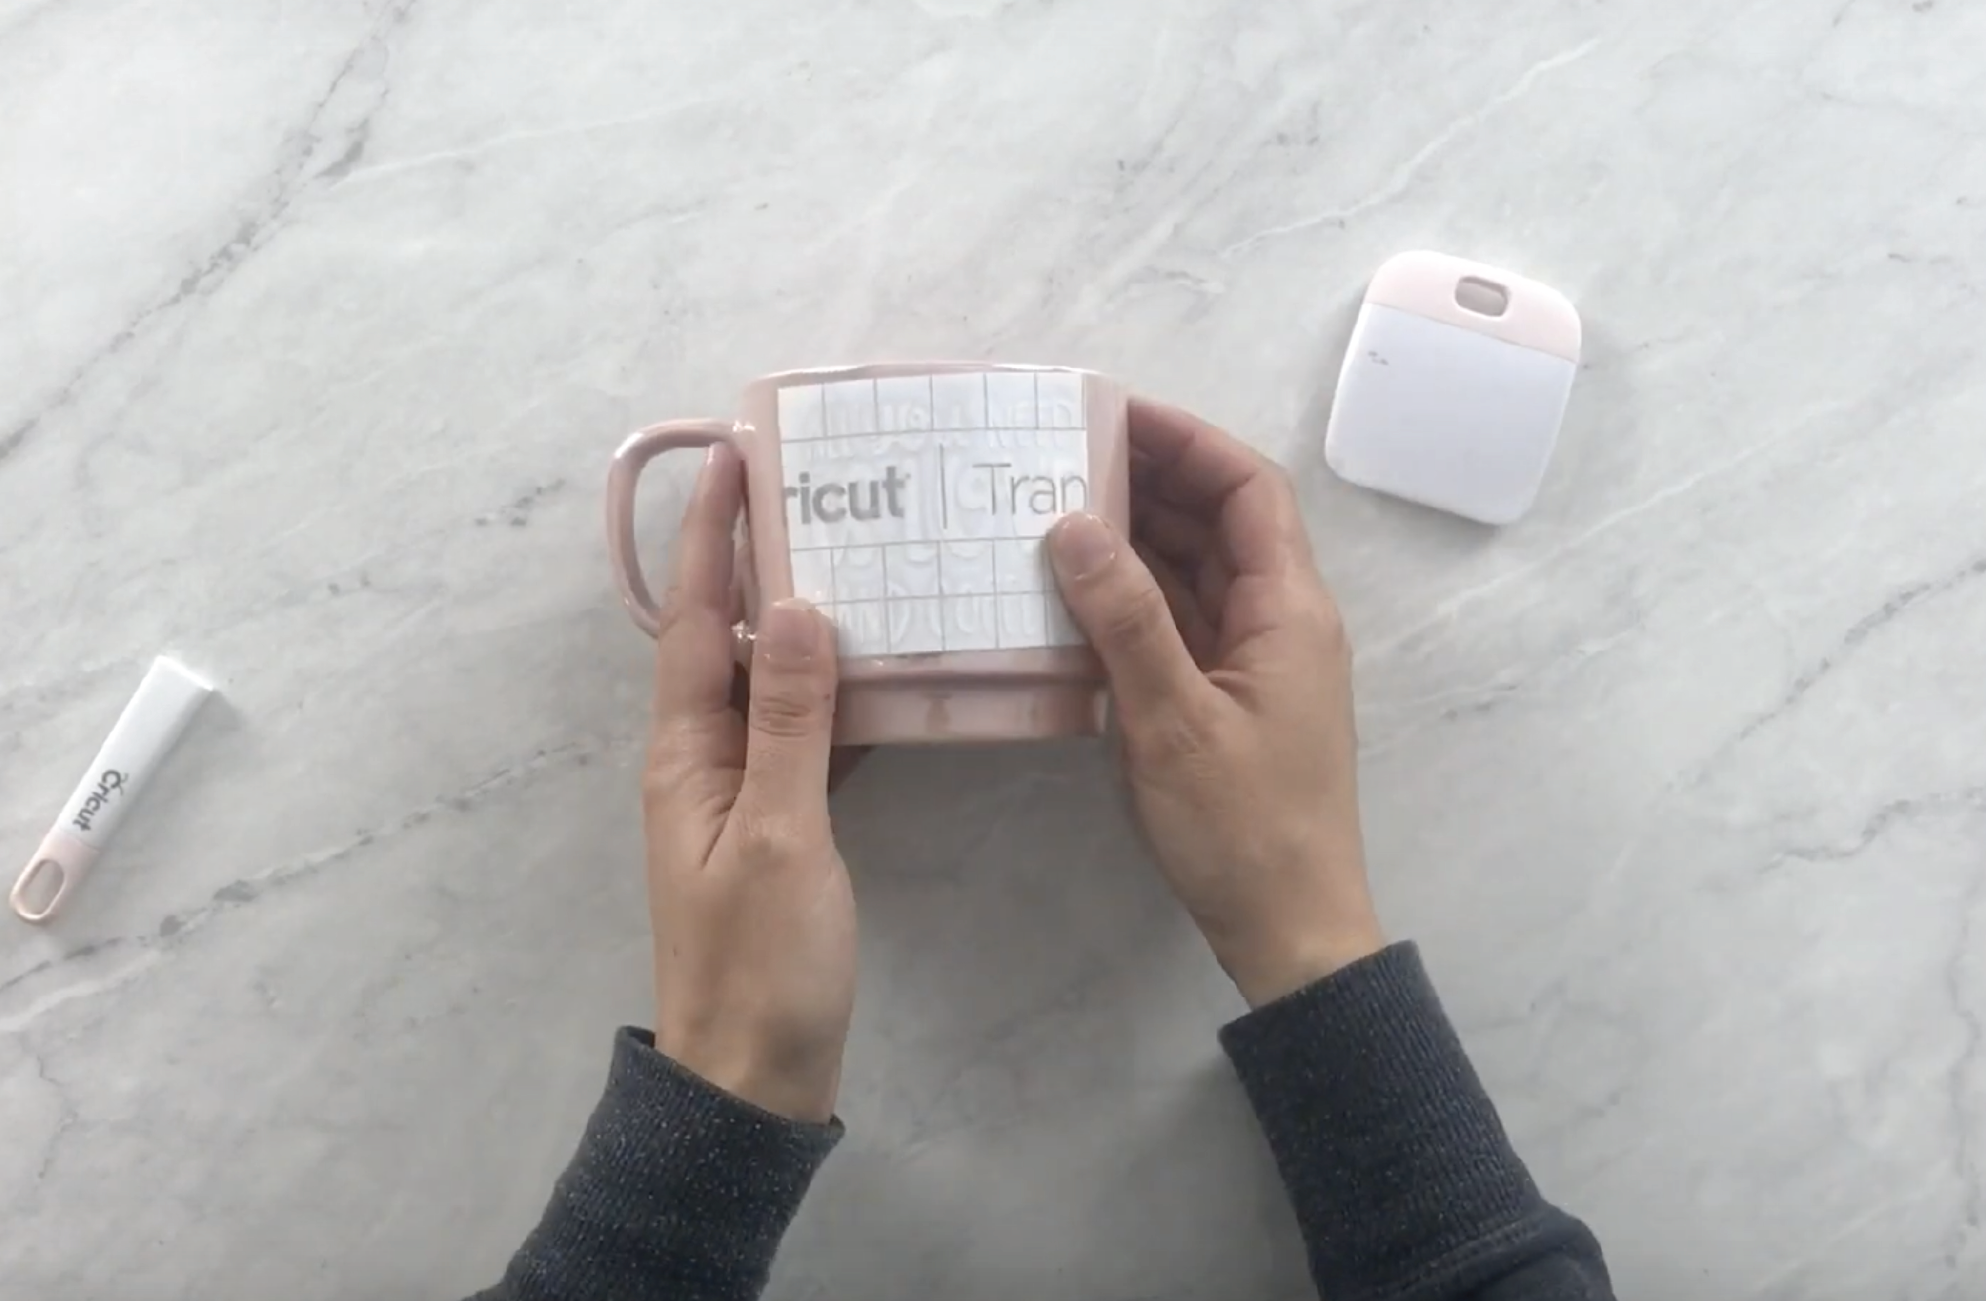
With the liner still on, position your image on the mug

I know it’s tempting, but do not remove the transfer tape from the liner! Trim down your image and transfer tape. Then position it on the surface you plan to transfer it to. If you plan to transfer it on to a mug, I’d recommend wiping it down with rubbing alcohol so that the surface is nice and clean.

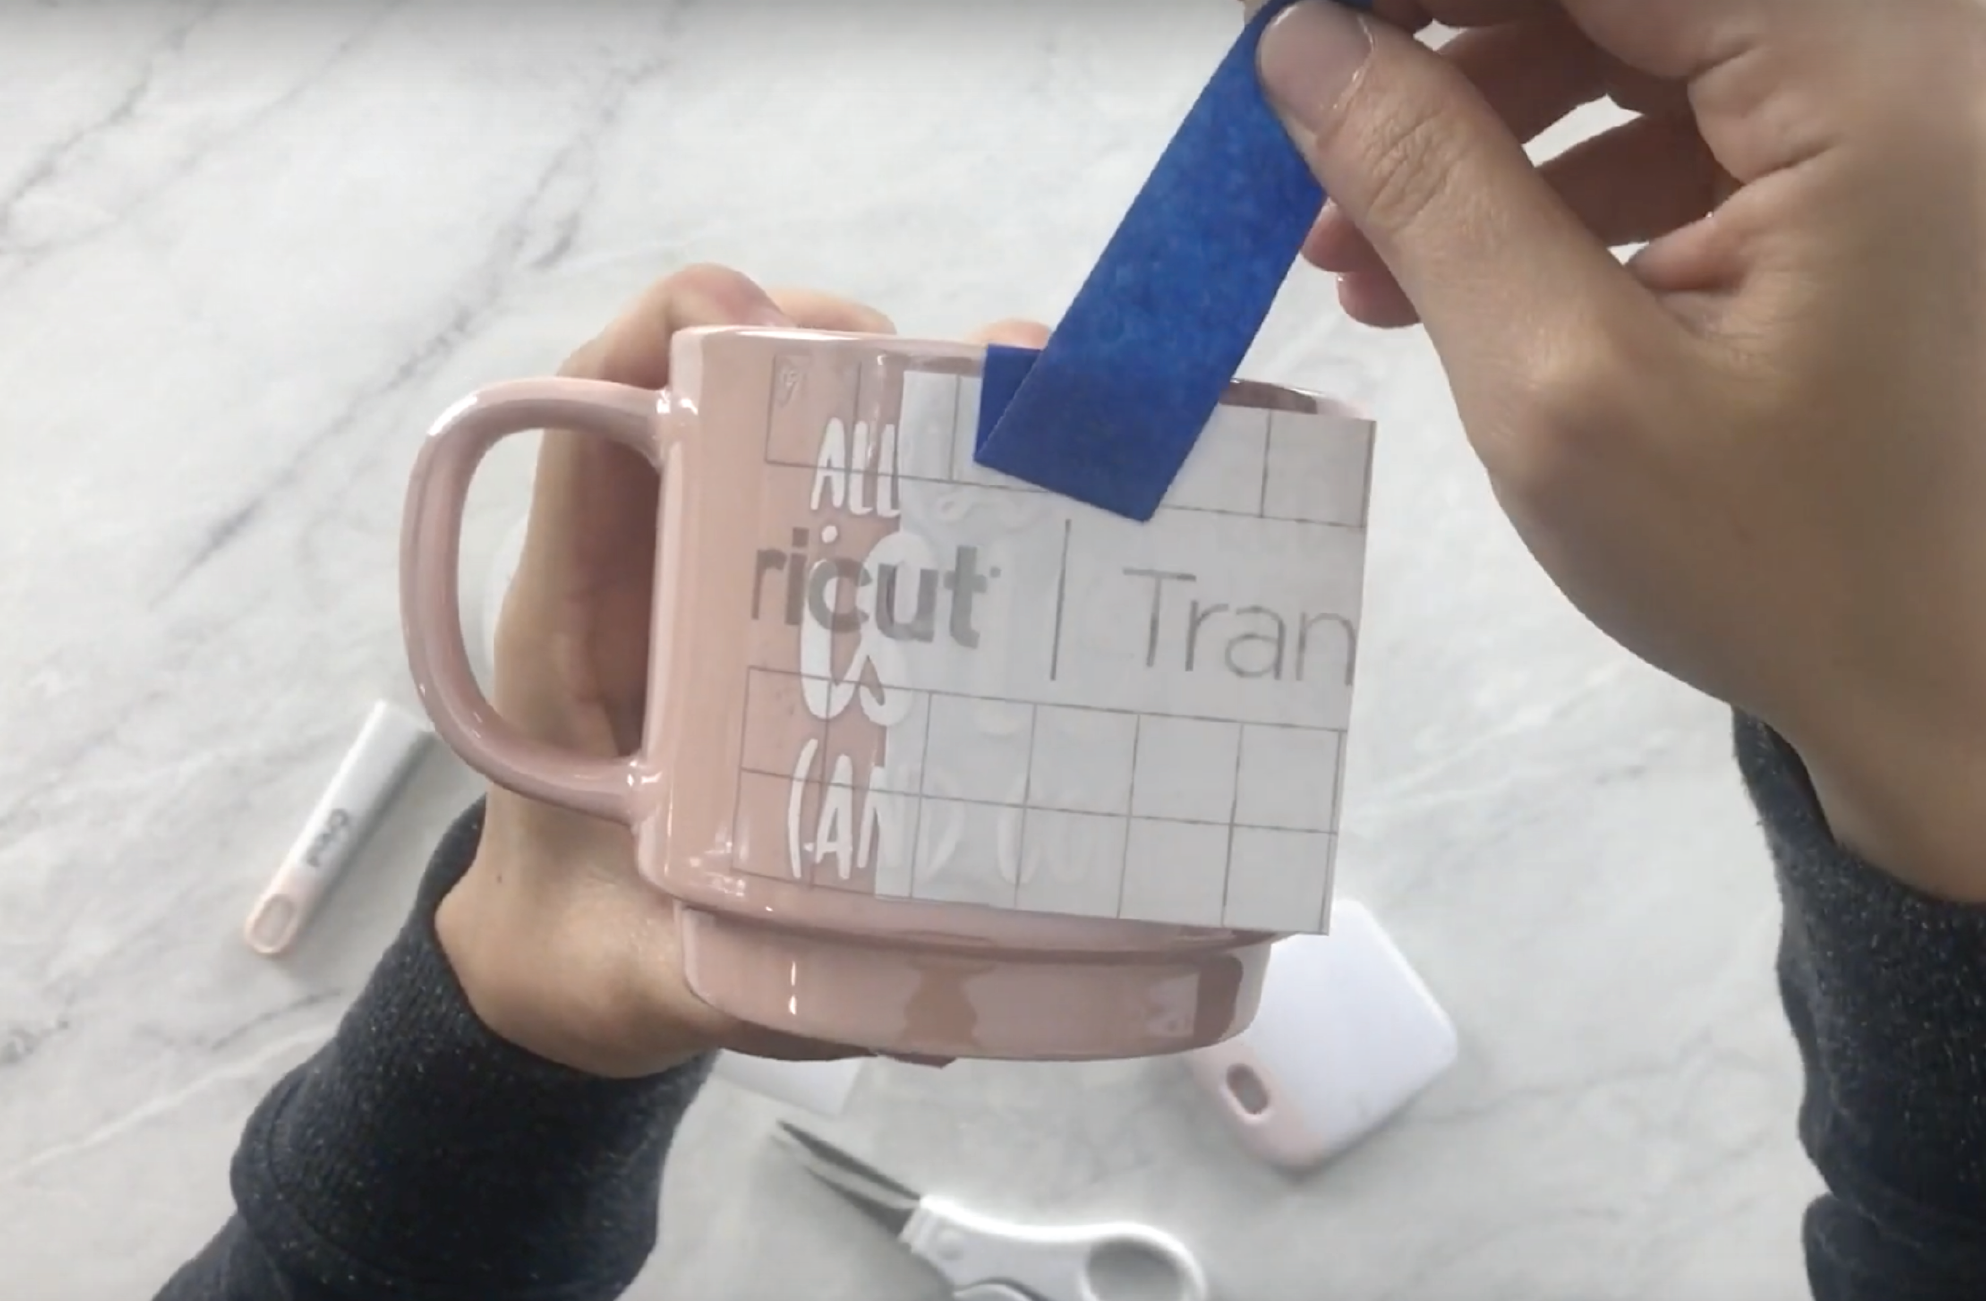
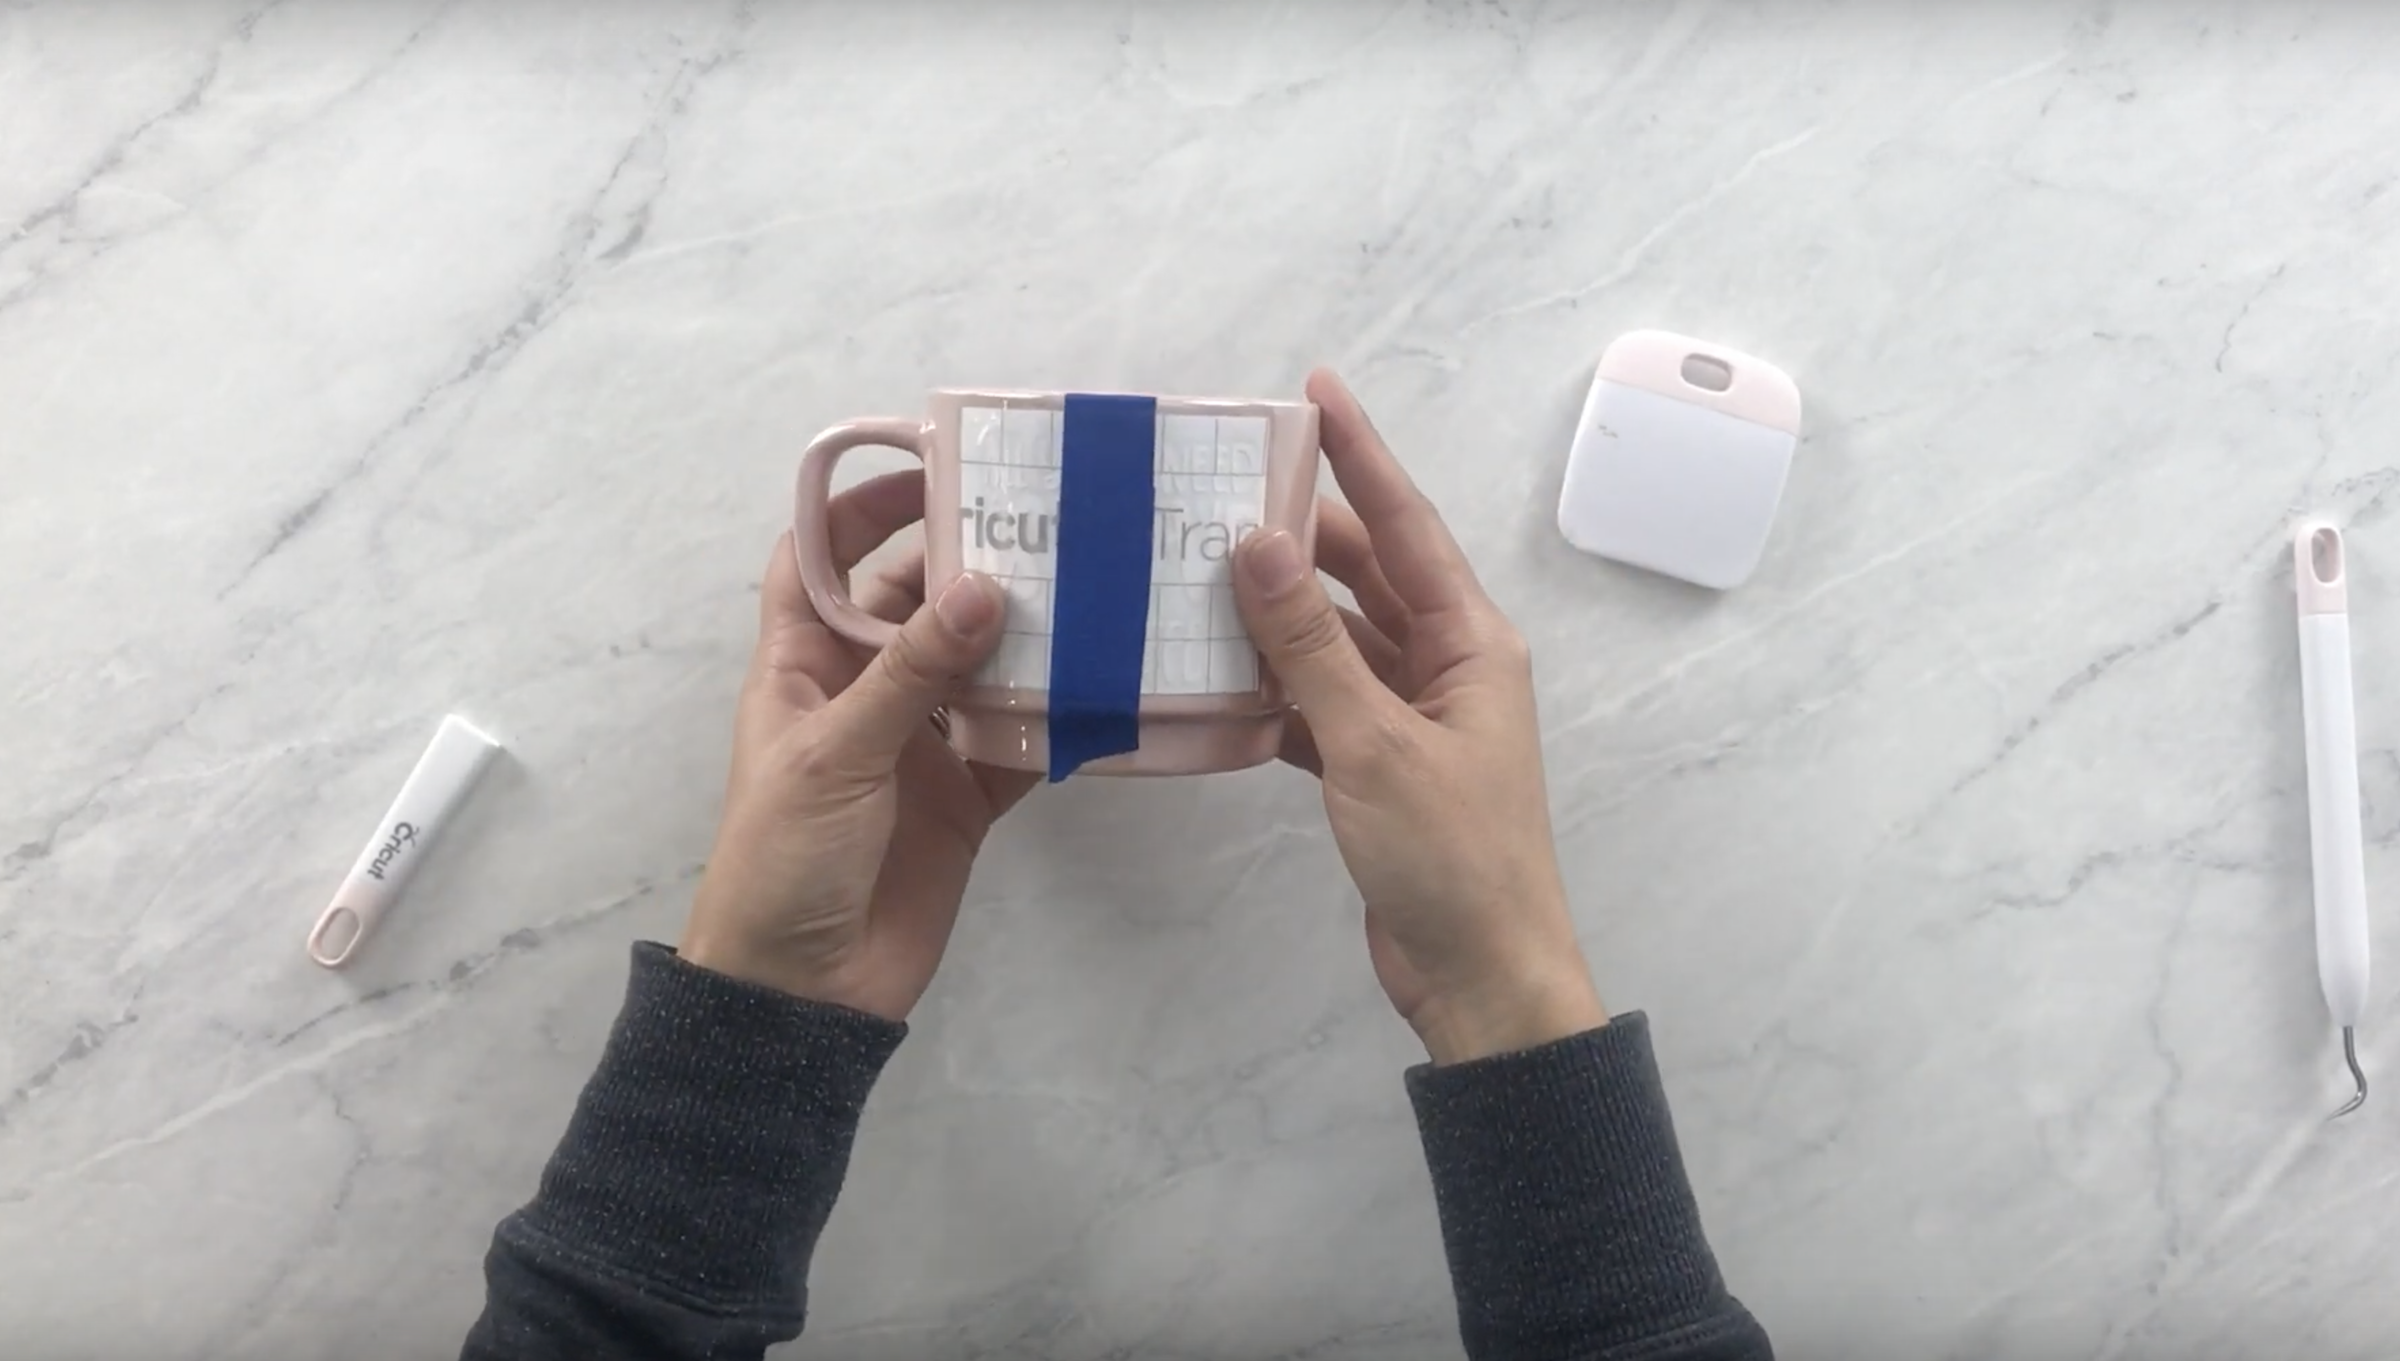
Use a piece of masking tape to secure your design in place

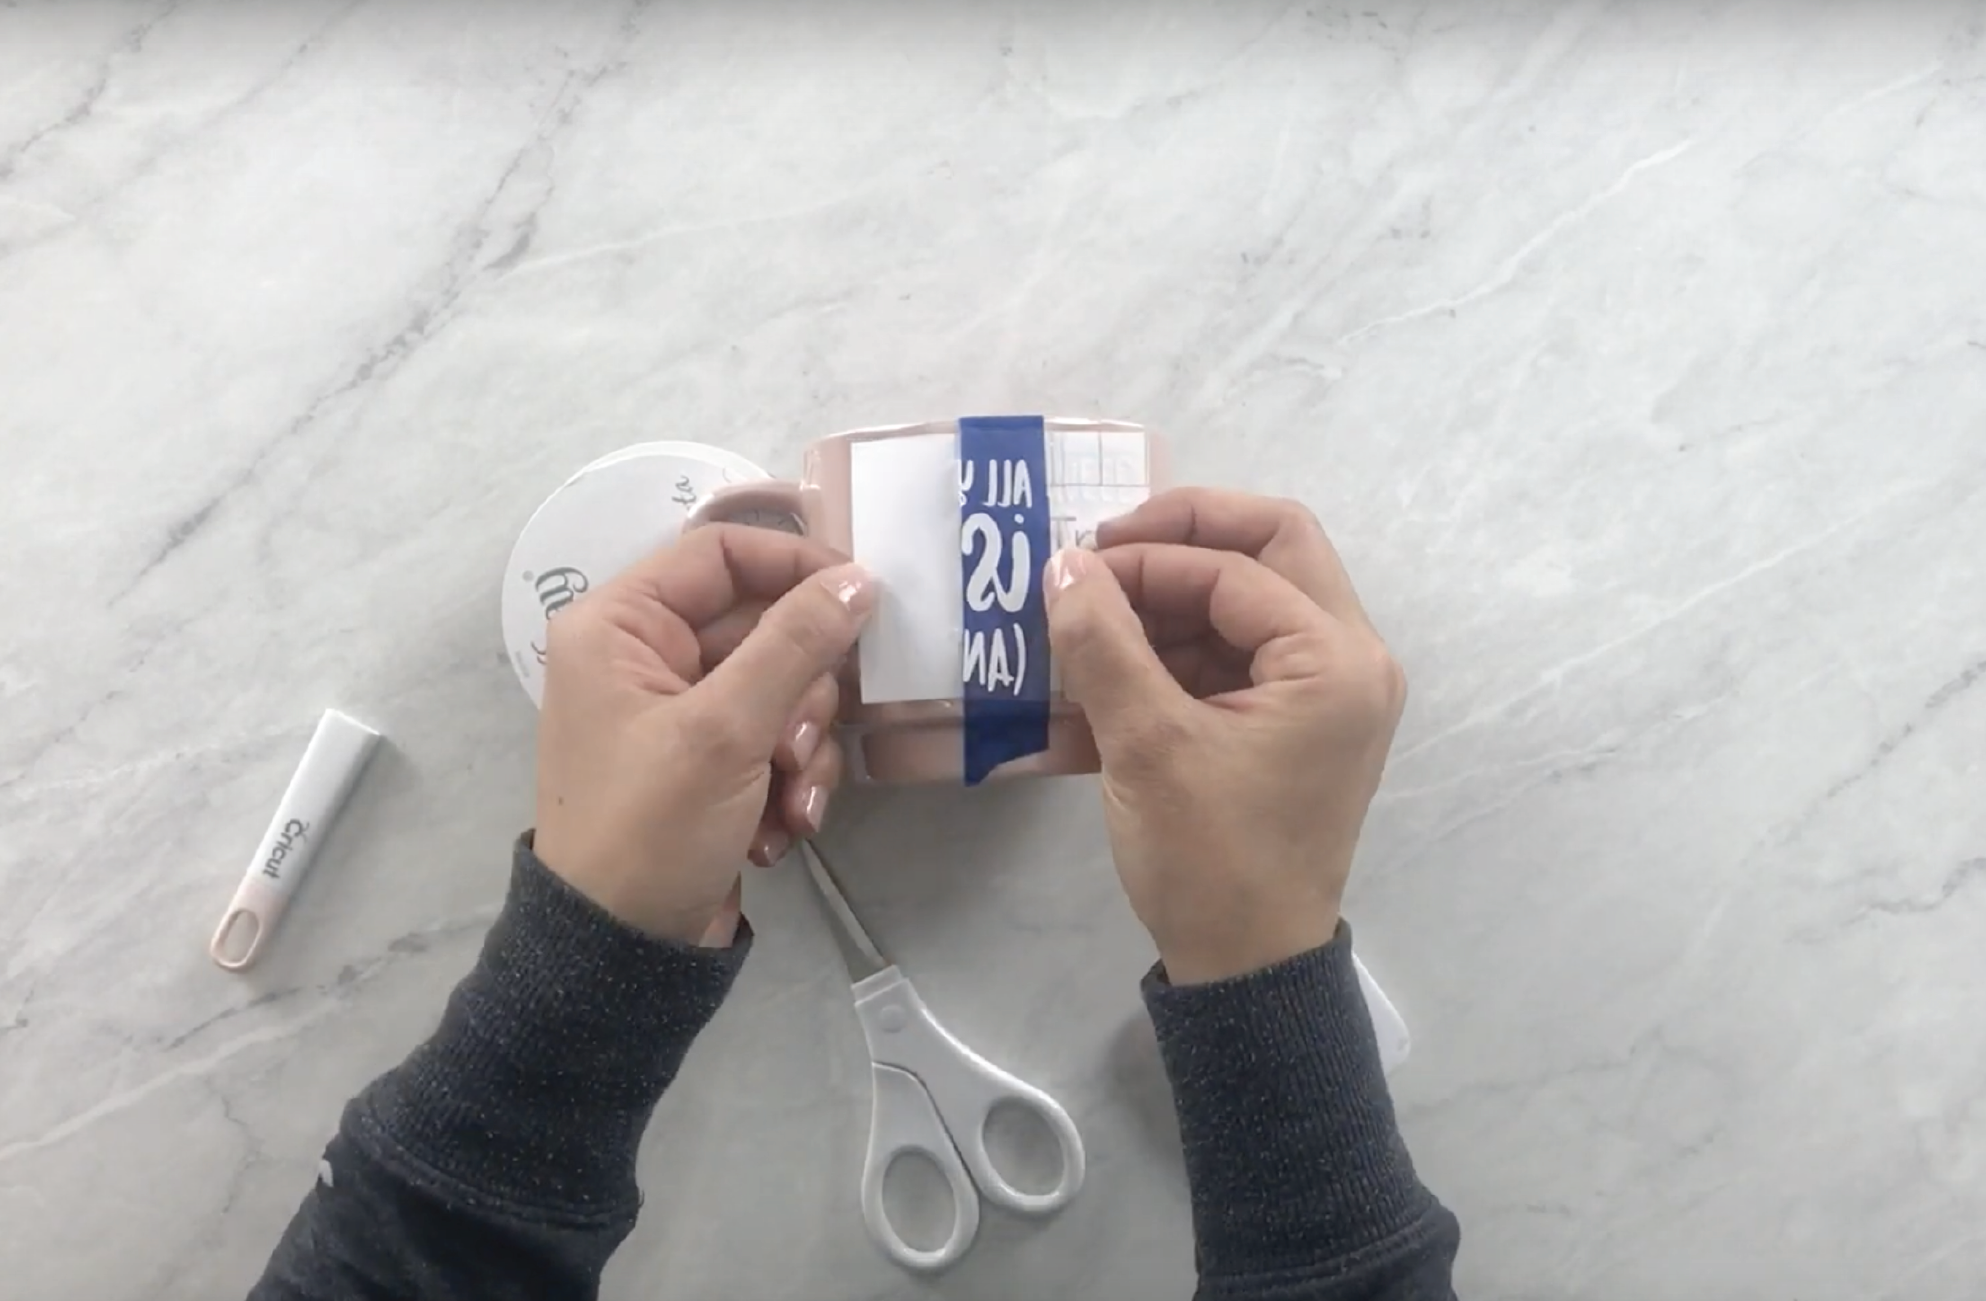
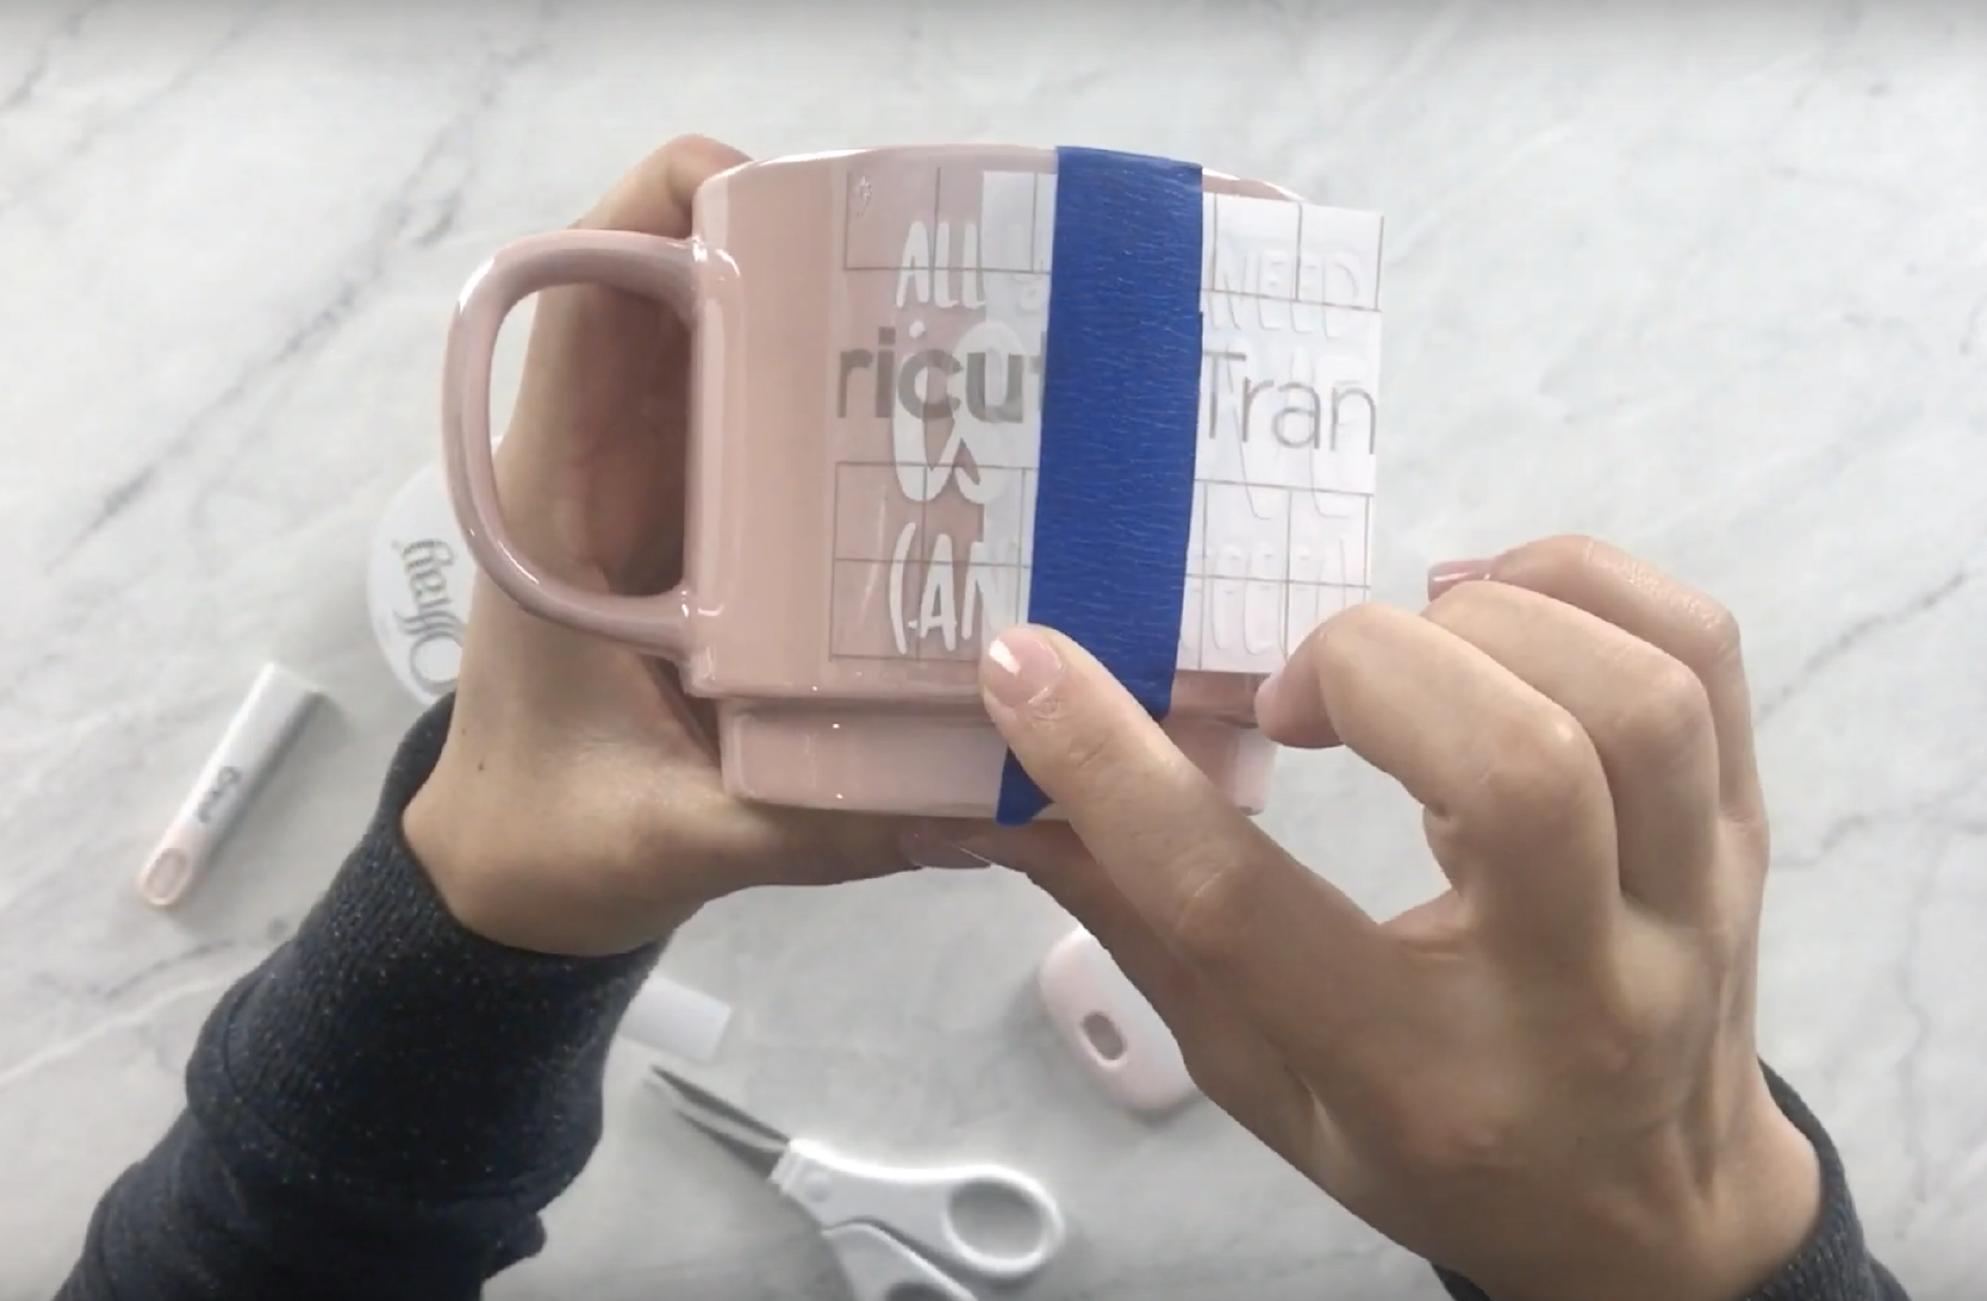
The piece of tape will act as a hinge. Place the tape down the middle of your design. If you need to adjust the placement, lift the tape and move the design. Then secure your design with the tape.  

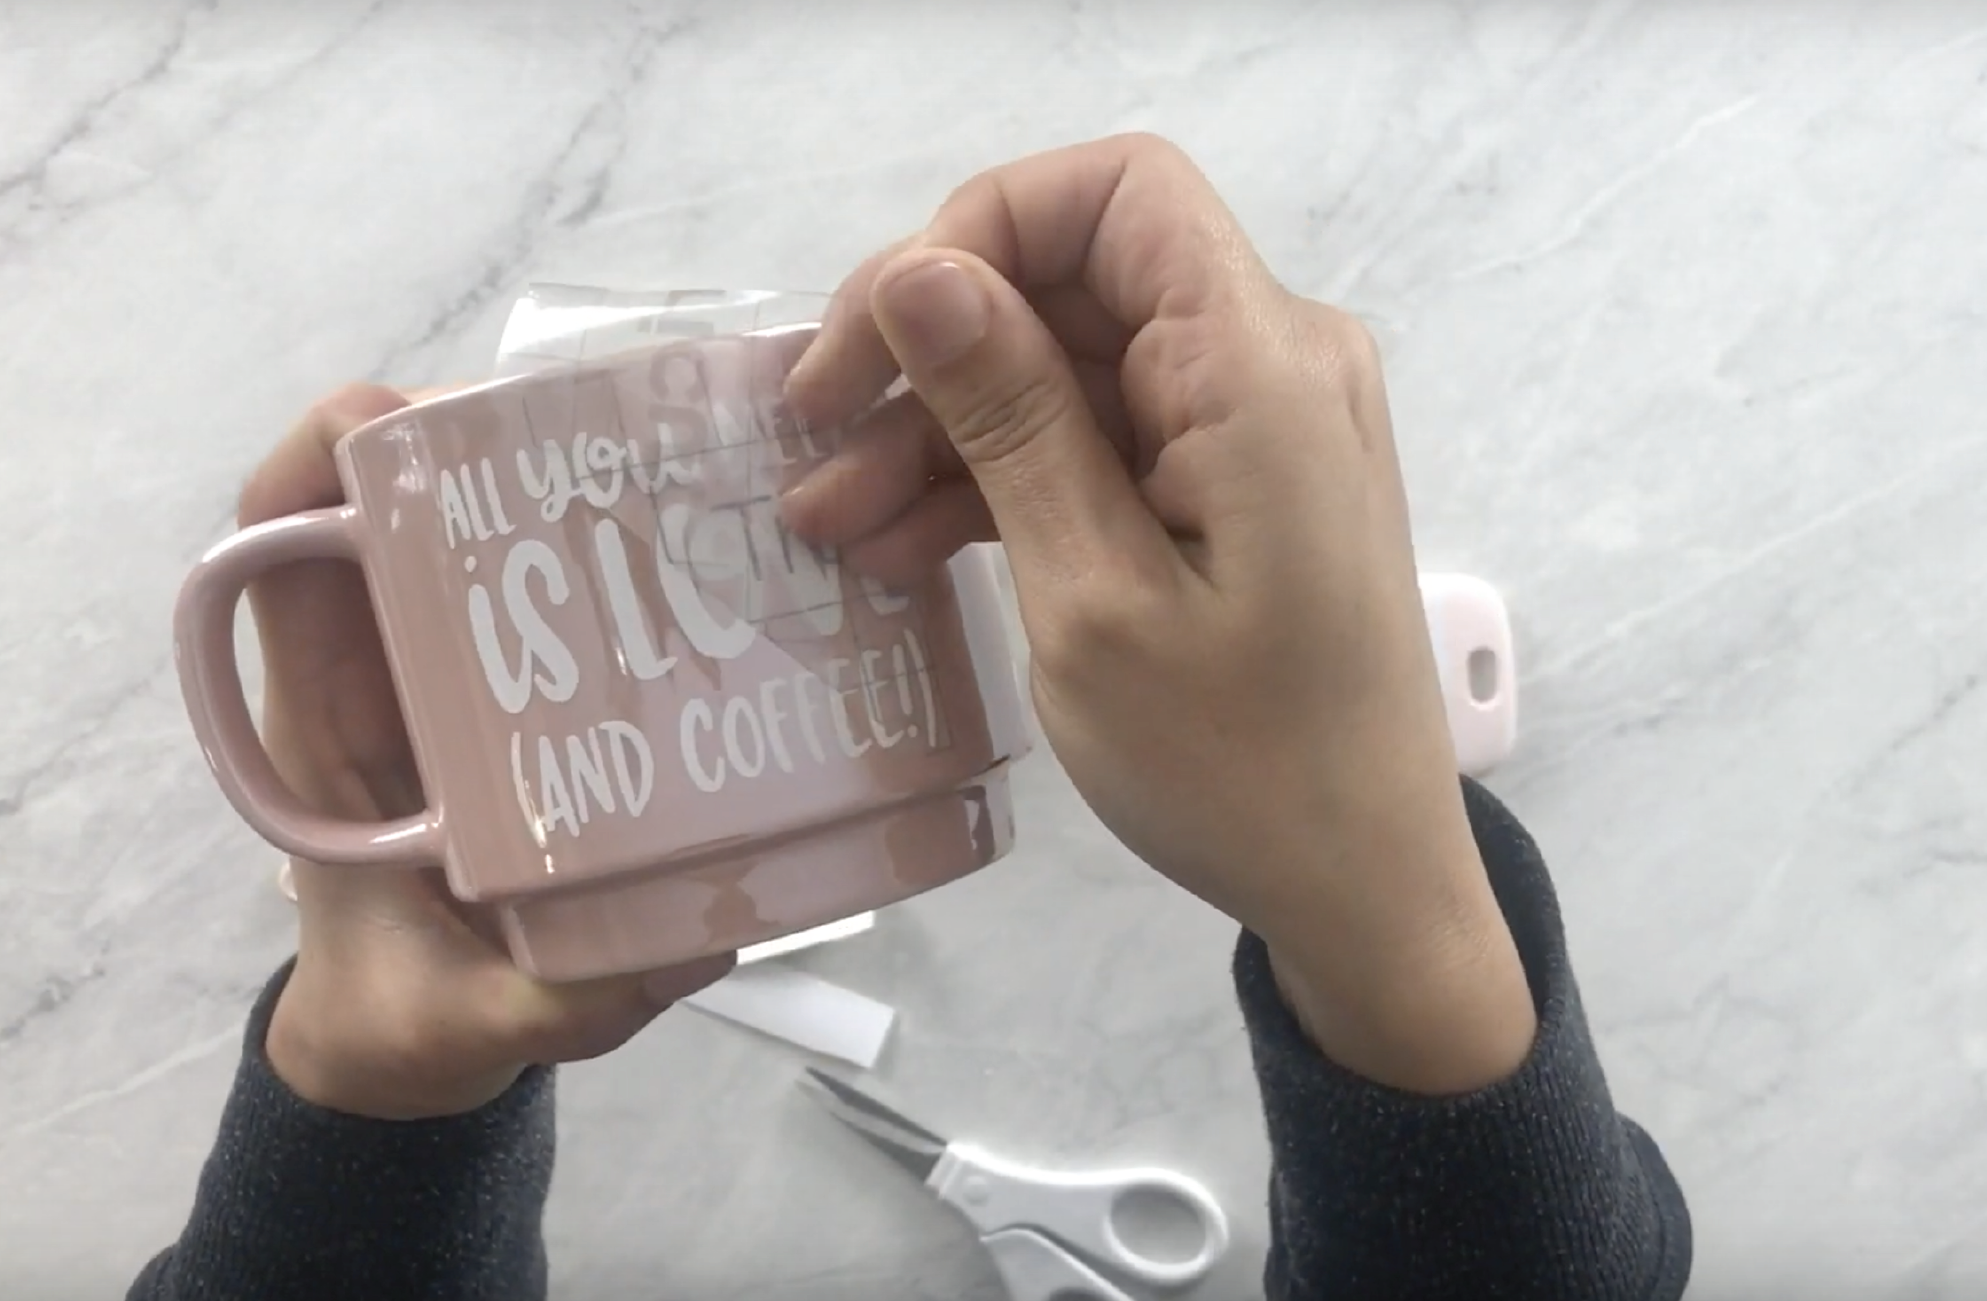
Peel the transfer tape back to expose the liner

Find the corner of your transfer tape and peel it back. Make sure all of your vinyl design sticks to the clear transfer tape. 

Trim away the liner

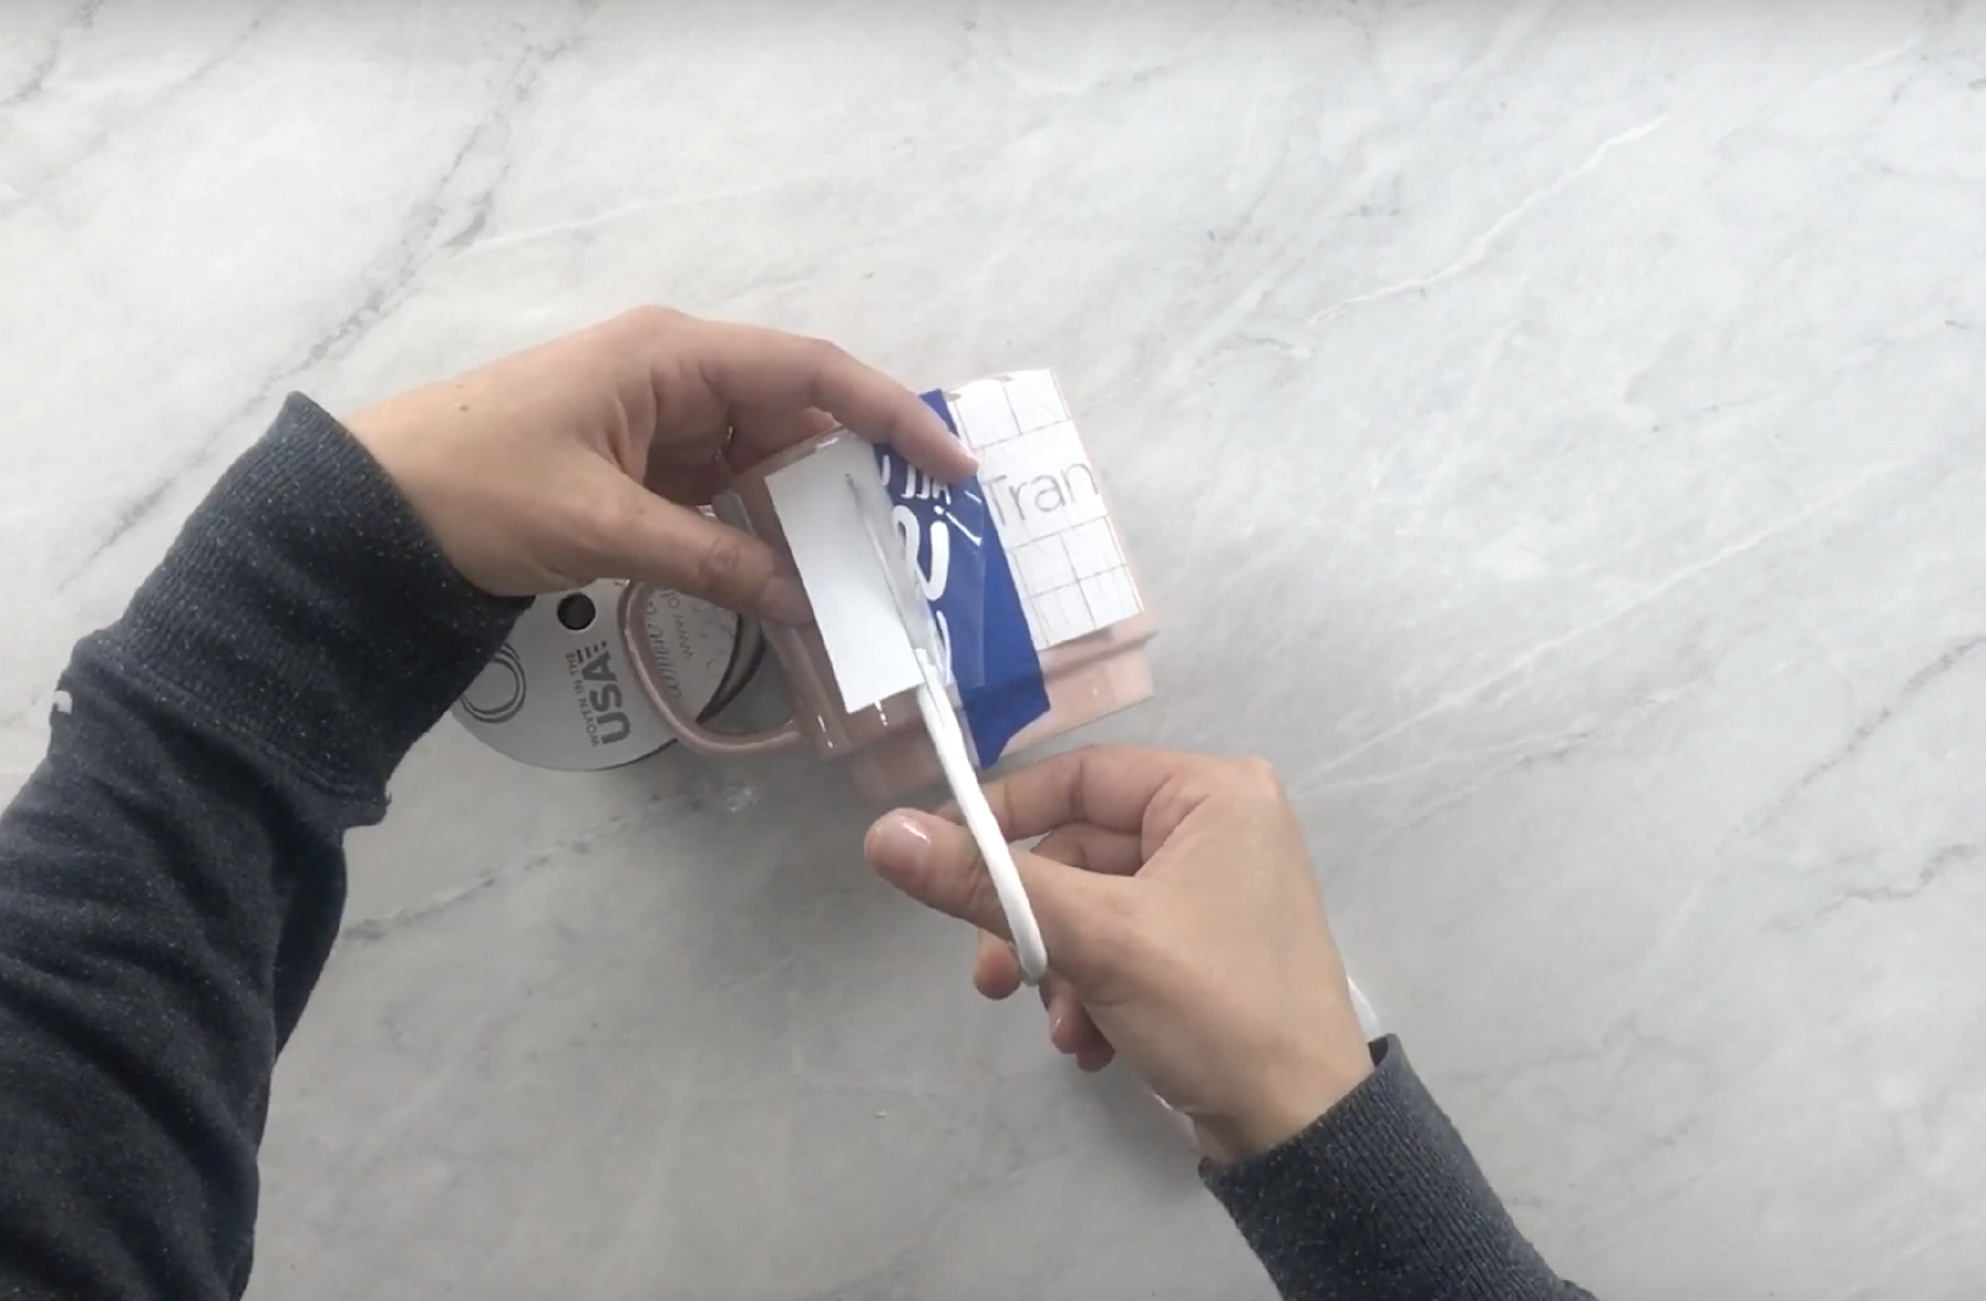
While holding your transfer tape back, trim the liner away. 

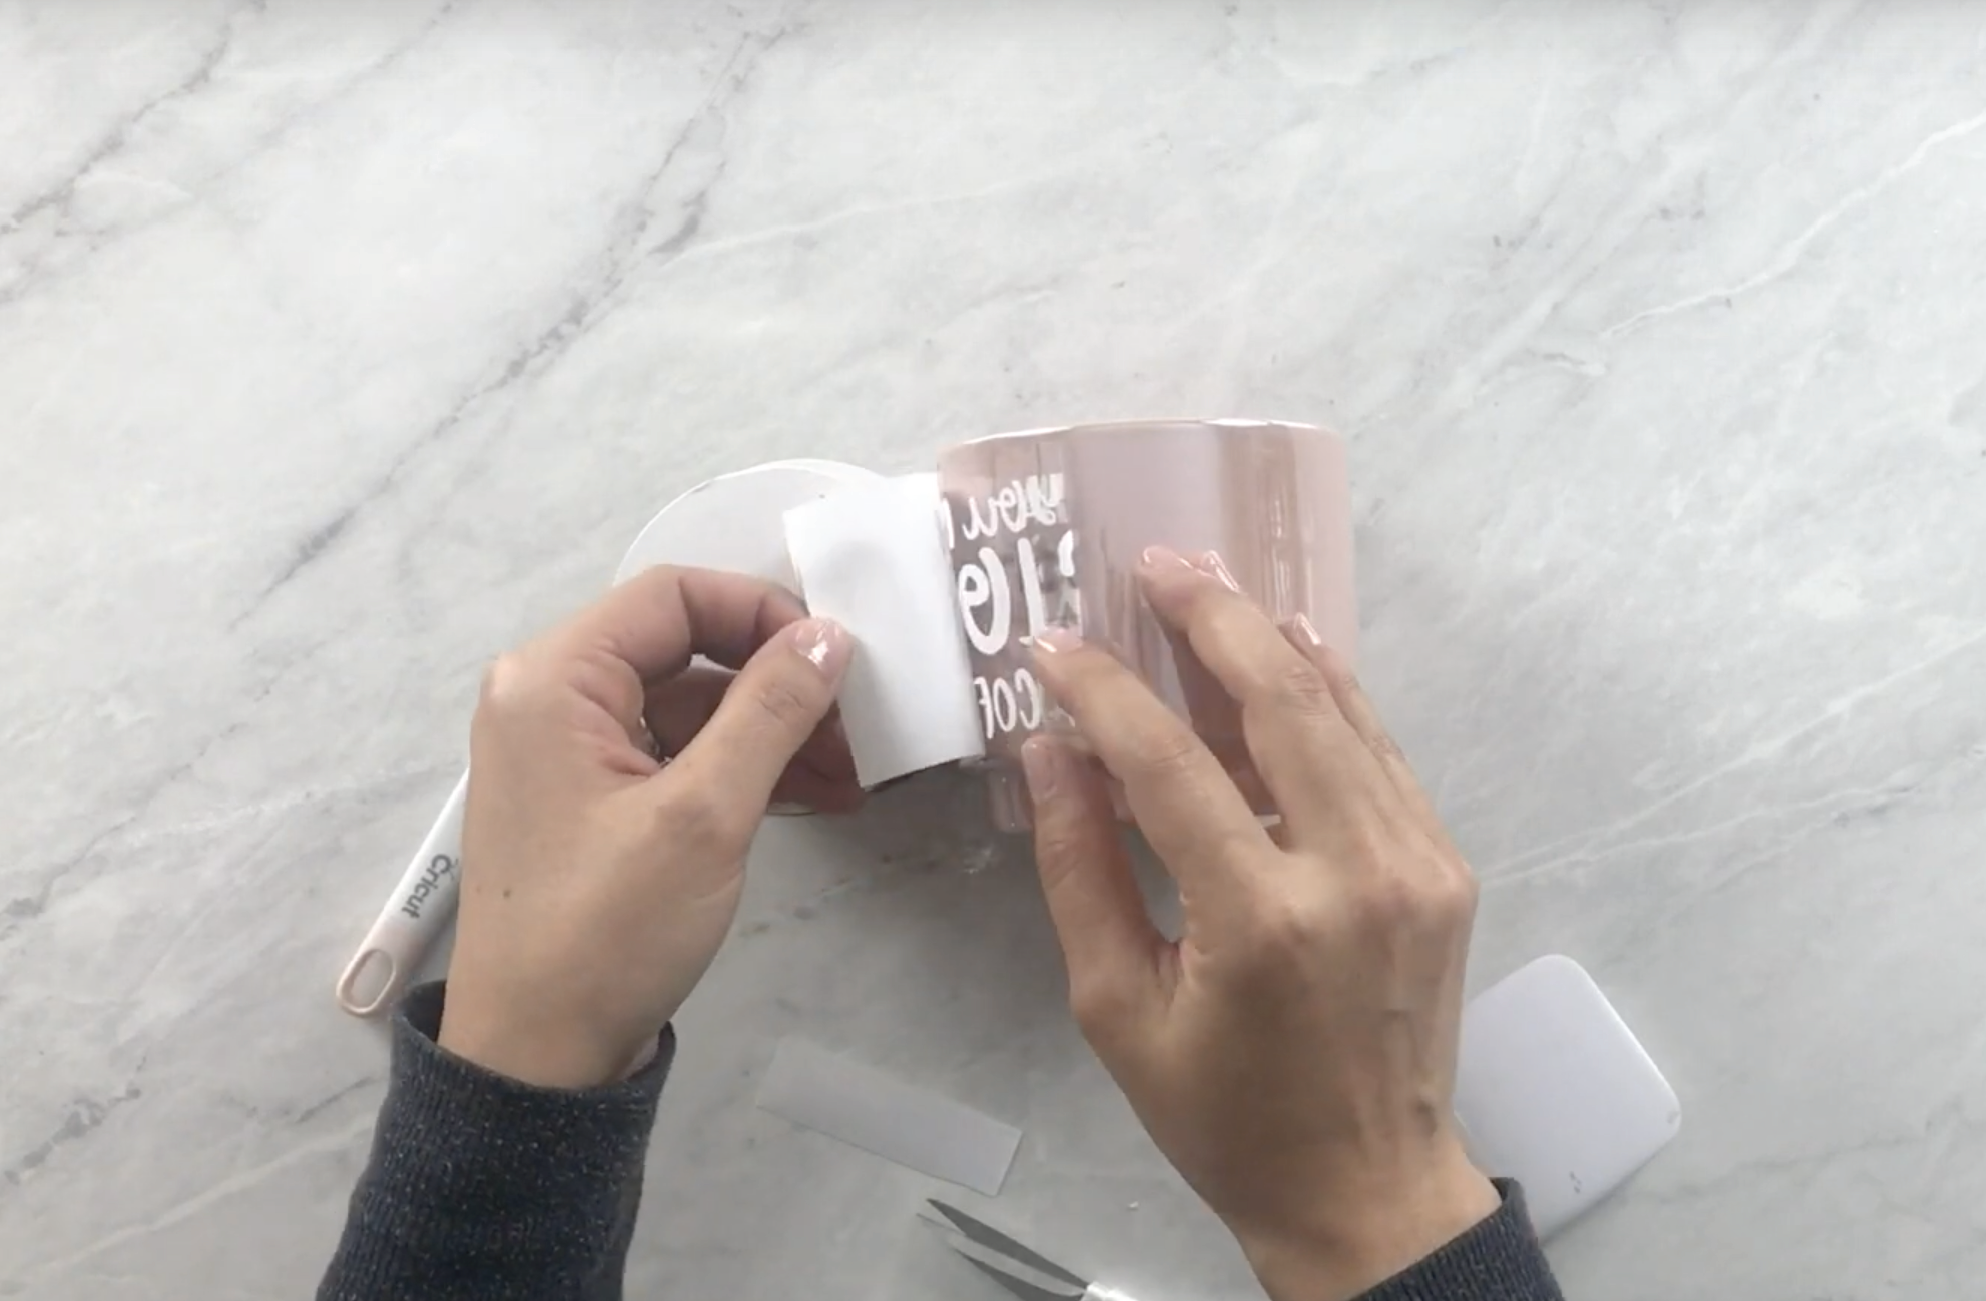
Slowly apply your vinyl and transfer tape

Starting from the middle of your image, apply the design. I slowly work my finger from the middle outward ensuring all my vinyl is smooth and free of any bubbles.   

Remove the hinge (tape)

Now the your design is half way secured, you can remove your hinge (tape).   

Peel back the other side of the design

Now we will repeat this process on the other side. Peel back the opposite side and then remove the liner from the transfer tape.

Working from the middle, apply the design

Once again, starting from the middle of your image, apply the design smoothing out the bubbles as you go. 

Remove your transfer tape

Starting from the corner of your design, peel away the transfer tape. I find that peeling away the tape at a 45° angle works best. If the vinyl sticks to the transfer tape, simply burnish the vinyl with a scraper or your finger onto the surface again. Then peel away the transfer tape. 

Care Instructions

Please allow your vinyl to cure for 48 hours before washing your project or exposing it to any other elements. Cricut recommends only hand washing your projects made with Premium Permanent Vinyl. I personally have put my mugs in the dishwasher on the top rack without any peeling or melting! All dishwashers are different, so Cricut can’t guarantee that the vinyl will hold up. 

Additional Resources

lf you want to see the entire tutorial, check it out below! 

Artwork on Mug

Looking for the design used on this project, check out this video! It is a design from Silhouette America’s Design Store that you can purchase here. If you are unfamiliar with how to use images from the Design Store with your Cricut, the video tutorial will walk you through that process. You’ll love all of the designs!

Ready to try it out?

Here are the links to the products used in this tutorial!

Looking for a discount code to use on Cricut’s shop? Since my code changes each quarter, make sure you join my Facebook Group to get the most up to date code! The code will save you 10% and give you free shipping on orders over $50! Not on Facebook? No problem, send me an email to Karley@karleyhall.com or leave a comment below!

Have Questions or want to connect!?

Happy Crafting,

Karley

Hello

I’m Karley

Welcome to my blog! A place where I can share my love for all things crafting with you! If you are obsessed with your Cricut… I’m sorry to inform you that your obsession will only get worse while you’re here! I will teach you everything you need to know to get up and crafting with your Cricut. I am here to help! To reach me, use any of the social links below! 

Have specific Cricut questions?  Join Our Facebook Group!