DIY Alphabet, Numbers, and Shapes Reusable Tracing Board: Free SVG Included

DIY Alphabet, Numbers, and Shapes Reusable Tracing Board: Free SVG Included

This post and the photos within it may contain Amazon or other affiliate links. If you purchase something through the link, I may receive a small commission at no extra charge to you.

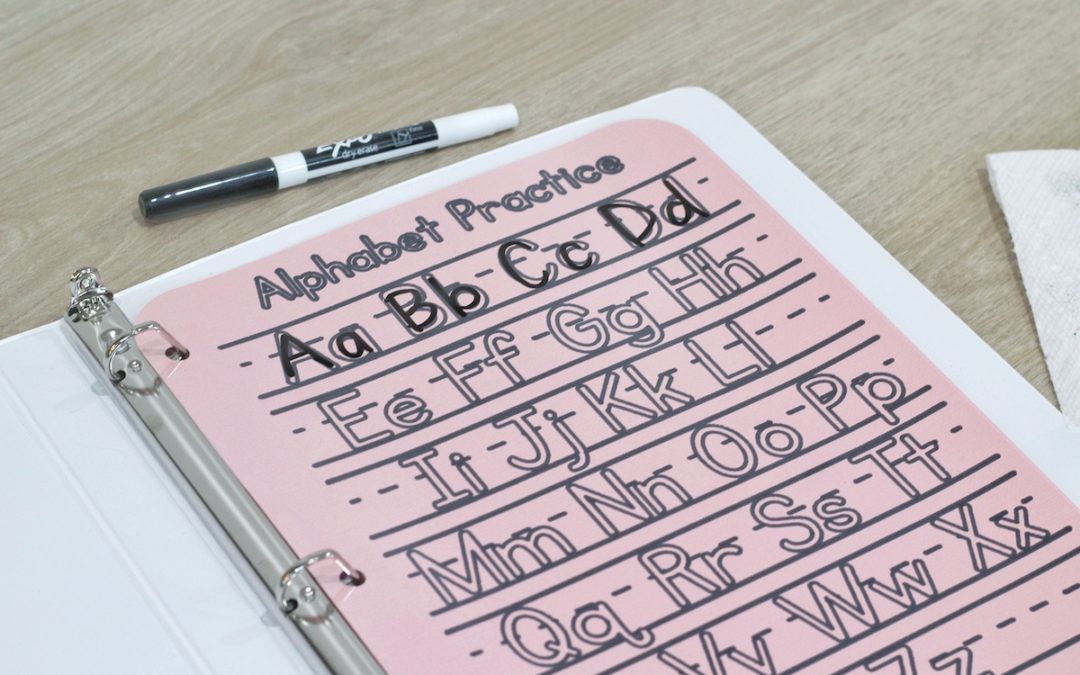
When I heard the news that Utah schools would be closed until at least May 1st, my heart sank a little! Don’t get me wrong! My friends are crushing the whole work from home, home-schooling, and surviving a global pandemic thing! Honestly, I don’t know how they are doing it… but my heart sank for the kids! Because honestly, I was the type of kid that LOVED going to school. Type A, over-achiever type. Assignments and good grades made me so excited. So even though I don’t have kids of my own just yet, I wanted to create something that I would have loved as a kid. I know times have changed and you can probably download an app to practice your penmanship… but something about this activity makes me so happy. It’s super easy to create and hopefully will keep your kids busy for a few minutes!

Here’s what we need to get this craft party started:

In this tutorial, I am going to share how to make this project using your Cricut machine, but at the end, I will also show you some other ways you can create this project without using any cutting machine. If you want to skip the written tutorial, check out the video below.  

Looking for the SVG mentioned in the video?

If you are looking for the SVG used in the tutorial– here it is! Simply agree to the “Terms & Conditions” and subscribe to my email list to download! Your support means the world to me!

Alphabet, Numbers & Shapes Tracing Activity
TERMS AND CONDITIONS
By entering your email you will be subscribed to Karley Hall's email list and can INSTANTLY download this file. Your email will only be subscribed once and you may unsubscribe at any time. Image rights: For personal use only! You can create projects using this image for any individual, organization, or event so long as it is not with the intent of resale or other commercial purposes. Under no circumstances are you permitted to resell, give-away, or otherwise distribute any actual files associated with digital designs offered on KarleyHall.com Privacy Policy: We hate spam and promise to keep your email address safe. For questions, email karley@karleyhall.com

After you download the SVG, upload it to Cricut’s Design Space. If you need help with that, I have a few YouTube videos to help you out. If you are using an iOS device like an iPad or and iPhone, check out this video. Or if you are using a laptop/ computer check out this video

Adjust the Layers in Cricut’s Design Space

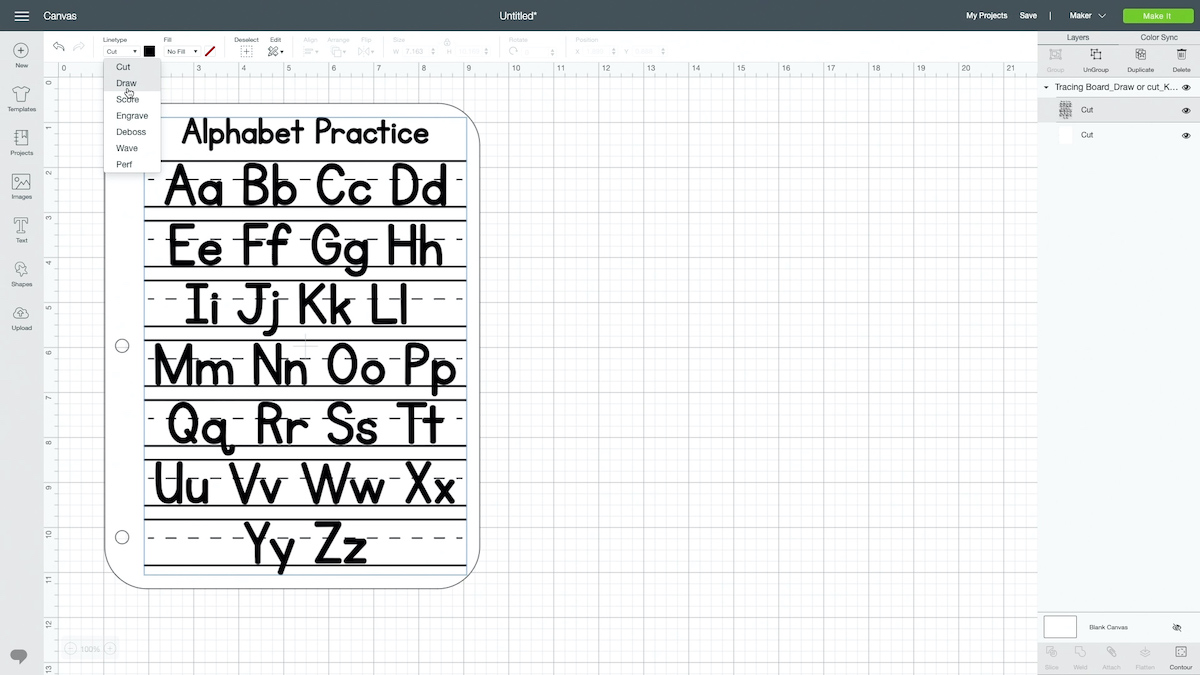
Once you have successfully uploaded the file into Design Space, we need to adjust the different layers. By default when you bring a file into Design Space, Cricut assumes you want to cut everything, but we know that we want to draw the alphabet and then cut the cardstock. So we need to tell our Cricut to do just that. 

Begin by ungrouping the shapes. Select everything and then choose ungroup.

Once everything is ungrouped, choose the alphabet layer. With it selected, choose the “linetype” up at the top and then choose “Draw.” If this sounds like a foreign language, click on the image below and it’ll take you to this part in the full video tutorial. 

Duplicate the Background & Attach the Draw Layer

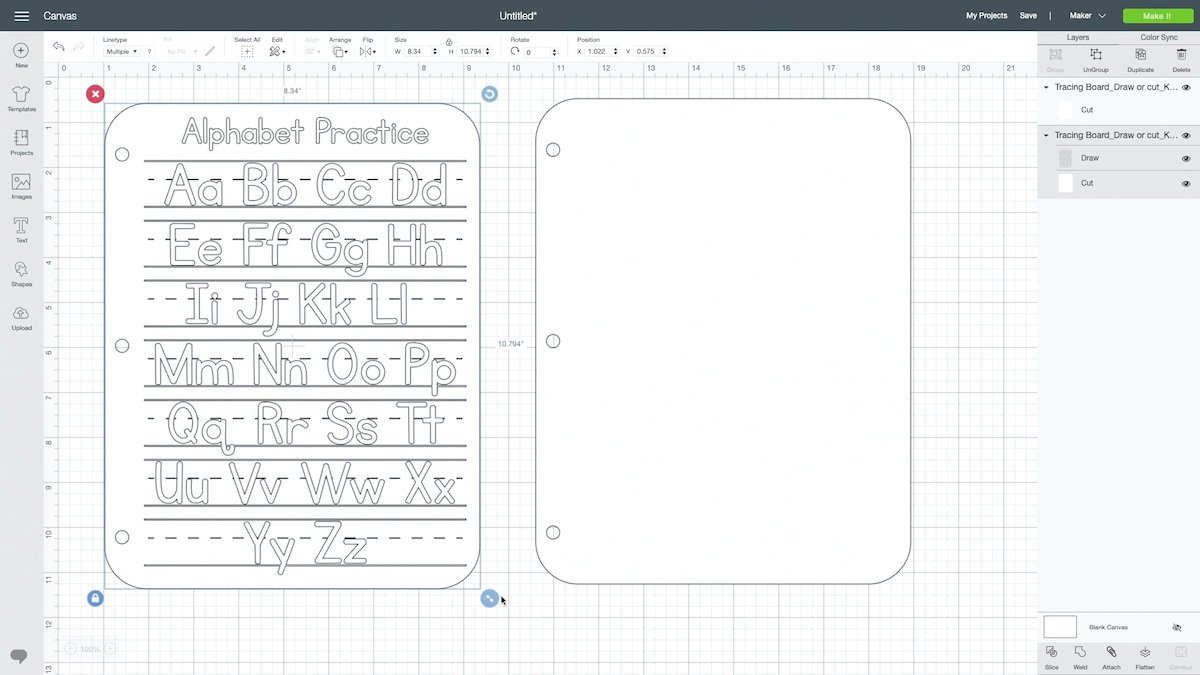
After you have adjusted your linetype, we will need to make a copy of the background. We will draw and cut on the cardstock, but the additional shape will be used to cut our transparency film. Select just the background shape and then choose duplicate. Move that layer off to the side. 

Next, we need to attach our draw layer to one of the background layers. Attaching the draw layer to the background basically means that we are paper clipping them together. If we didn’t do this, the drawing layer would end up on a different mat than the cut layer. Attaching them ensures that the draw and cut actions will be performed together. It sounds more confusing than it is. To get a better understanding of the action, you can check out the video

Click “Make It” and set your material to cardstock!

Load Your Materials, Tools, and Pen in the Machine

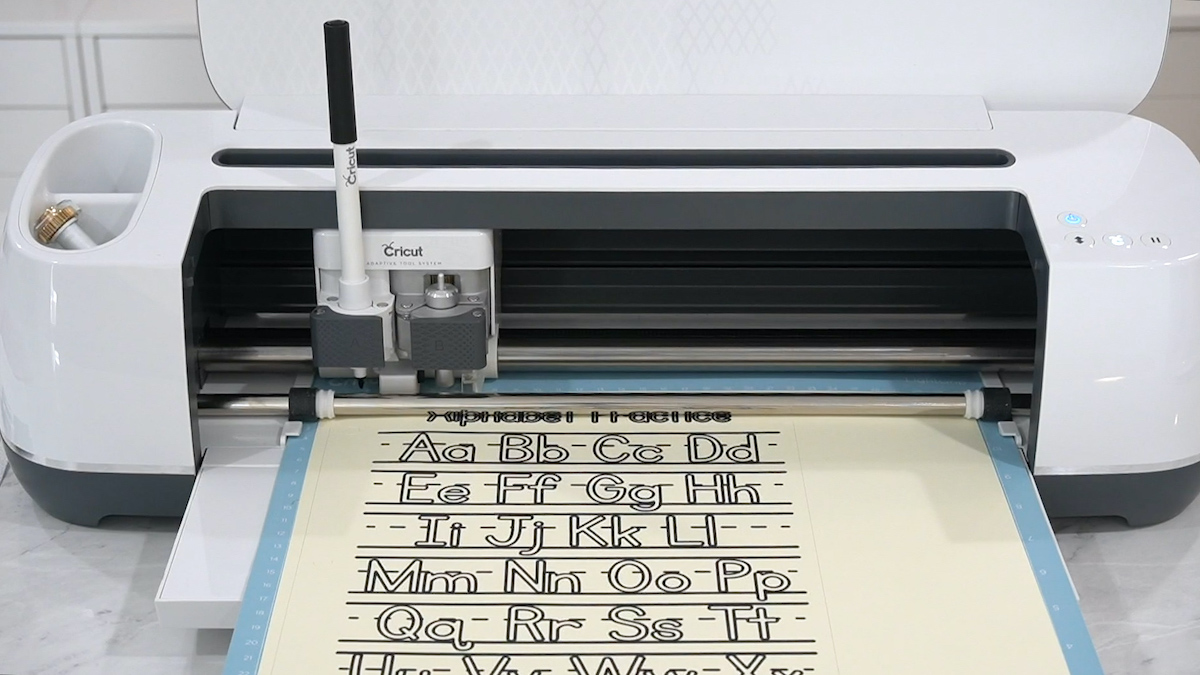
Load your pen into the machine ensuring that the arrow is no longer visible.

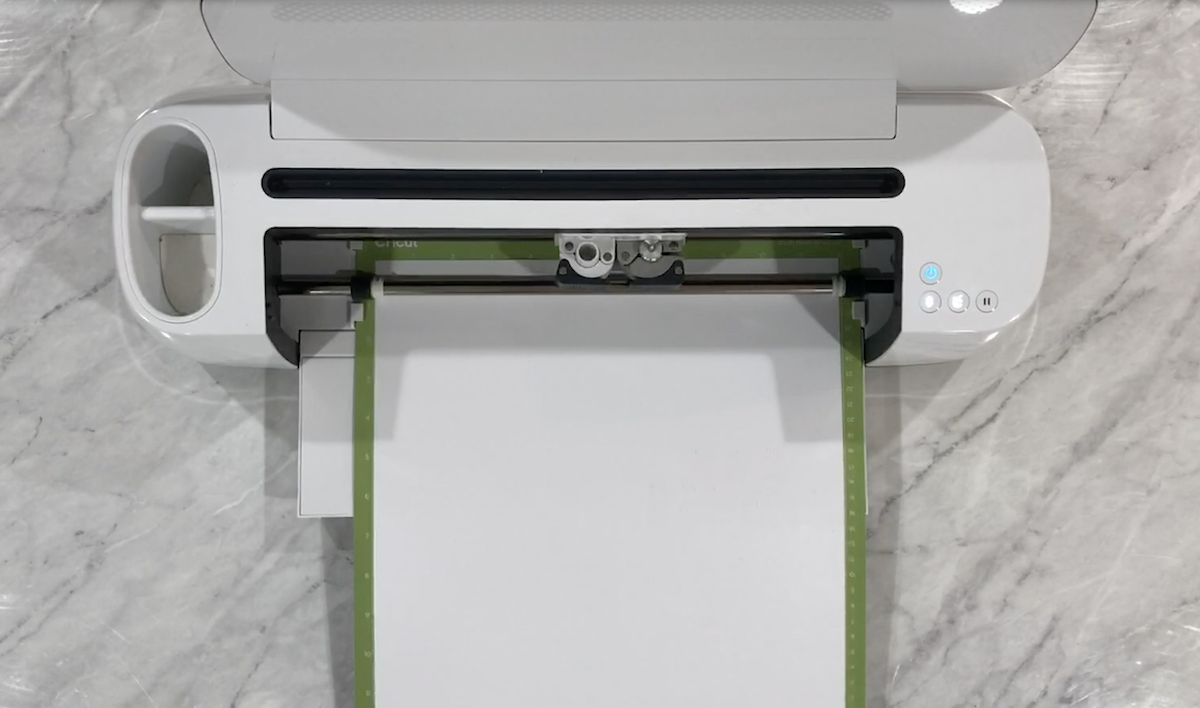
Using a StandardGrip (green) or LightGrip (blue) mat, load your cardstock onto the mat. Then load that into the machine.

Click the flashing “C” button and your machine will draw and cut your design!

Once your cardstock is done cutting, unload your machine and mat. Navigate back over to Design Space and change your material to “transparency” and then load the film onto your cutting mat and load that into the machine to be cut. 
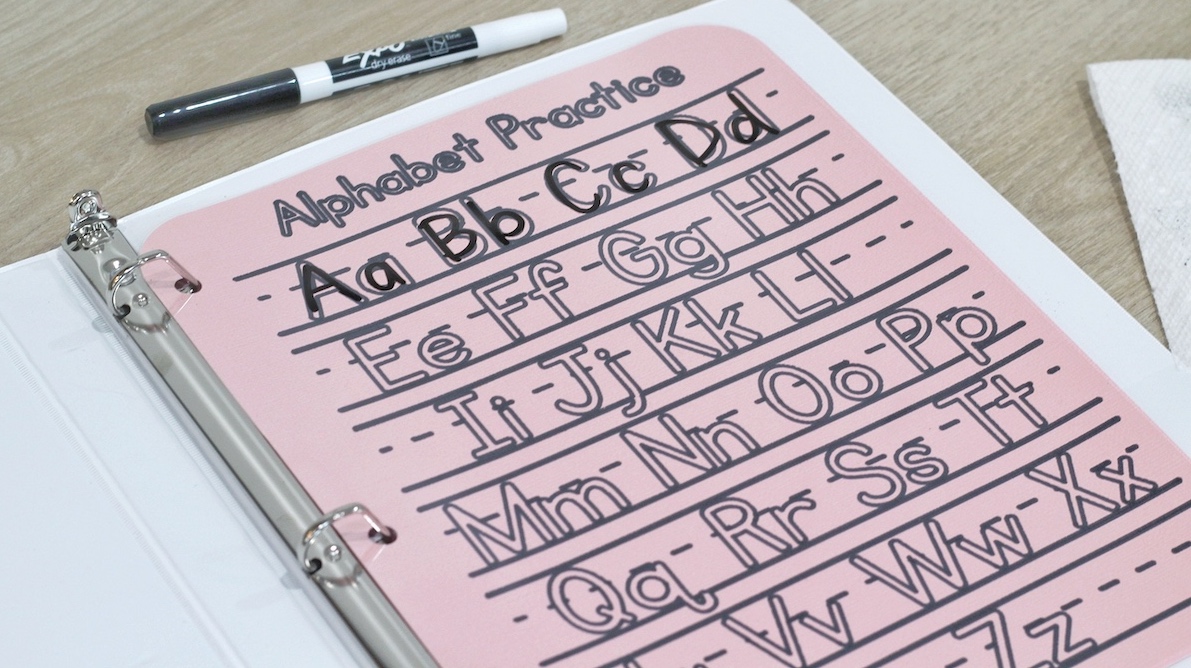
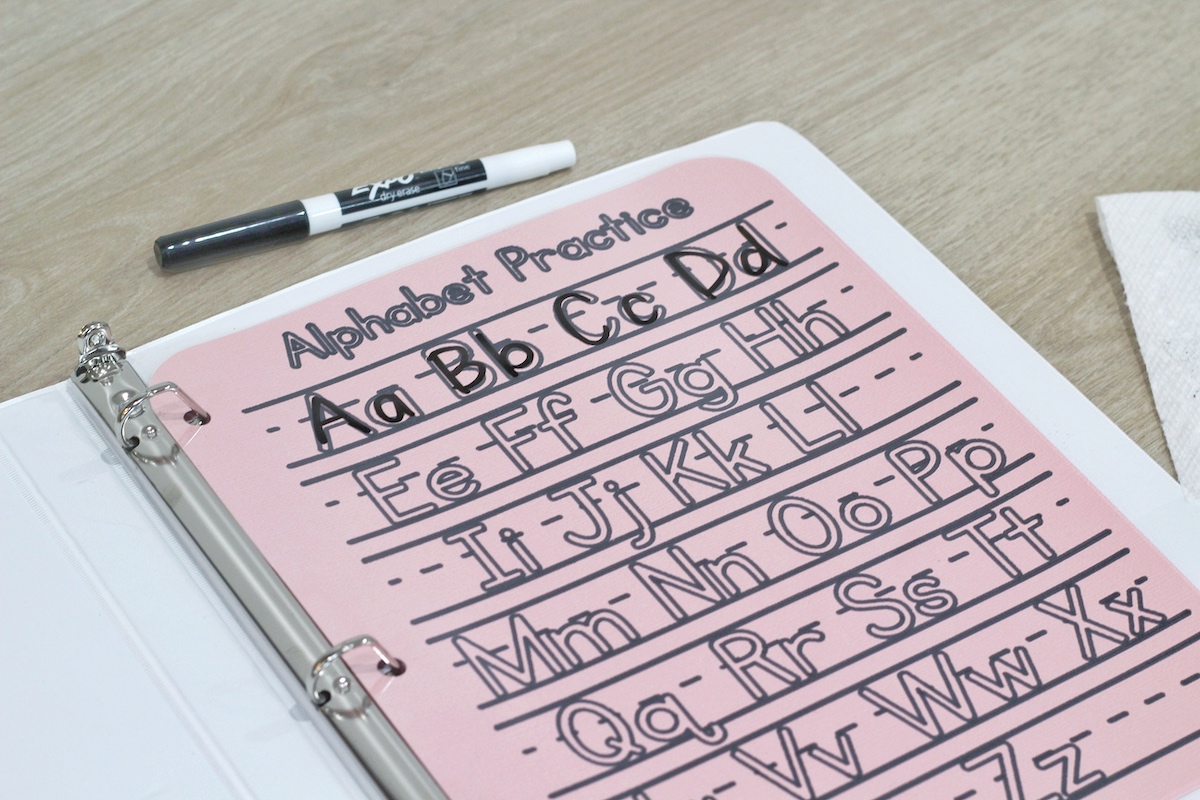
Layer your transparency film over the cardstock and clip it into a 3-ring binder. Now you are set for some tracing practice! If you don’t have a cutting machine, don’t worry, you can use the free files above with just a home printer! 

Other ways to use the free files!
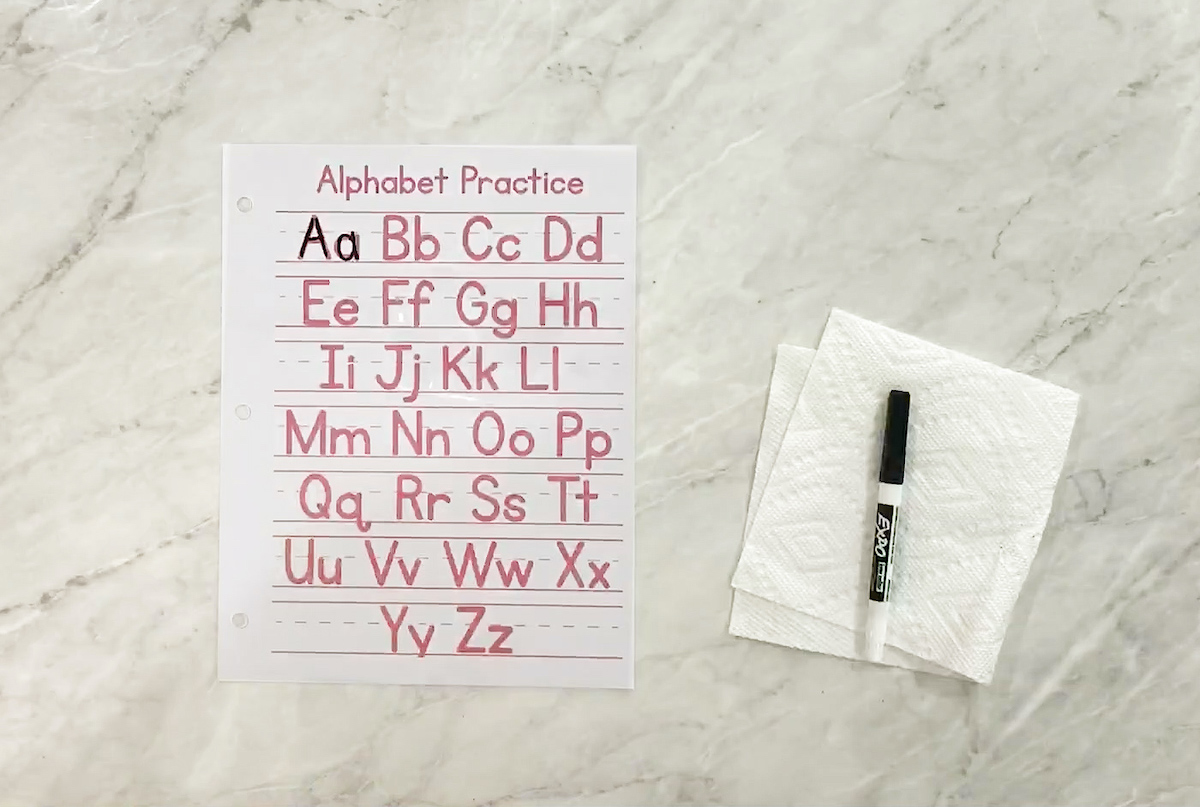
Print the PDF version on printer paper and place a transparency film on top of it. Hole punch them both and you are good to go! If you don’t have a transparency film, you can use any clear plastic on top! Some ideas include laminating the sheet, using packing tape on top, clear contact paper, a clear plastic bag… you get the idea!
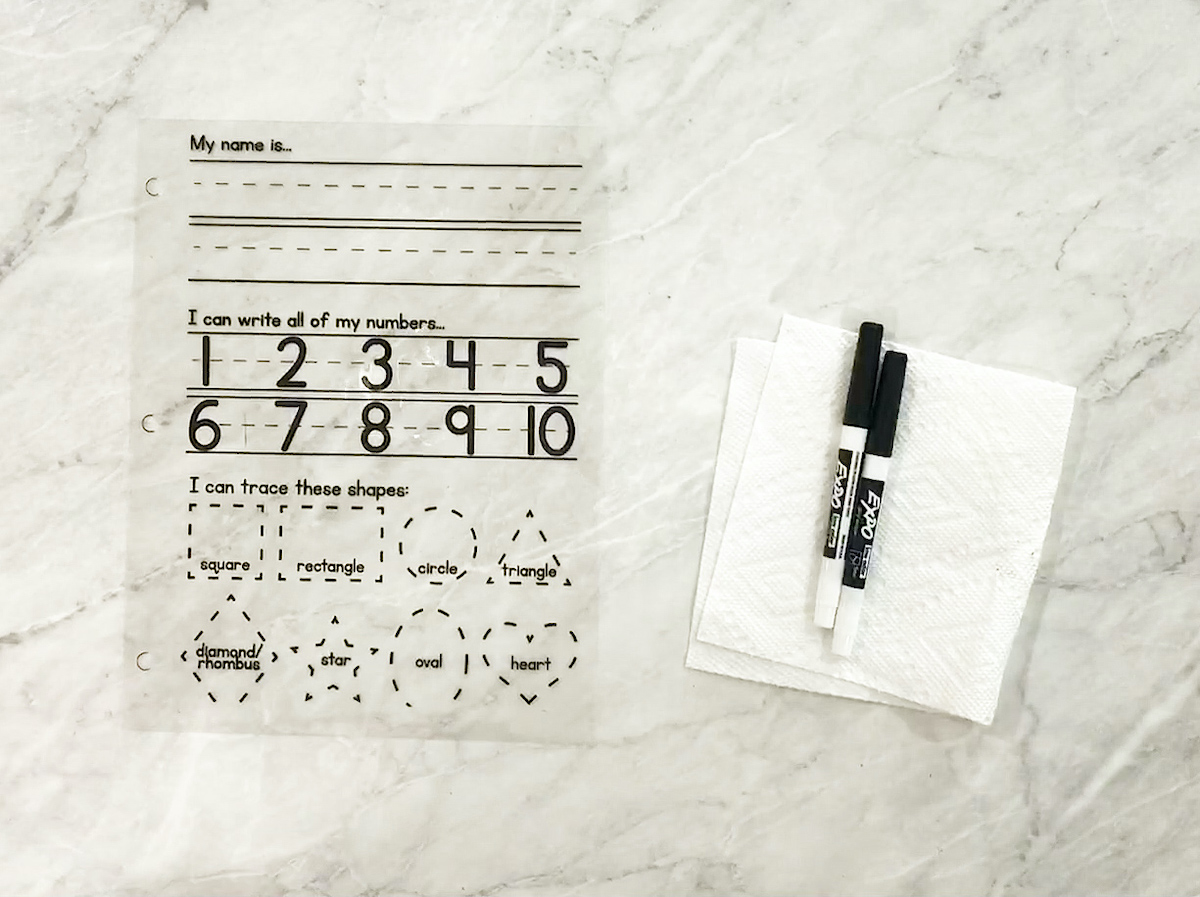
If you have a transparency film, you can also print directly onto it! I’d recommend mirroring your text so that it prints on the underside of the film. That way when you draw on top it is nice and smooth! 

And lastly if you have a Glowforge, you cut and engrave this on 1/8″ Clear Acrylic. I included a Glowforge file in the files above. Make sure that you mirror the image so that the engraving is on the underside of the acrylic. For the settings, I would recommend the Proofgrade Medium Clear Acrylic with an SD Engrave. You can defocus your laser to smooth out the lines if you’d like! For a commercial license to sell the projects you make, check out my Etsy listing. I added felt dividers to protect the acrylic from scratching against the other acrylic pages.  

Have Questions or want to connect!?

Thanks so much for checking out this tutorial! If you have other ideas or requests for kids’ crafts, leave them in the comments below! I am happy to create more kids content so that we can get through this time together! My happiest memories as a child are when I was crafting… so maybe one day your littles will look back and remember all the extra crafts they got to do while being quarantined instead of the scary, toilet paper hoarding memories we adults will have!

Happy crafting & stay safe!

Karley


Hello

I’m Karley
Welcome to my blog! A place where I can share my love for all things crafting with you! If you are obsessed with your Cricut… I’m sorry to inform you that your obsession will only get worse while you’re here! I will teach you everything you need to know to get up and crafting with your Cricut. I am here to help! To reach me, use any of the social links below! 

Have specific Cricut questions?  Join Our Facebook Group!

How to Cut Vinyl Super Small with a Cricut Machine

How to Cut Vinyl Super Small with a Cricut Machine

This post and the photos within it may contain Amazon or other affiliate links. If you purchase something through the link, I may receive a small commission at no extra charge to you.

As a Cricut crafter, you may have attempted to cut teeny, tiny letters and then given up because it is just too frustrating. I have been there too. I will share some of my favorite tips to cut, weed, and transfer your vinyl… you will need patience, but you can do it!

Here’s what we need to get this craft party started:

If at any point during this tutorial you get lost or confused, click the image and it’ll take you to that exact moment in a full how-to video tutorial. The video will show you everything you need to know about cutting vinyl super teeny, tiny!

Just want to check out the video? Watch it below!  


Cutting Your StarCraft HD Vinyl 

I had been hearing about this StarCraft HD vinyl all over the internet and was so excited to try it out so I could give you an honest review. I feel like all too often people blindly stand behind products without ever trying them. Well, rest assured, I need to do my due diligence before drawing any conclusions or making any claims. I did my research and right off the bat I was pretty impressed. StarCraft HD Vinyl is made in America and the company states that it is rated up to 5-6 years durability. HD stands for High Durability and is available in both matte and gloss finishes. 

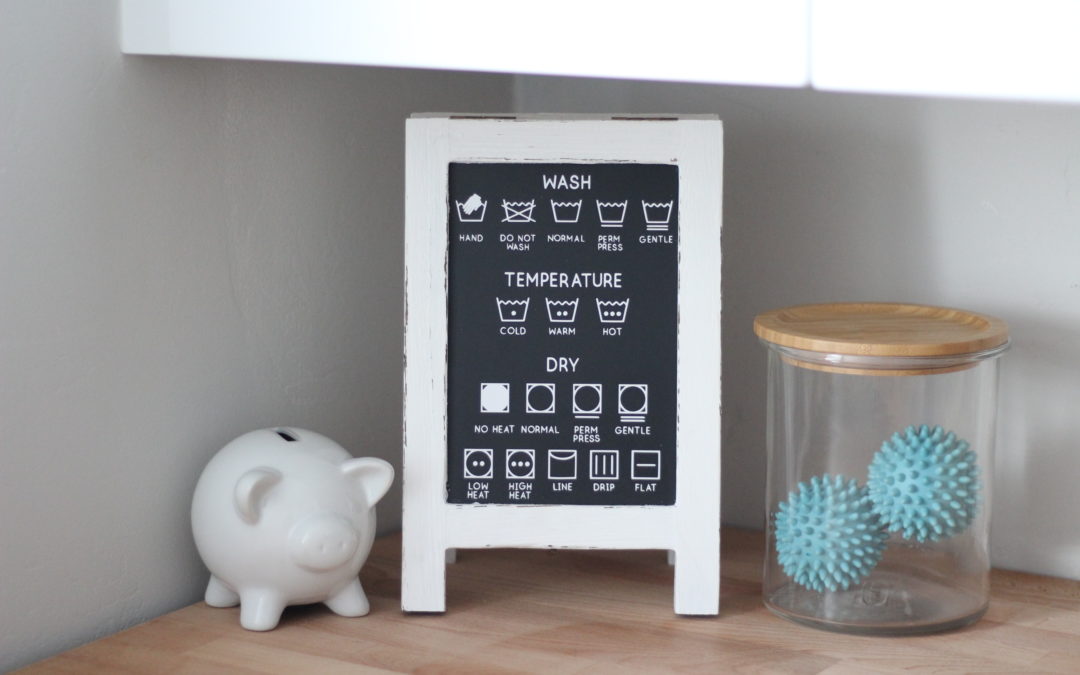
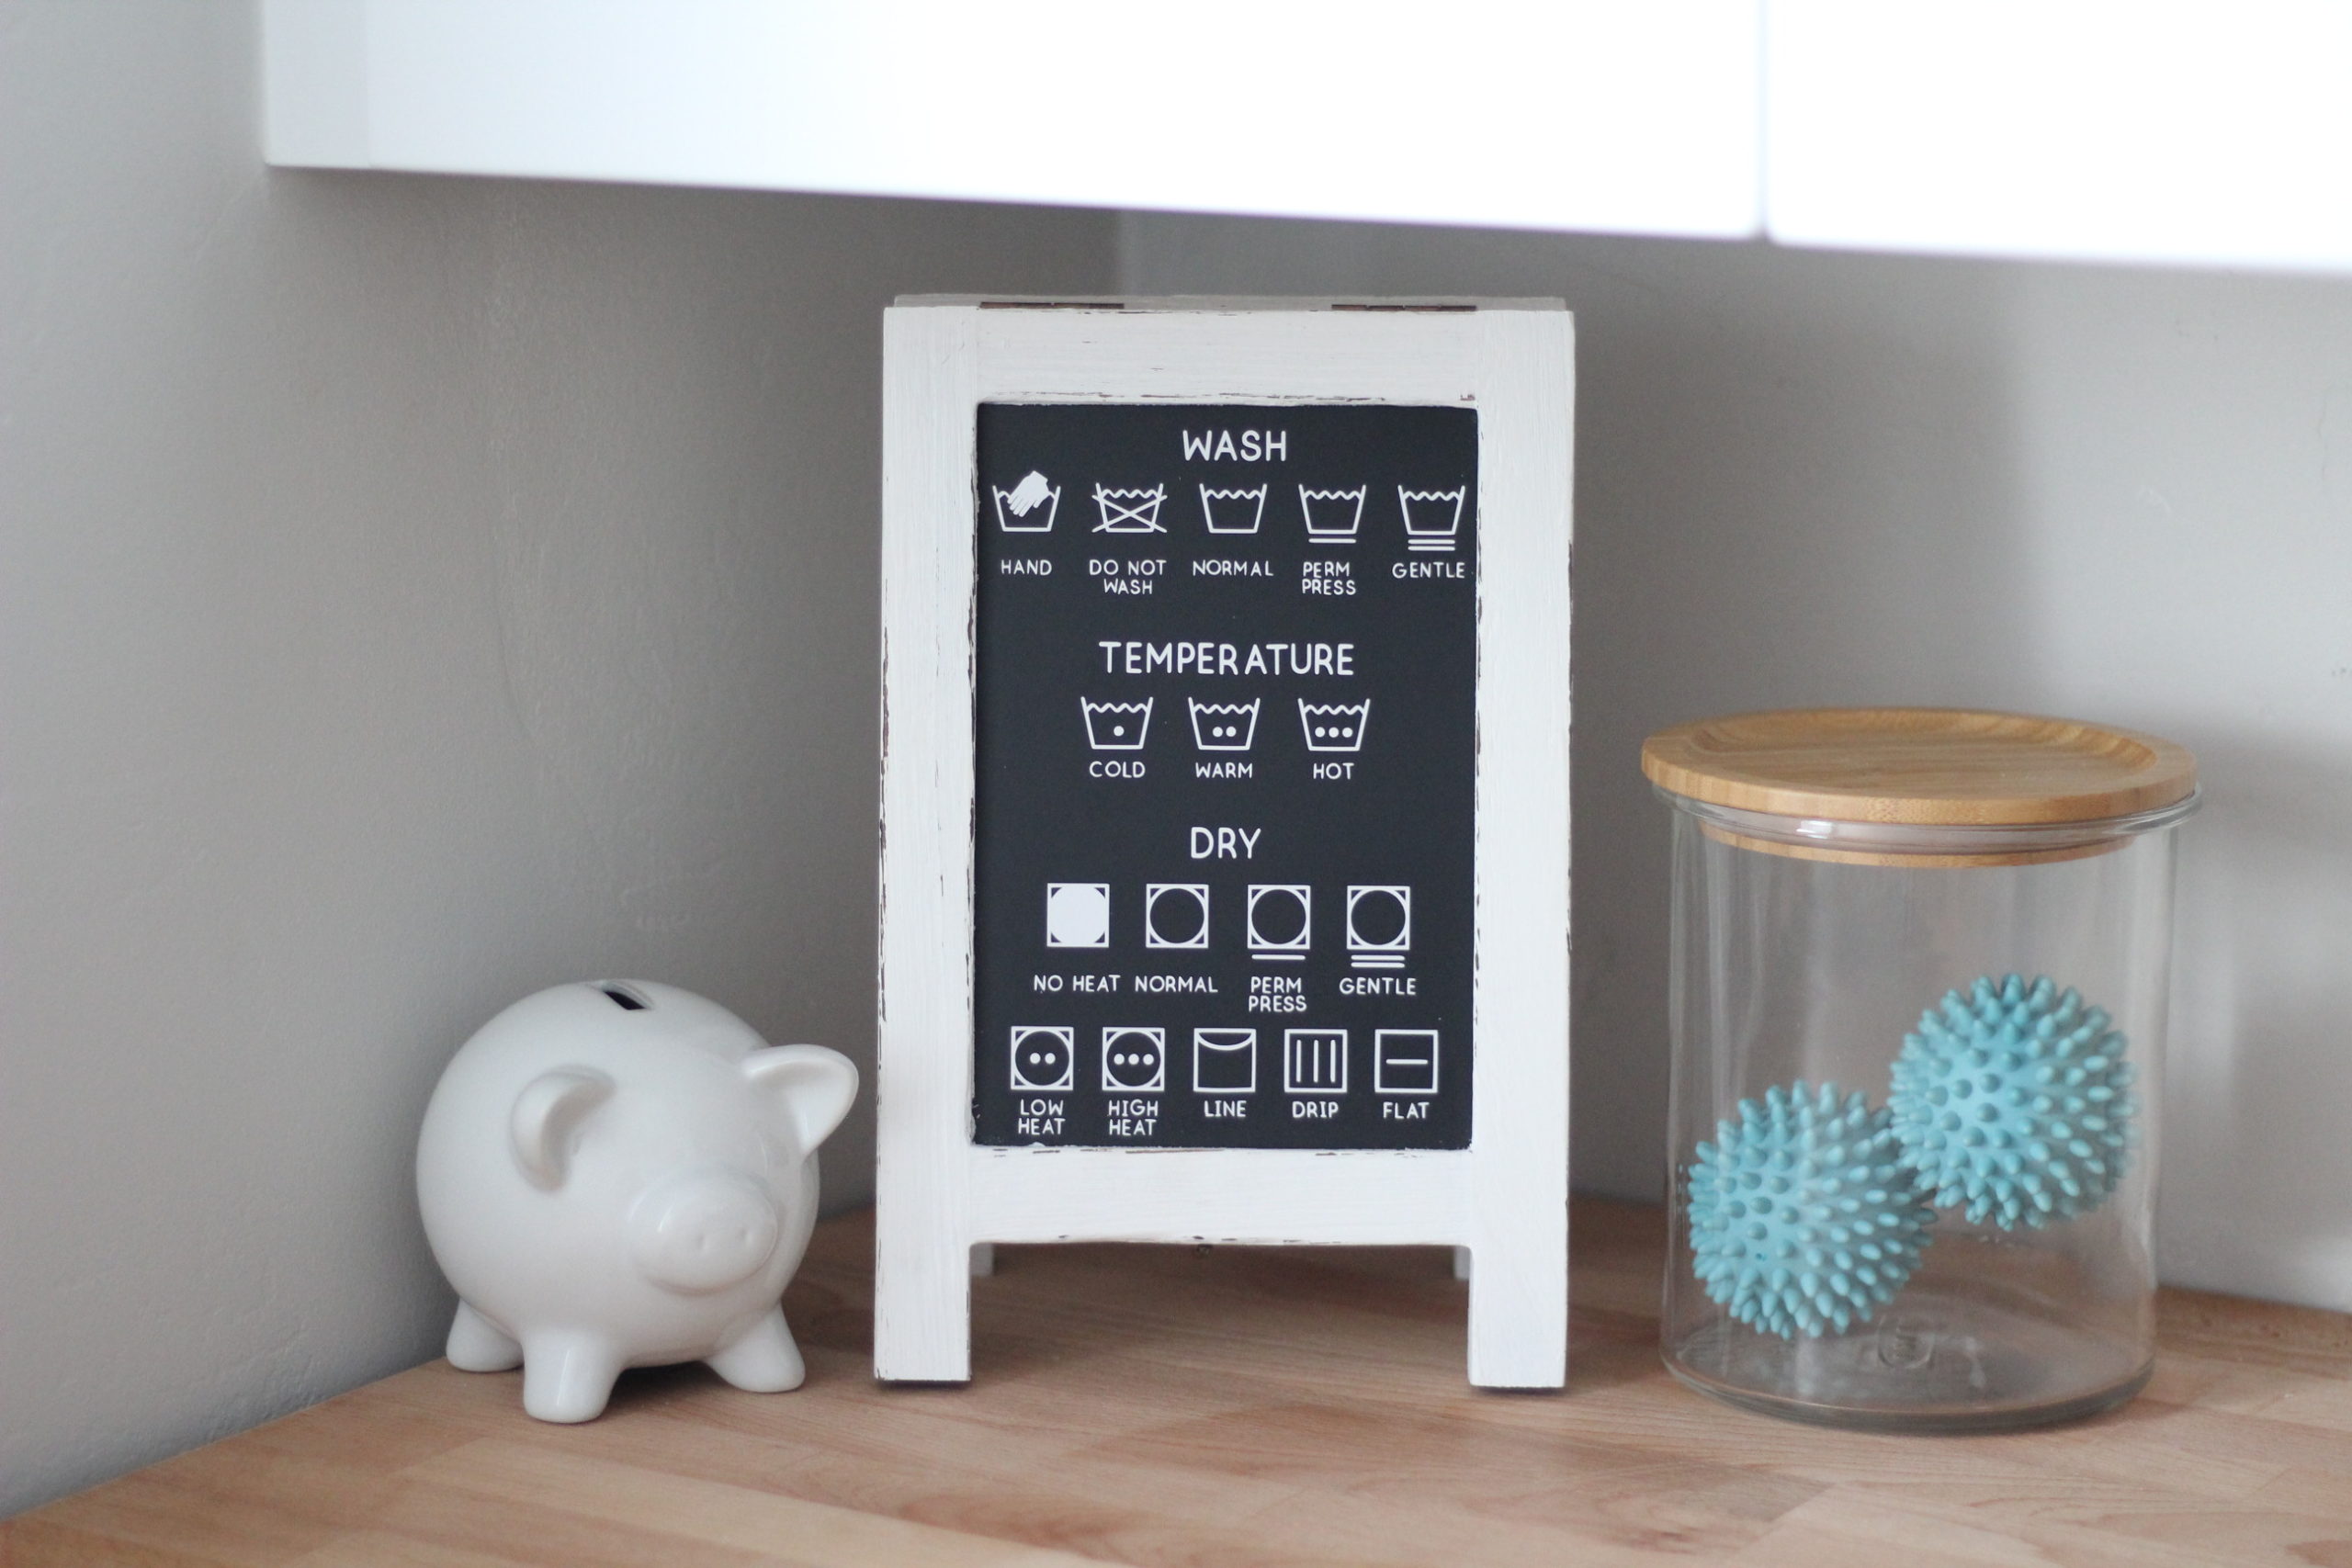
When it arrived, I already had a project in my mind that I knew would put it to the test. I have a small little chalkboard in my laundry room that desperately needed some vinyl icons. I wasn’t sure if the Cricut would even be able to cut as small as I wanted. I pulled up the recommended settings for the HD vinyl and did a small test cut! I was surprised with the results and went ahead and cut the entire design using the recommendations provided by 651Vinyl.   

If you are new to Cricut or new to vinyl, check out this blog post to learn more about working with vinyl!

How to Weed Your Intricate Cuts 

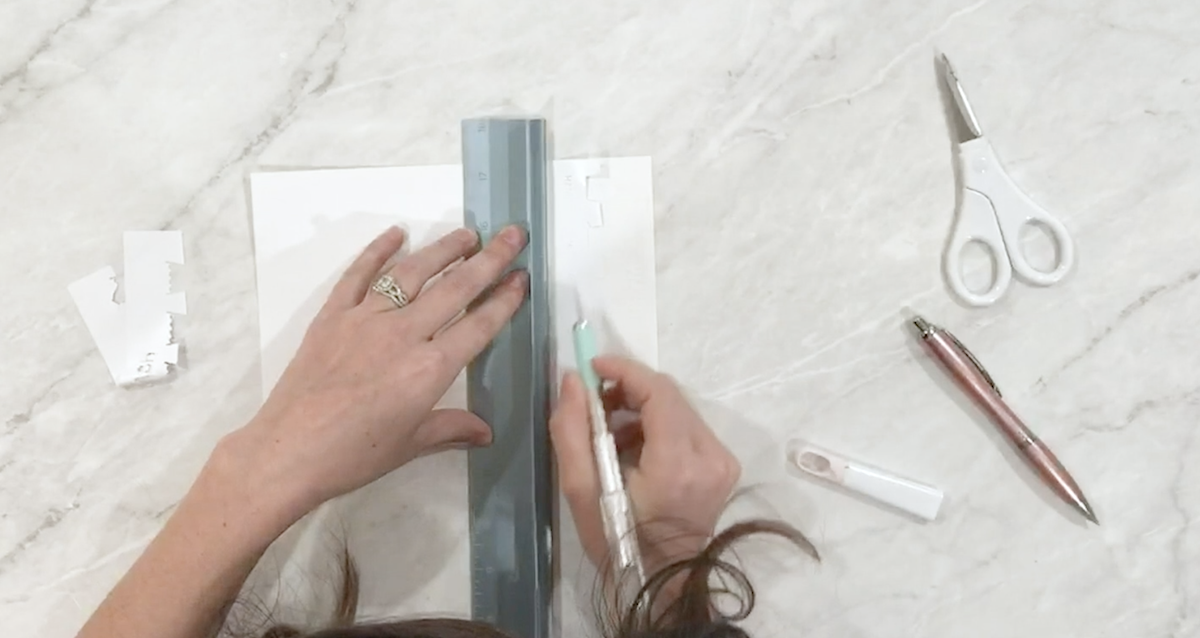
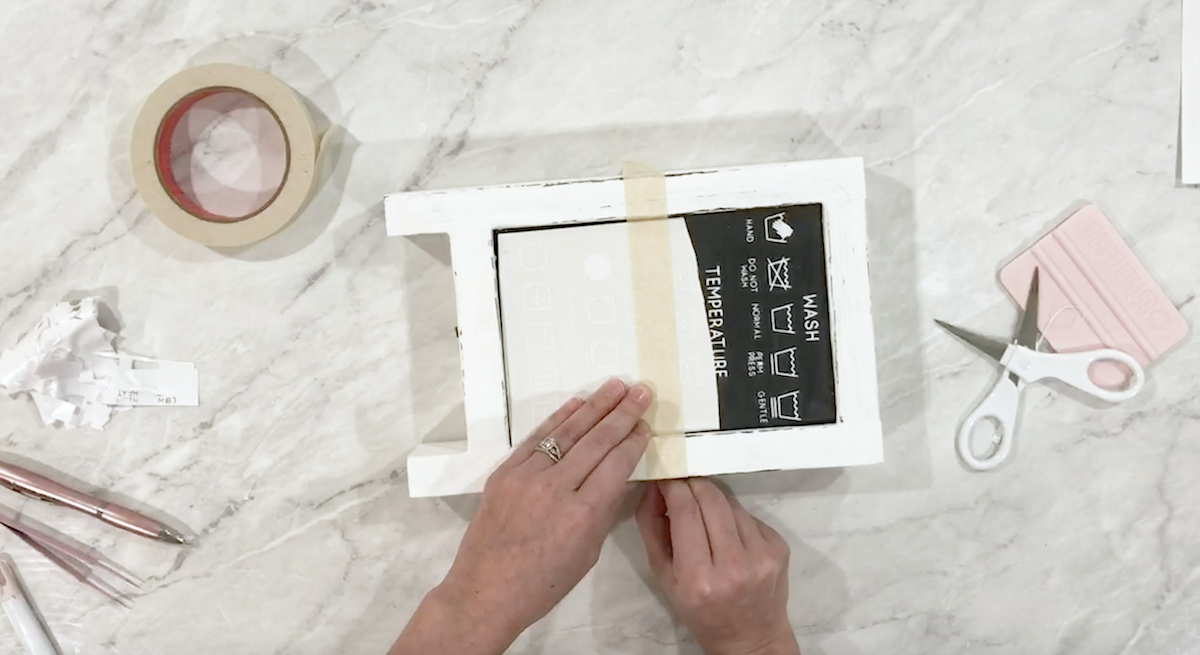
Once your design is finished cutting, trim it down, and weed it. I found adding some weeding lines really helps! Hindsight, I probably should have added those to the cut file so that my Cricut could have cut them perfectly straight. In the file below, I added an option with weeding lines for you. Since I didn’t add mine to the file, I used a ruler and a knife to cut through the vinyl to make weeding a little easier.     

With the added cut lines, it makes the vinyl more manageable to weed. The worst part about weeding vinyl is that it has a tendency to stick to itself. Weeding in smaller portions helps reduce the risk of unwanted sticking. Make sure to go super slowly and keep a close eye on all of the small letters. In the video, I mention that I cut this a lot smaller than Cricut would recommend cutting… but if you know me… you know I like testing the limits. I was very impressed to see how well the Cricut cut the StarCraft vinyl, but you do have to weed it super slowly so that your tiny letters don’t shift.  

Transfer Using the Hinge Method

I am going to say this until I am blue in the face– use the hinge method to transfer your vinyl!!! Don’t know about the hinge method? Here is a blog post that will show you all about it! 

Since this was my first time using the 651Vinyl Transfer Tape, I wish I would have checked to see if the little letters transferred before starting the hinge method. So do what I say and not as I do! Cover your entire image with transfer tape and after you burnish your transfer tape over your design, peel off the entire piece of tape to make sure all of the letters transfer and then place it back on the liner! I had to fight the vinyl a little bit to get it to adhere to the tape. Next time I will get it off the liner first, then lightly place it back down on the liner, and then line it up for the hinge method. Hopefully that makes sense, but if not, leave me a comment below and I will get you the help you need! 

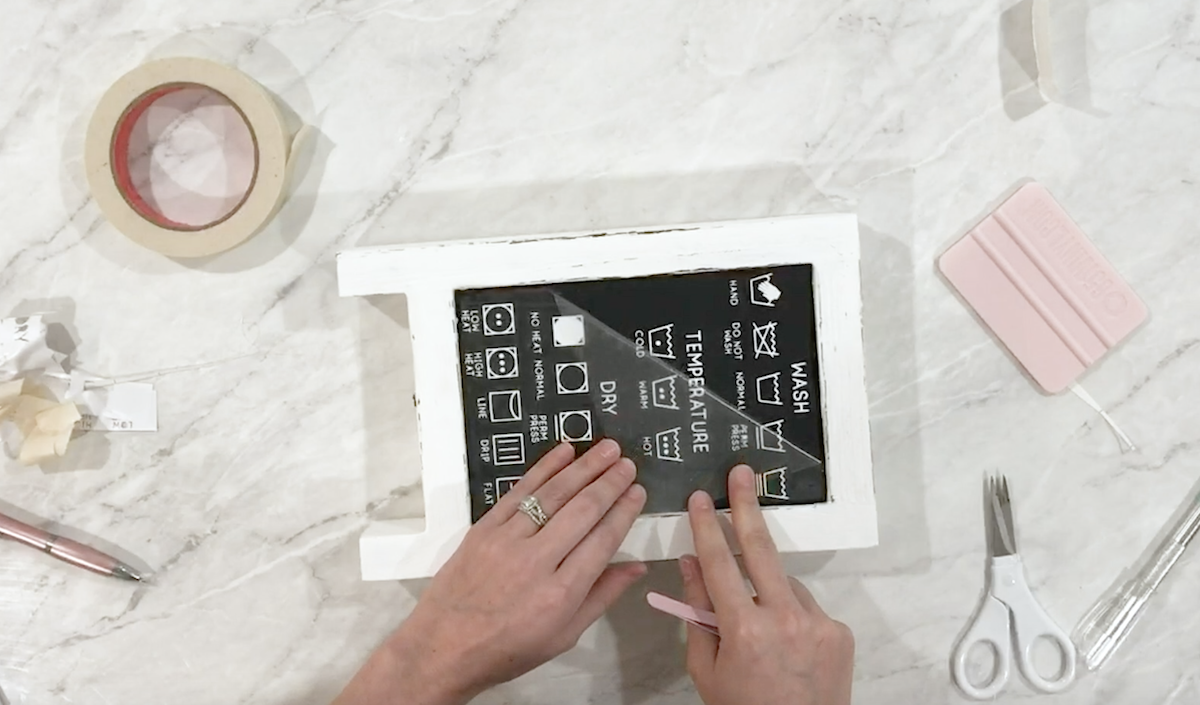
Peel off the transfer tape 

I made this its own step because I was so impressed with how easily the transfer tape released from the vinyl and chalkboard! I only had to use my tweezers to push down two or three little areas. The tape wasn’t too sticky and left absolutely no residue on my project. I think it helped that the vinyl has a permanent adhesive so when it came in contact with my chalkboard, it held tight! Clearly I am impressed so far with this StarCraft HD Vinyl

This vinyl does have a curing period for about 24- 72 hours. So make sure that you don’t expose it to the elements for those first few days if you want it to hold up!

Looking for the SVG mentioned in the video?

If you are looking for the SVG used in the tutorial– here it is! Simply agree to the “Terms & Conditions” and subscribe to my email list to download! Your support means the world to me!

Laundry Room Icons
TERMS AND CONDITIONS
By entering your email you will be subscribed to Karley Hall's email list and can INSTANTLY download this file. Your email will only be subscribed once and you may unsubscribe at any time. Image rights: For personal use only! You can create projects using this image for any individual, organization, or event so long as it is not with the intent of resale or other commercial purposes. Under no circumstances are you permitted to resell, give-away, or otherwise distribute any actual files associated with digital designs offered on KarleyHall.com Privacy Policy: We hate spam and promise to keep your email address safe. For questions, email karley@karleyhall.com
*Don’t forget to select everything and “attach” it before you cut it on your Cricut machine :)! The “attach” function will hold all of the icons and weeding lines in place.

Need help downloading the SVG and uploading it to Cricut Design Space?

Not a problem– check out the video below! And while you’re there, I’d love if you subscribe to my channel!

Are you excited to get started?! Here is the list of supplies to get your teeny, tiny vinyl project underway! 

 Here’s what we need to get this craft party started:

Have Questions or want to connect!?

Happy Crafting,

Karley
Hello

I’m Karley
Welcome to my blog! A place where I can share my love for all things crafting with you! If you are obsessed with your Cricut… I’m sorry to inform you that your obsession will only get worse while you’re here! I will teach you everything you need to know to get up and crafting with your Cricut. I am here to help! To reach me, use any of the social links below! 

Have specific Cricut questions?  Join Our Facebook Group!

Rainbow Baby Closet Dividers

Rainbow Baby Closet Dividers

This post and the photos within it may contain Amazon or other affiliate links. If you purchase something through the link, I may receive a small commission at no extra charge to you.

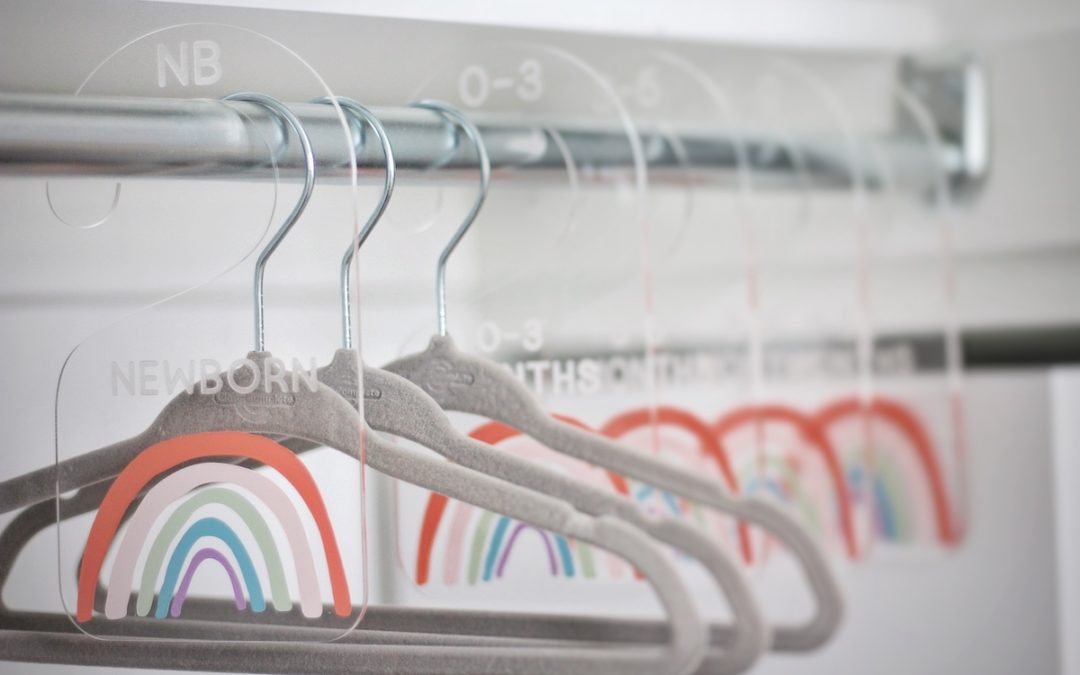
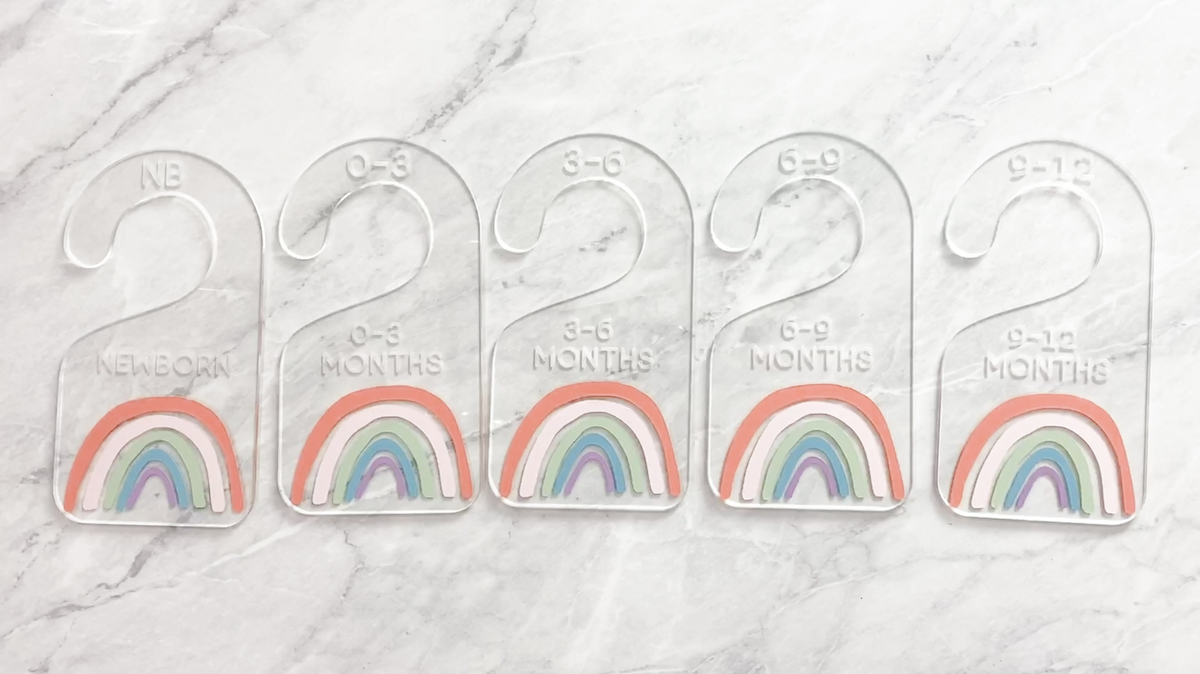
One of my best friends is having her first baby and I am so incredibly excited for her! I took a look at her registry and saw she was registered for baby hangers. First of all, as someone who does not have babies yet, baby hangers are the cutest! I added those to my shopping cart and then quickly began brainstorming what I could make to go alongside the gift! In a few minutes, I had this idea sketched up and could not be happier with how they turned out. She is doing a rainbow-themed nursery and I think these will go perfectly with the decor.

Here’s what we need to get this craft party started:

If at any point during this tutorial you get lost or confused, click the image and it’ll take you to that exact moment in a full how-to video tutorial. The video will show you how to apply the rainbow design to a clear, acrylic closet divider.

Just want to check out the video? Watch it below!  

Getting Started! 

When I came up with my rainbow design, I loved the idea of using vinyl on a clear divider, but how would I successfully apply the rainbow in the same place over and over?! I thought about having my Glowforge score the rainbow on the divider but I didn’t want the score lines to be visible from the back. Then it hit me! Print out a template and place the divider on top of it! I was so excited to try out my theory! 

For this project, I am just covering the application of the vinyl. You will need to purchase clear, acrylic closet dividers or cut and engrave your own using a Glowforge or other laser cutter. If you would like to cut your own using your laser cutter, you can access my free file below! 

Closet Divider SVG
TERMS AND CONDITIONS
By entering your email you will be subscribed to Karley Hall's email list and can INSTANTLY download this file. Your email will only be subscribed once and you may unsubscribe at any time. Image rights: For personal use only! You can create projects using this image for any individual, organization, or event so long as it is not with the intent of resale or other commercial purposes. Under no circumstances are you permitted to resell, give-away, or otherwise distribute any actual files associated with digital designs offered on KarleyHall.com Privacy Policy: We hate spam and promise to keep your email address safe. For questions, email karley@karleyhall.com
To achieve the rainbow look, please download the rainbow design and upload it to your Cricut Design Space or Silhouette Studio and cut it out using your cutting machine. If you need help uploading your image to Cricut Design Space, check out this video. Pro tip: Completely cut through your vinyl and liner so that your arches end up being stickers. This will help a ton during the application! Instead of choosing “vinyl” as your material, I would recommend using the “cardstock” setting. 

Rainbow Cut File
TERMS AND CONDITIONS
By entering your email you will be subscribed to Karley Hall's email list and can INSTANTLY download this file. Your email will only be subscribed once and you may unsubscribe at any time. Image rights: For personal use only! You can create projects using this image for any individual, organization, or event so long as it is not with the intent of resale or other commercial purposes. Under no circumstances are you permitted to resell, give-away, or otherwise distribute any actual files associated with digital designs offered on KarleyHall.com Privacy Policy: We hate spam and promise to keep your email address safe. For questions, email karley@karleyhall.com
Printing and using the template

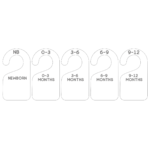
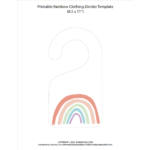
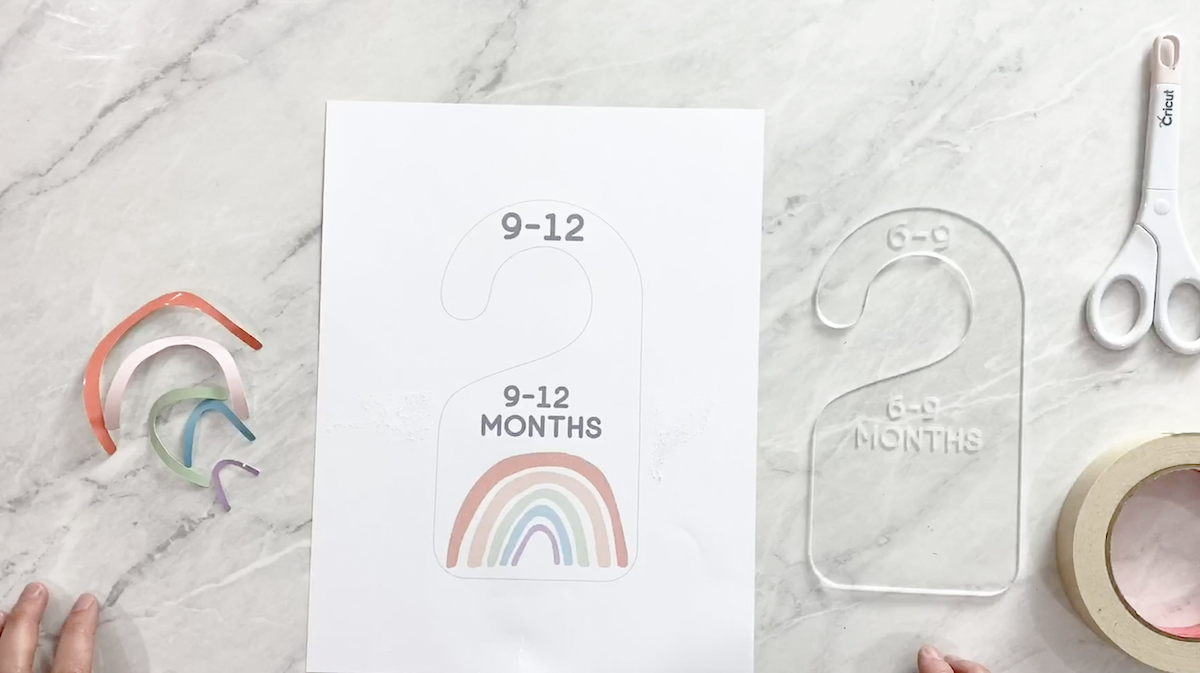
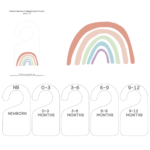
Once you have your dividers and vinyl all ready, download the template below and print it out using your home printer on an 8.5×11″ sheet of paper. 

Printable Rainbow Closet Divider Template
TERMS AND CONDITIONS
By entering your email you will be subscribed to Karley Hall's email list and can INSTANTLY download this file. Your email will only be subscribed once and you may unsubscribe at any time. Image rights: For personal use only! You can create projects using this image for any individual, organization, or event so long as it is not with the intent of resale or other commercial purposes. Under no circumstances are you permitted to resell, give-away, or otherwise distribute any actual files associated with digital designs offered on KarleyHall.com Privacy Policy: We hate spam and promise to keep your email address safe. For questions, email karley@karleyhall.com

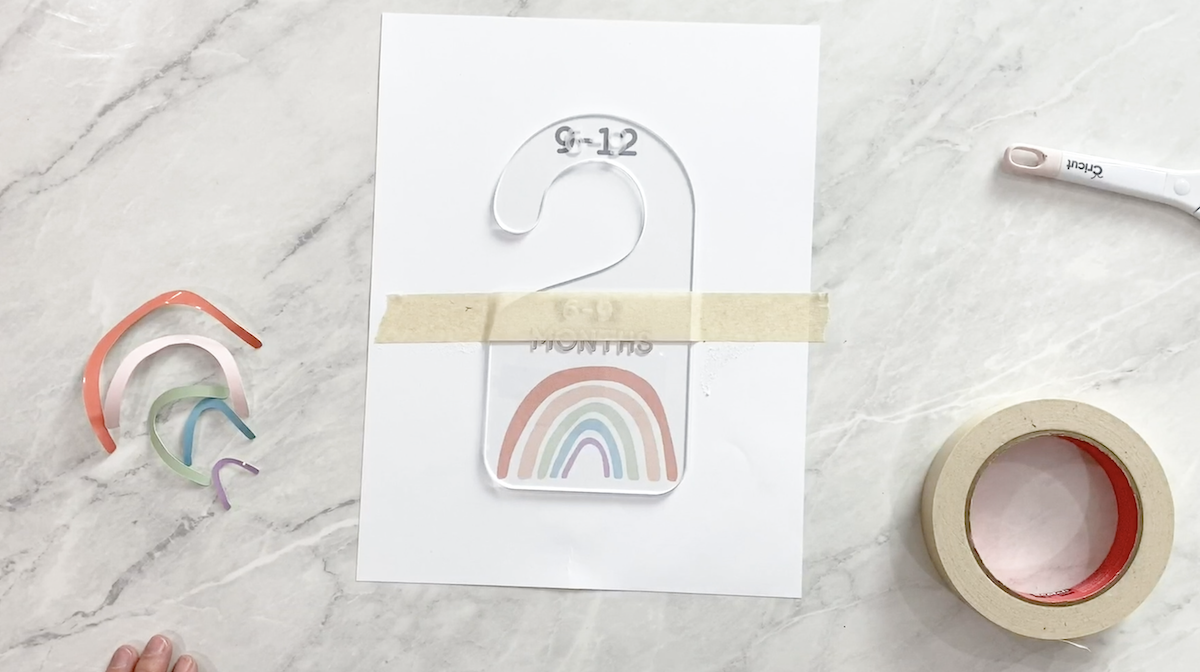
We are going to line our acrylic divider up on top of the template so we know exactly where to place our vinyl rainbows ensuring that all of our dividers are the same. 

Using masking tape, tape your divider in place on top of the paper template.

Apply vinyl using the hinge method  

If you have been around for a while, you know I love the hinge method. If you don’t know what the hinge method is yet, check out this post! We won’t need transfer tape for this tutorial… which in my opinion, makes this even easier! 

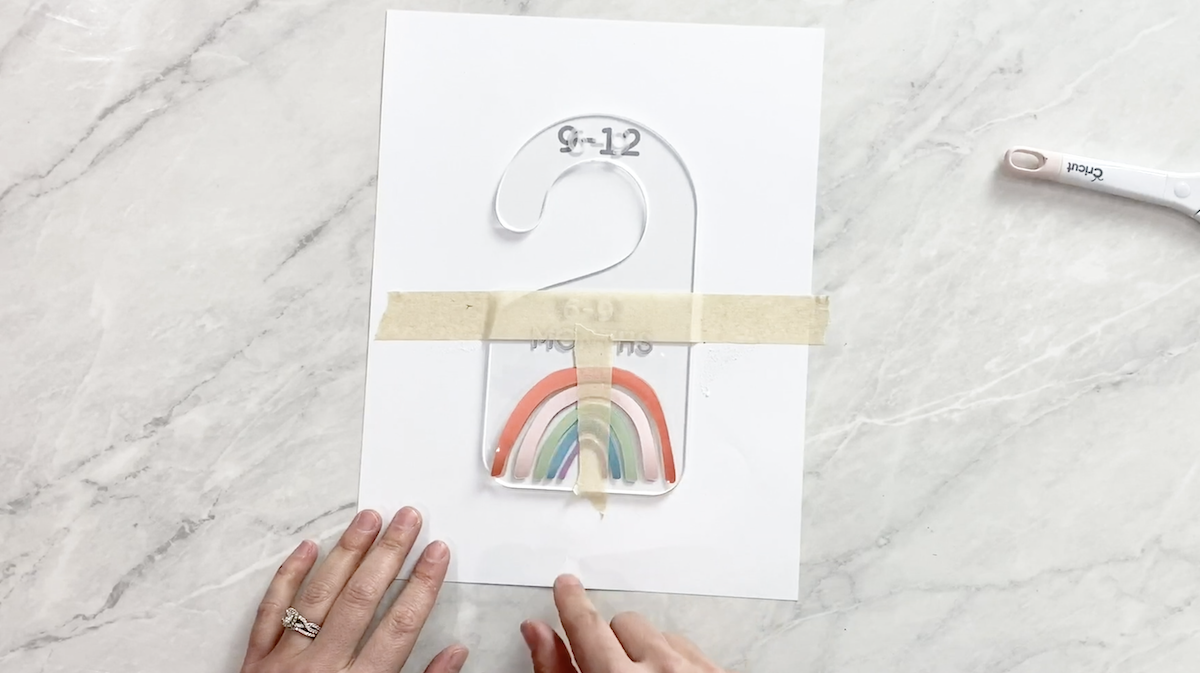
Using a piece of masking tape, line your vinyl up and tape it (with the liner still on) onto your clear divider. Since the liner is still on, the stickiness of the vinyl will be protected. This allows you to adjust your vinyl until you are 100% happy with the placement. I decided to tape all of my arches in place at once, but you can go one by one if you want!  

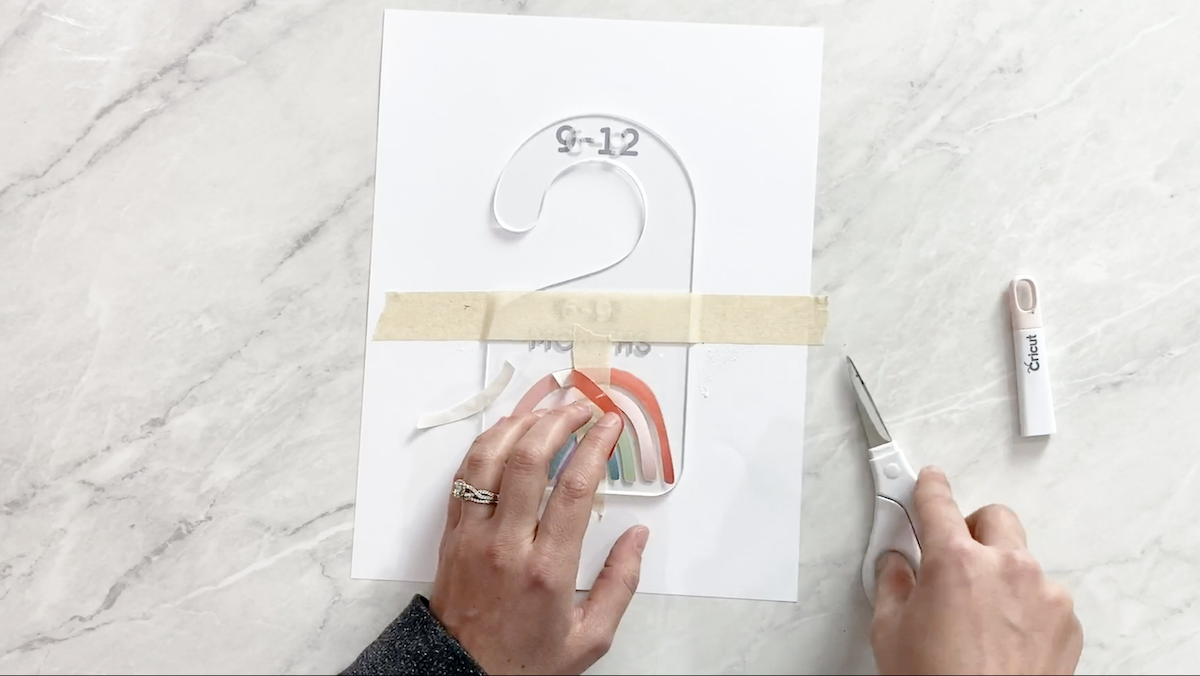
After all of your vinyl is in place, peel back one side of the vinyl to expose the sticky back.

Using a pair of scissors, trim away the liner so that it is out of the way. 

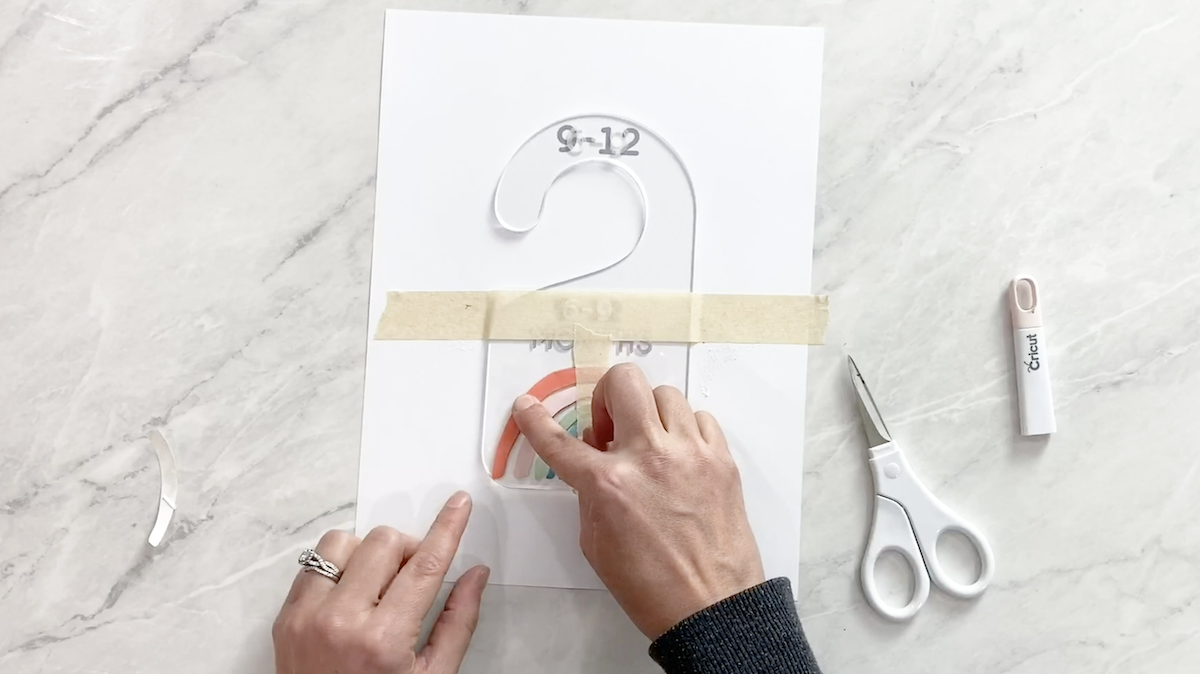
Then push the vinyl down onto the clear divider. Repeat this process for each rainbow arch color. 

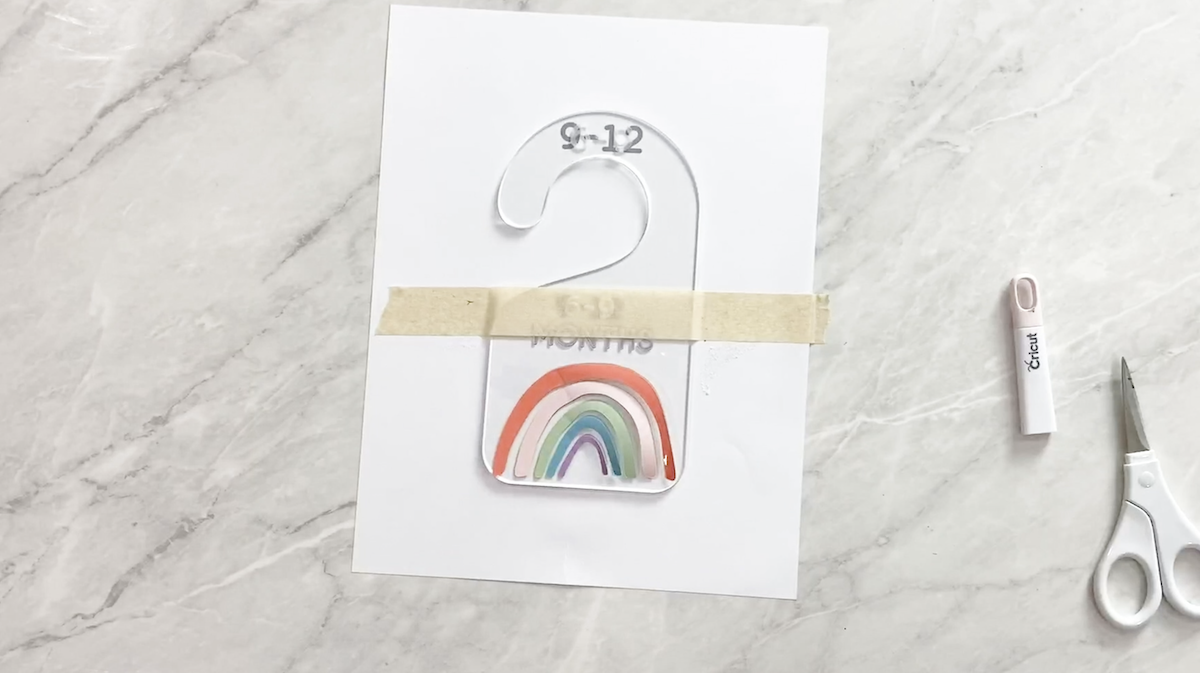
Once you are finished, peel away the masking tape from the center of your rainbow and remove the liner on the other side. If you get hung up on any of the steps above, click on the image and it will take you to the how-to video tutorial!

Peel off the tape and enjoy!  

Once your vinyl is all secured, peel the tape off your divider and template and enjoy your adorable creation! If you need to press the vinyl on further, use your finger or scraper to burnish the vinyl. These dividers only take a few minutes once you get the hang of it! Let me know in the comments if you plan to make your own!

Looking for all of the files mentioned in the video?

If you are looking for all of the files used in the tutorial– here they are! Simply agree to the “Terms & Conditions” and subscribe to my email list to download! Your support means the world to me!

Rainbow Baby Closet Dividers (All Files)
TERMS AND CONDITIONS
By entering your email you will be subscribed to Karley Hall's email list and can INSTANTLY download this file. Your email will only be subscribed once and you may unsubscribe at any time. Image rights: For personal use only! You can create projects using this image for any individual, organization, or event so long as it is not with the intent of resale or other commercial purposes. Under no circumstances are you permitted to resell, give-away, or otherwise distribute any actual files associated with digital designs offered on KarleyHall.com Privacy Policy: We hate spam and promise to keep your email address safe. For questions, email karley@karleyhall.com

Need help downloading the SVG and uploading it to Cricut Design Space?

Not a problem– check out the video below! And while you’re there, I’d love if you subscribe to my channel!

Ready to try it out!? Here’s what you need!

Have Questions or want to connect!?


Happy Crafting,

Karley

Hello

I’m Karley

Welcome to my blog! A place where I can share my love for all things crafting with you! If you are obsessed with your Cricut… I’m sorry to inform you that your obsession will only get worse while you’re here! I will teach you everything you need to know to get up and crafting with your Cricut. I am here to help! To reach me, use any of the social links below! 

Have specific Cricut questions?  Join Our Facebook Group!

Engraving with Your Cricut Machine

Engraving with Your Cricut Machine

This post and the photos within it may contain Amazon or other affiliate links. If you purchase something through the link, I may receive a small commission at no extra charge to you. I received compensation for this post, but all opinions are my own.

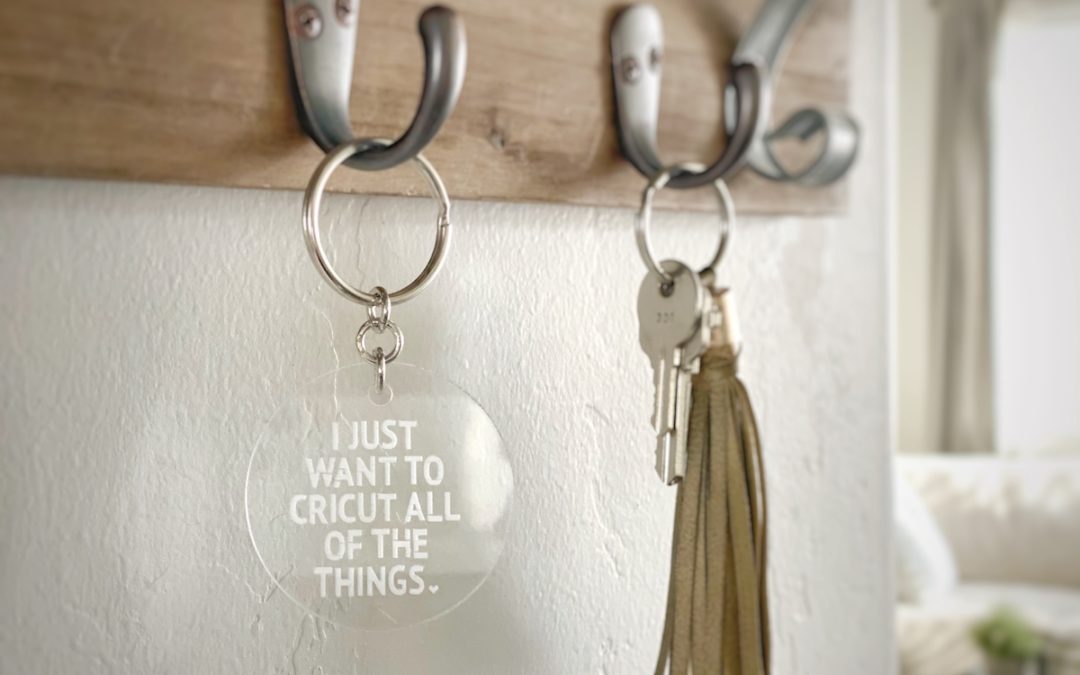
Engraving seems intimidating when you don’t know how to create files that work with your cutting machine! Don’t worry– I figured out the hard part and will share with you all of my favorite tips and tricks in this tutorial!

Here’s what we need to get this craft party started:

If at any point during this tutorial you get lost or confused, click the image and it’ll take you to that exact moment in a full how-to video tutorial. The video will show you everything you need to know about designing a file that works well with engraving, uploading the file to Cricut Design Space, and engraving the file using your Cricut Maker.

Just want to check out the video? Watch it below!  

Designing your file to have a filled font 

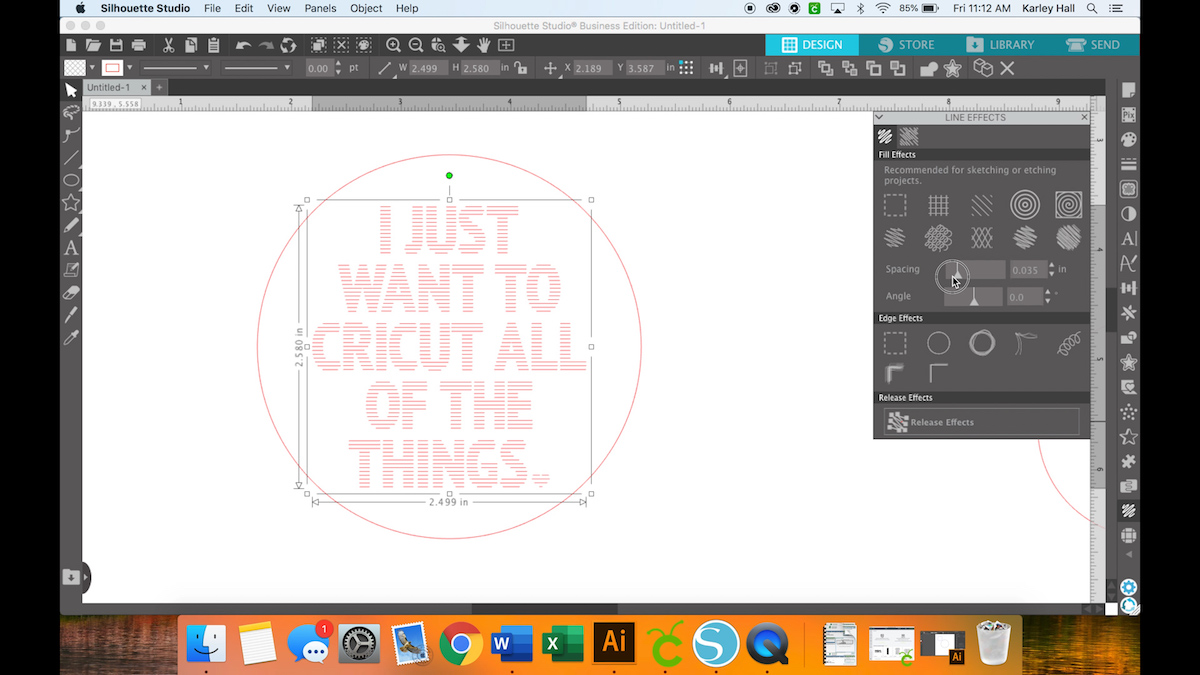
So before my days of working at Cricut, I actually worked at the Silhouette America headquarters. I love using Silhouette Studio and actually miss a lot of the features when I am working in Cricut’s Design Space. But did you know you actually can use Silhouette Studio to make files to work with your Cricut machine?! You do need to upgrade to Silhouette Studio Business Edition to export your files, but before you rush off to do that, try out the free version here. I’m sure you will want to upgrade in no time at all.  

This part of the tutorial is pretty intense, so instead of walking through each and every step, for this portion, I would recommend watching my YouTube video. Or if you have no interest in learning the design side of things, scroll down and download the free SVG (scalable vector graphic) below! 

Acrylic Blanks 

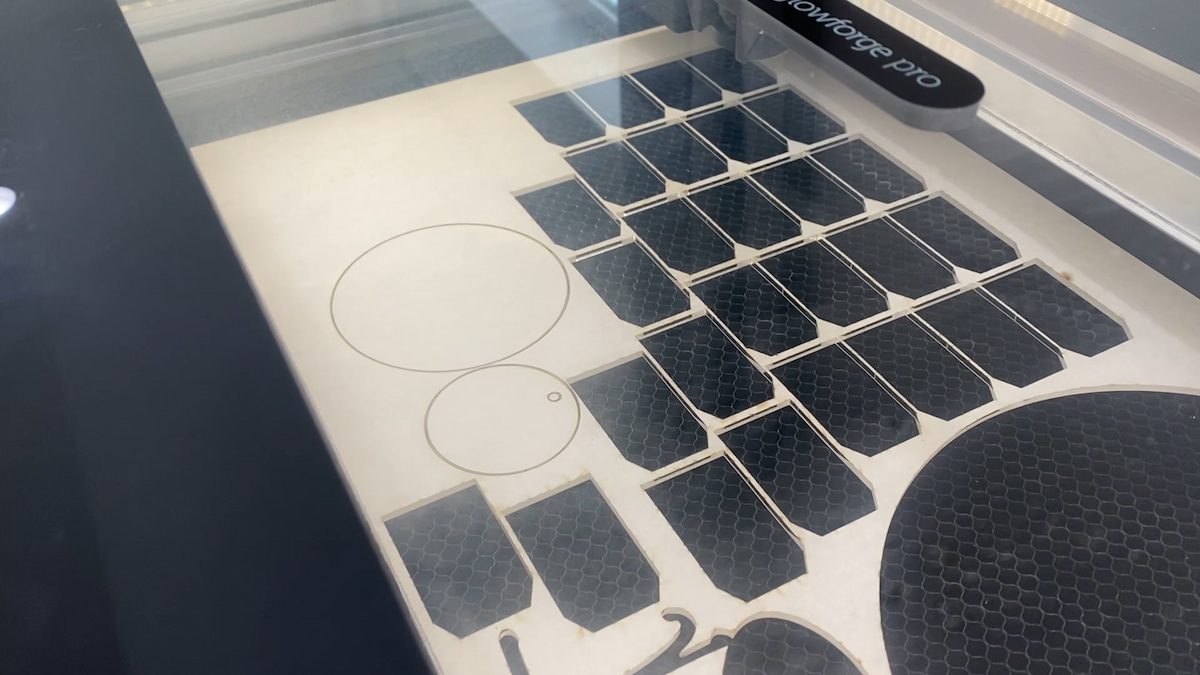
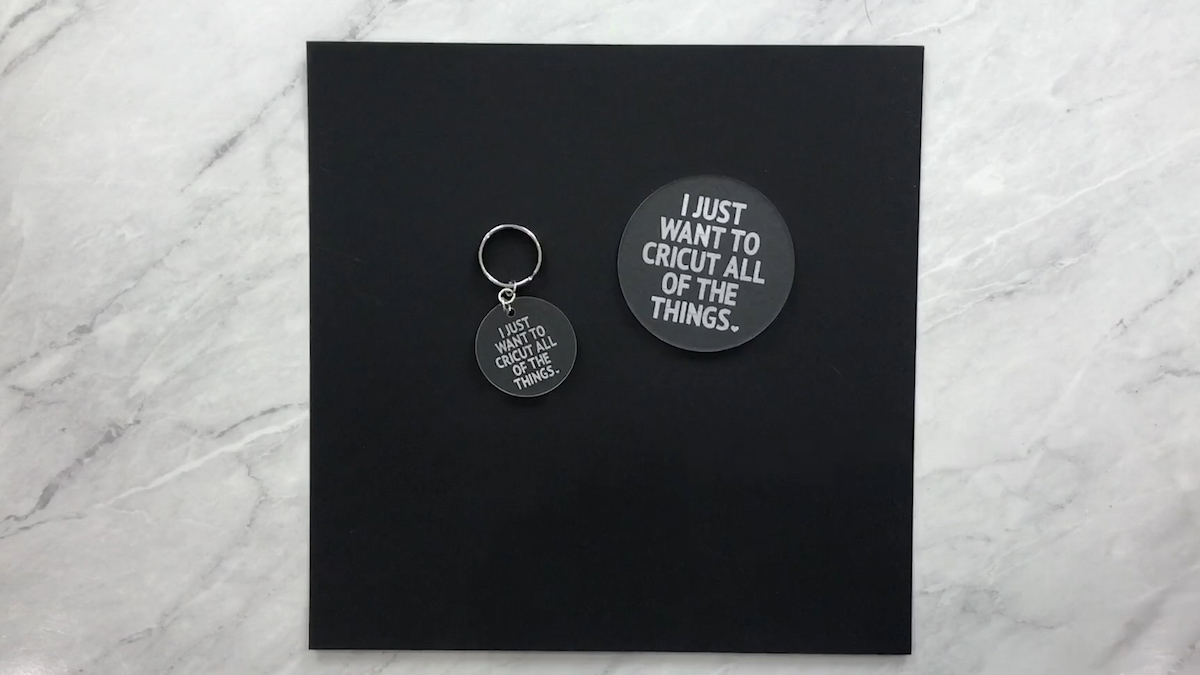
Once you have your file set up, next you need to determine what you are going to engrave it on. I use 1/8″ thick acrylic that I cut on my Glowforge. 1/8″ converts to 3.175 mm but when I used my calipers and actually measured my pieces they came in around 2.7 mm. 

If you do not have a Glowforge, do yourself a favor and check it out! But you definitely do not need one to do this project, you can find precut acrylic blanks all over the internet.  

You can even order blanks from Amazon! You will want to order the 1/8″ thick. They come shipped with masking tape that you will peel off before you engrave.

Lining up your project 

I have found my engravings to be most accurate when I line the acrylic up at the center of my cutting mat. Click on the photo below to see how to move your image to the center of your mat from the mat preview screen. Remove the masking from the top side of your acrylic blank and tape it on to your StrongGrip cutting mat using masking/ painters tape.  

If you want your design to be on the underside of your blank, mirror the design so that it is nice and smooth on the top of your acrylic. Click on the image below to see what I mean!      

Engraving Tip for the Cricut Maker 

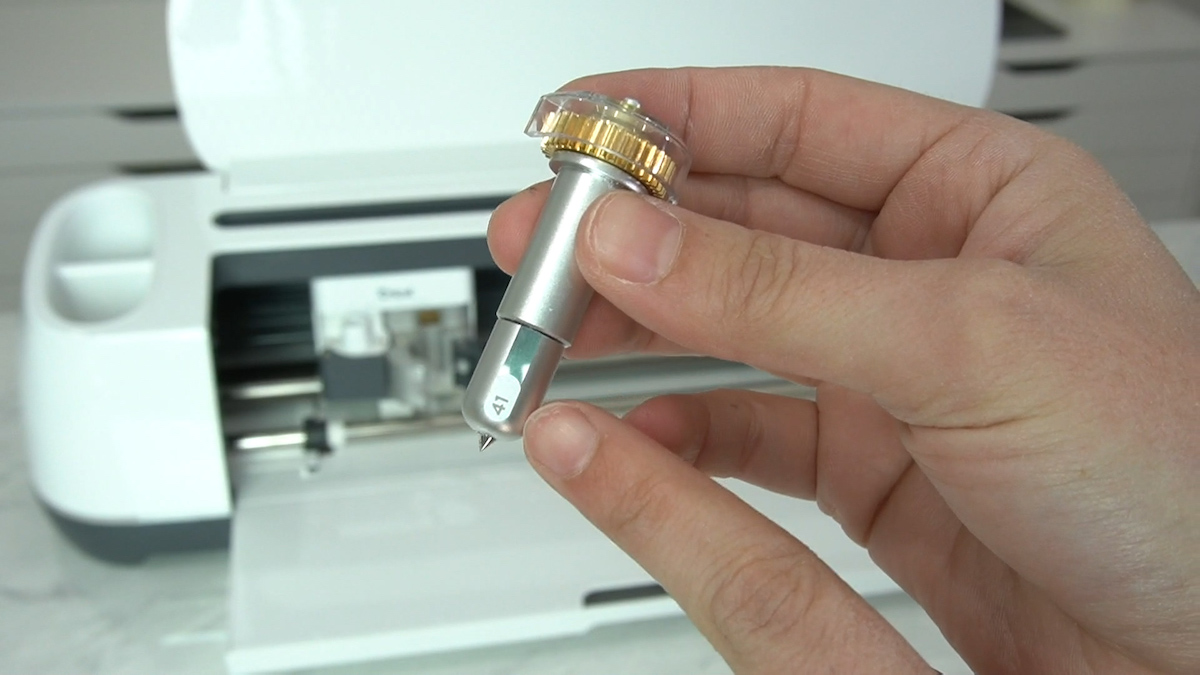
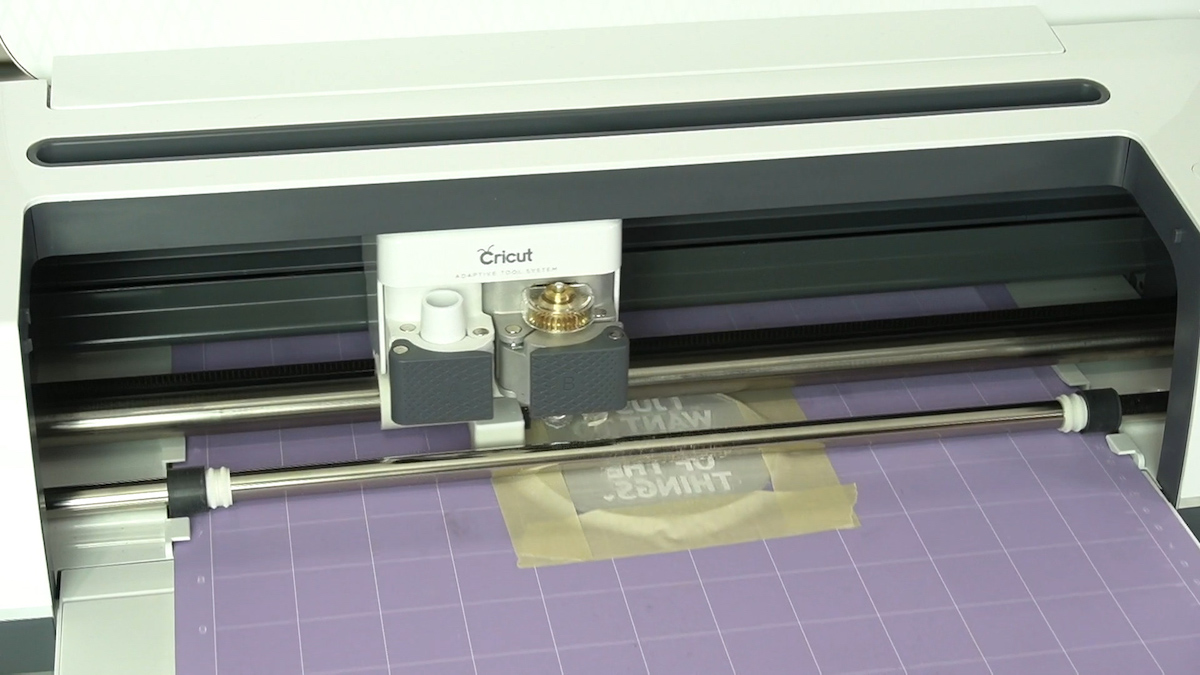
We are using the Cricut Maker for this tutorial. There are 3rd party engraving tips for the Explore machines, but I personally like using tools that Cricut has developed and tested. The engraving tip works with the QuickSwap housing sold by Cricut. I know they rigorously tested it and it will last through a lot of engraving.

Please note the QuickSwap housing is different than the Rotary Blade that came with your machine. To understand the difference in the blades, check out this video.    

How long does this take?!  

If you use the file below, your engraving will take a while… about an hour! I walked away from my machine and worked on other projects while my machine was engraving. I kept an eye on it to ensure it didn’t jam, but for the most part I just let it run and do its thing! 

While the machine is engraving, the tool will lift and spin! Do not be alarmed, this is completely normal!

Once the engraving is done, I use a lint roller to roll off the engraving dust! 

Enjoy!  

Peel off the tape and flip over your mat and peel it off of your acrylic blank. Remove the masking on the back of your blank and enjoy! 

If you notice any gaps in your design, I would recommend reporting this feedback to Cricut! I made them aware that each time the tool lifts and spins, it comes back down in a slightly different location resulting in small little gaps in my design. Now that they are aware of the issue, they are looking into it and have assured me they will get back to me ASAP. The gaps did not bug me, but I wanted to be extremely upfront about the issue before you invest time and money into your own engraving projects. Personally, the gaps don’t bother me, but again, I want to be very transparent that your image will not be 100% filled in if you choose to have your lines filled as tightly as I recommend.  

Looking for the SVG mentioned in the video?

If you are looking for the SVG used in the tutorial– here it is! Simply agree to the “Terms & Conditions” and subscribe to my email list to download! Your support means the world to me!

Cricut Things Engraving SVG
TERMS AND CONDITIONS
By entering your email you will be subscribed to Karley Hall's email list and can INSTANTLY download this file. Your email will only be subscribed once and you may unsubscribe at any time. Privacy Policy: We hate spam and promise to keep your email address safe. For questions, email karley@karleyhall.com

Need help downloading the SVG and uploading it to Cricut Design Space?

Not a problem– check out the video below! And while you’re there, I’d love if you subscribe to my channel!

Are you excited to get started?! Here is the list of supplies to get your engraving project underway! 

Extra

Have Questions or want to connect!?

Happy Crafting, Karley

Hello

I’m Karley

Welcome to my blog! A place where I can share my love for all things crafting with you! If you are obsessed with your Cricut… I’m sorry to inform you that your obsession will only get worse while you’re here! I will teach you everything you need to know to get up and crafting with your Cricut. I am here to help! To reach me, use any of the social links below! 

Have specific Cricut questions?  Join Our Facebook Group!

How to Make a Door Mat with Your Cricut

How to Make a Door Mat with Your Cricut

This post and the photos within it may contain Amazon or other affiliate links. If you purchase something through the link, I may receive a small commission at no extra charge to you.

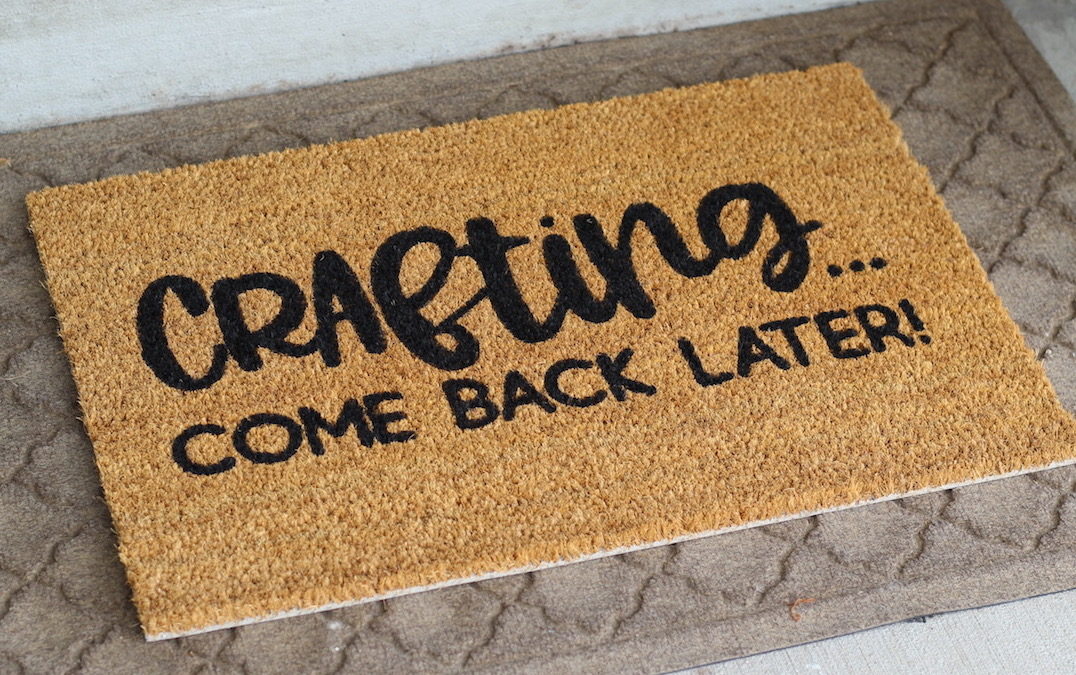
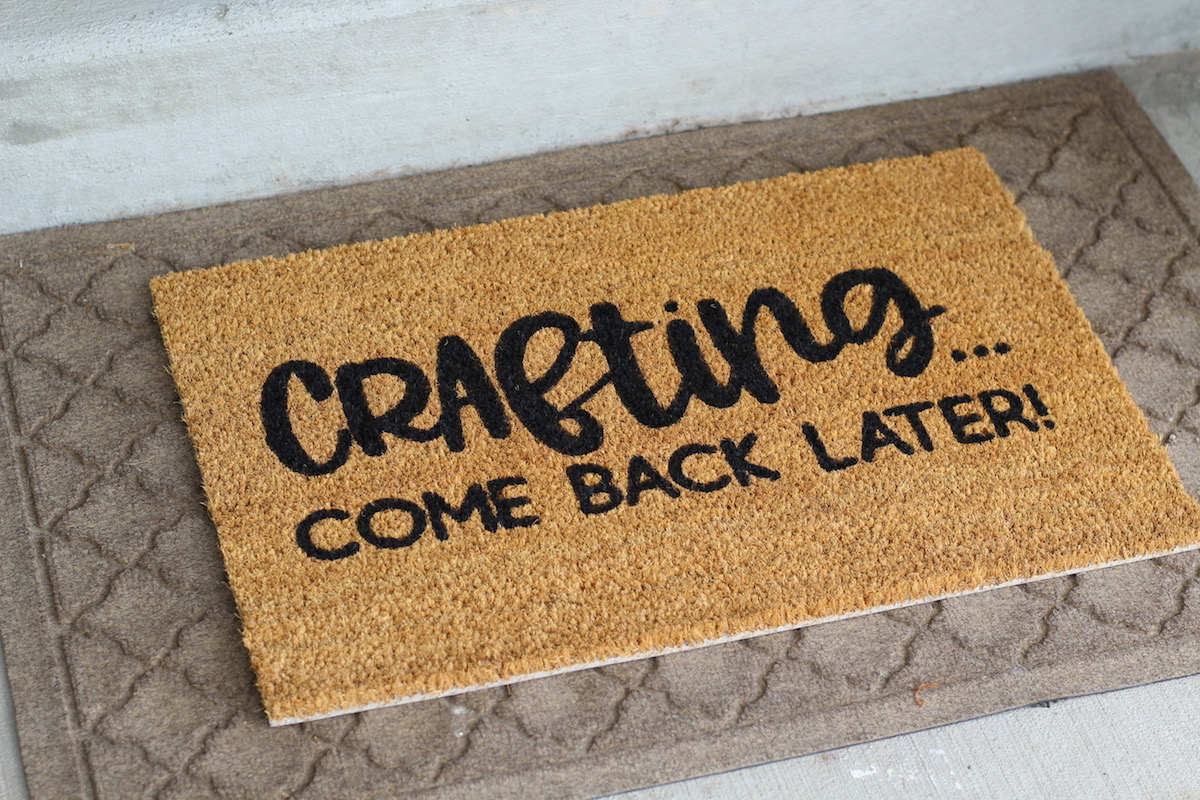
Have you seen those snarky doormats all over Pinterest?! I would always see them and think, I could make that! Turns out it’s not too hard! Follow these steps and you will have a completed doormat in no time!

Here’s what we need to get this craft party started:

If at any point during this tutorial you get lost or confused, click the image and it’ll take you to that exact moment in a full how-to video tutorial. The video will show you everything you need to know about creating your own custom doormat!

Design your project in Cricut Design Space 

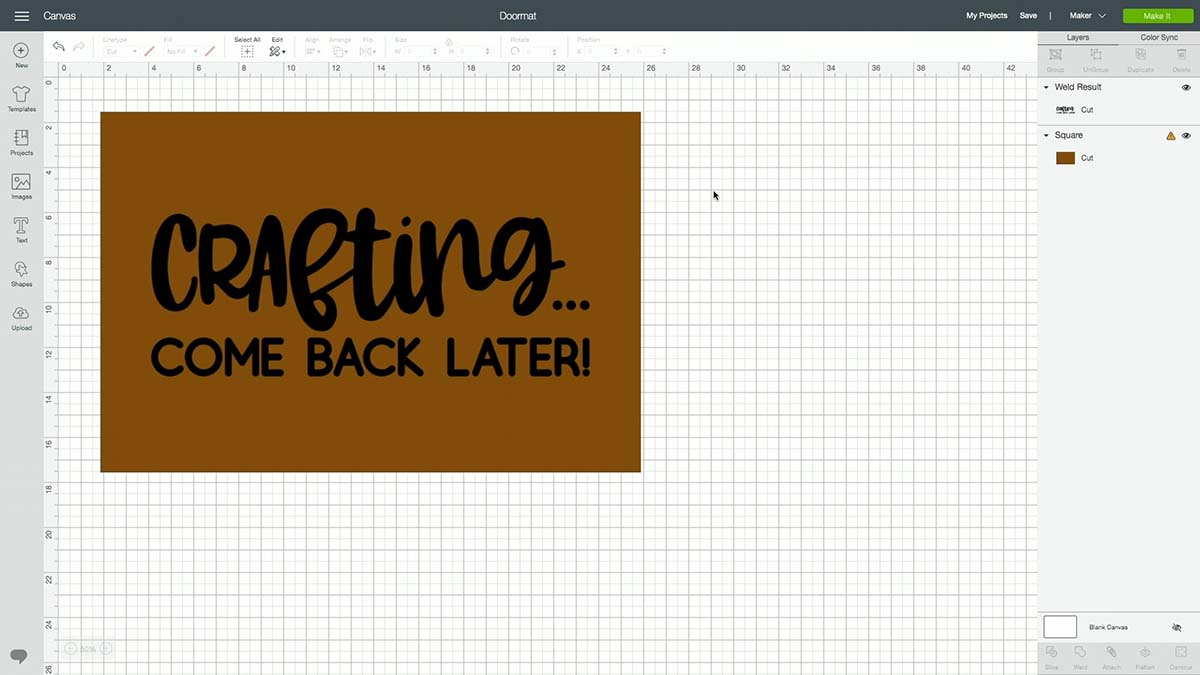
To create your design in Design Space, I inserted a rectangle that matched the size of my doormat. This way I could resize my design to ensure I liked how it looked even before I cut it. For this project, I used a portion of this design and added “Come Back Later!” underneath it! Hindsight 20/20, I should have chosen “Come On In” because who doesn’t love crafting with a friend! If you don’t know how to download an SVG from Silhouette’s Design Store and upload it to Cricut Design Space, check out this video. Once you are happy with your design, delete your rectangle and ensure your design fits within the size parameters: 11.5″ x 23″  

Cut your freezer paper using your cutting machine

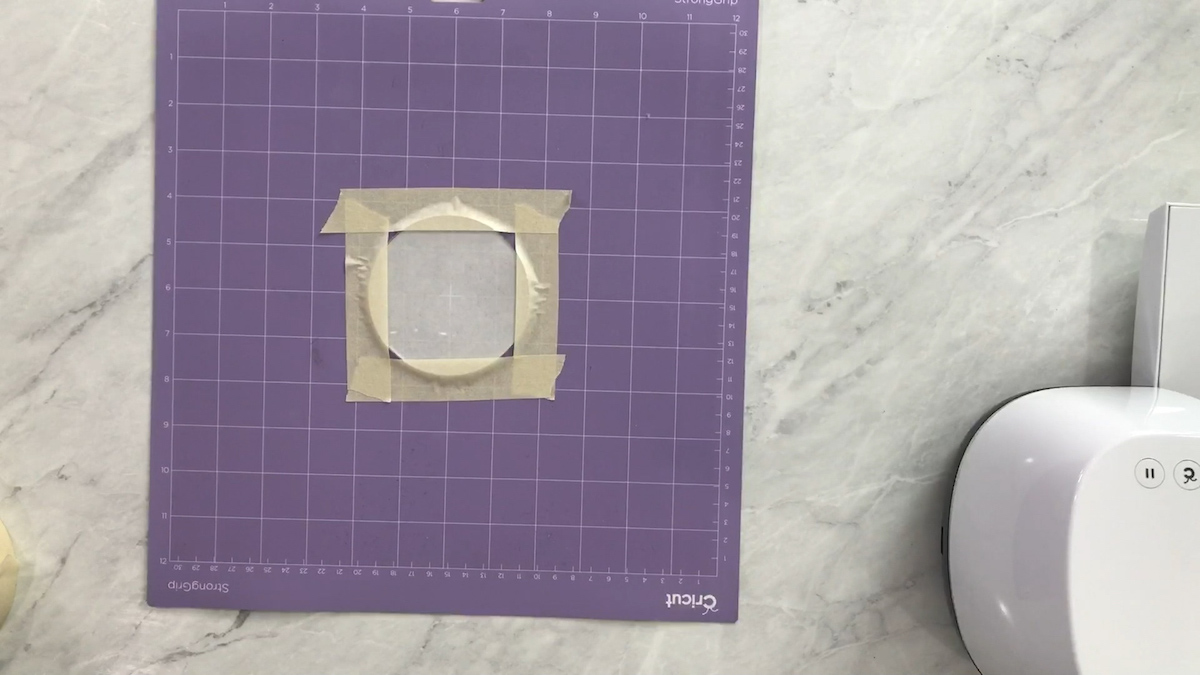
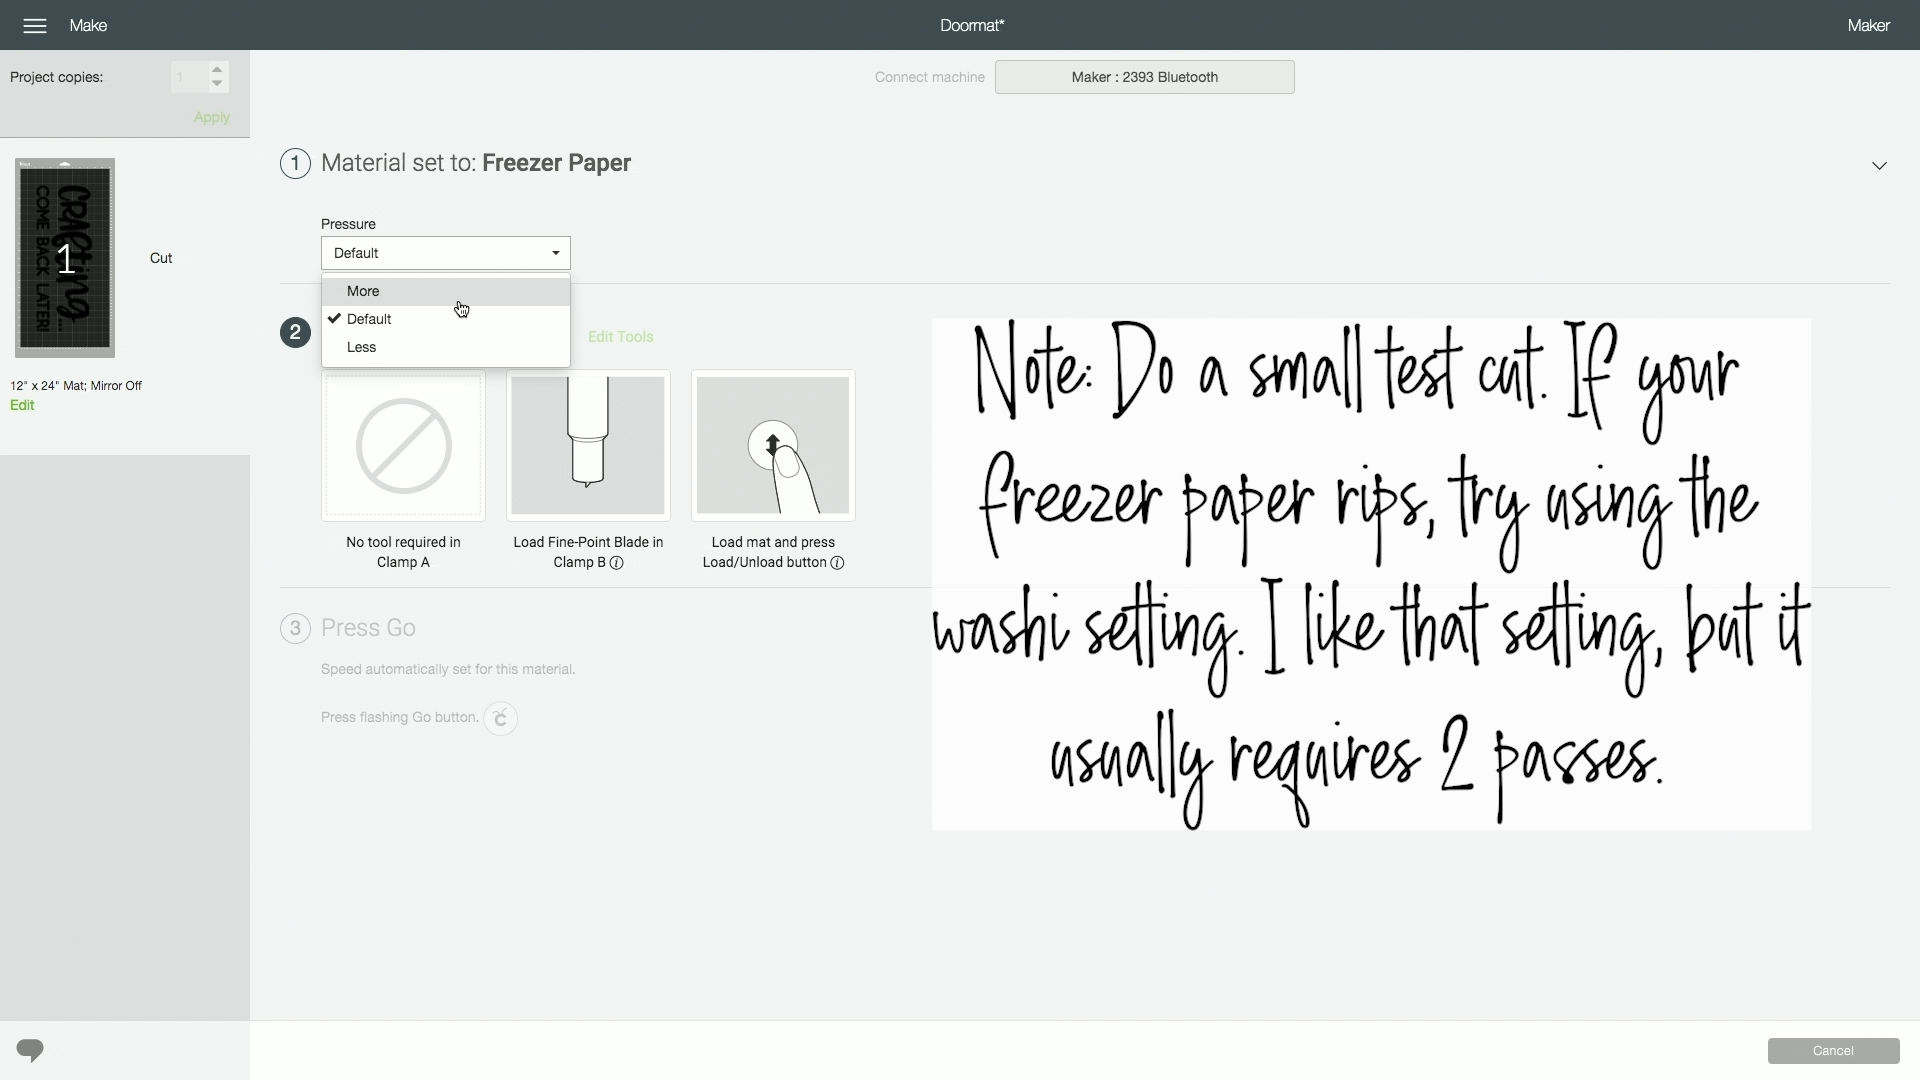
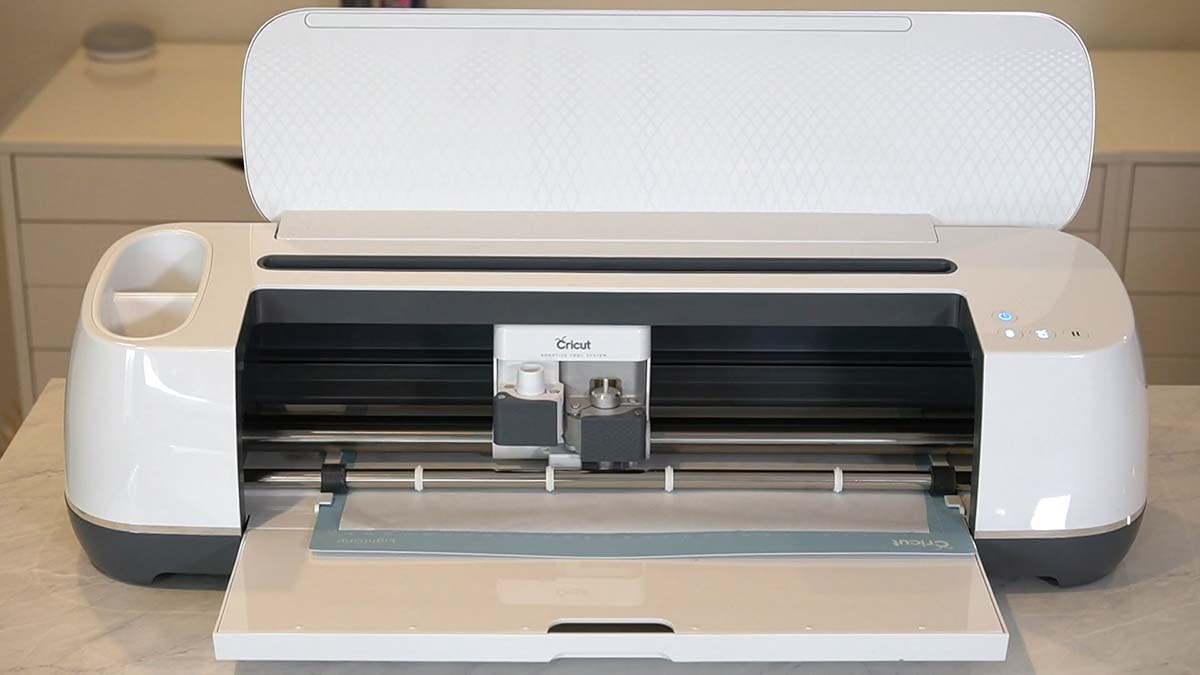
Trim your freezer paper down to fit your LightGrip Cutting mat. I use a ruler, TrueControl Knife, and my self-healing mat to get this job done. Before you load your full piece of trimmed down freezer paper, I would use one of your scraps to do a test cut. I usually cut a small 1 inch circle for my test. Load your trimmed down Freezer Paper on to your 12×24 LightGrip Cutting Mat with the waxy side facing down on the cutting mat. Set your material settings to freezer paper and perform your test cut. If the paper rips or snags, I would recommend trying the “Washi” setting, but you do need to double cut it. Once you have your settings nailed down, load your full 12×24 sheet of freezer paper onto your LightGrip Mat with the waxy side facing down on the mat and then cut it.    

Weed away the areas you plan to paint

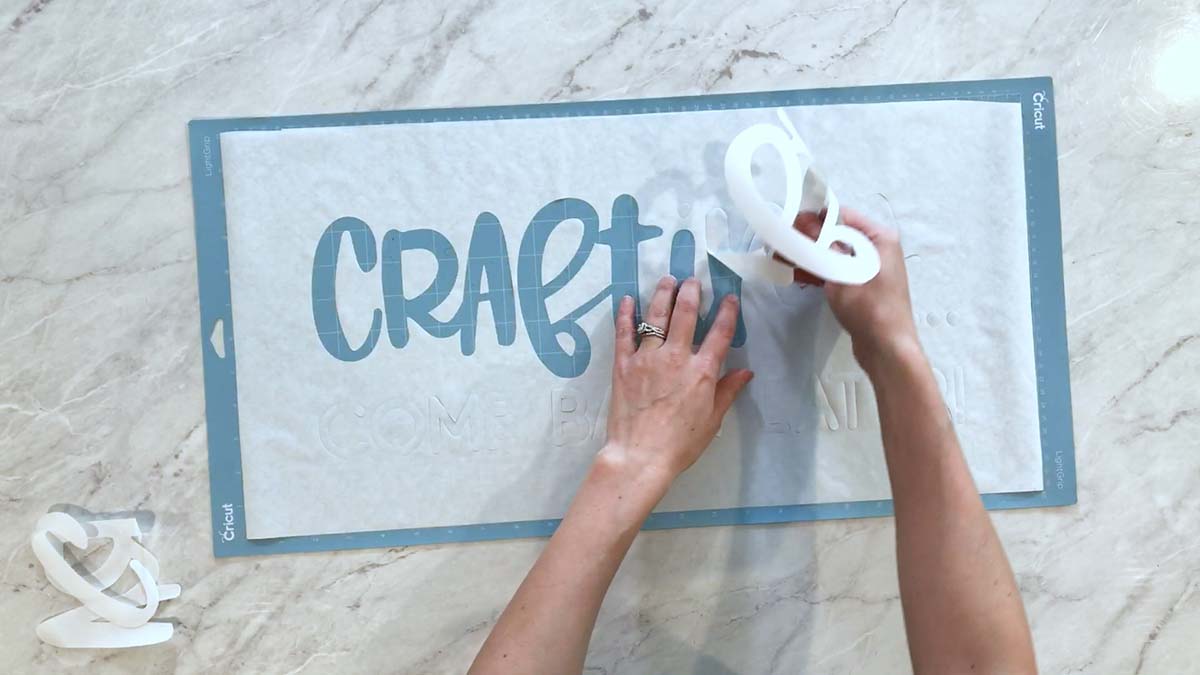
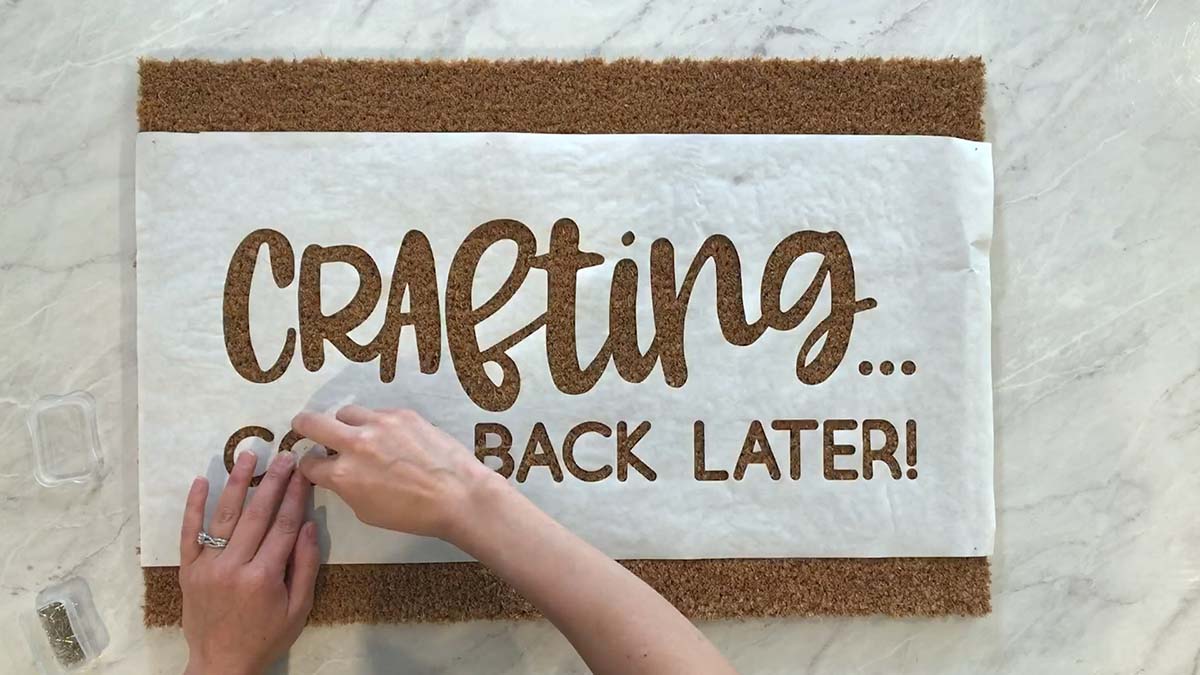
With your freezer paper still on the LightGrip Mat, peel away the areas you plan to paint. I do not use any tools for this part. If you can’t grip a portion of your design, tweezers work well to lift up your pieces. Go slowly and use care not to rip your design. Make sure to leave the insides of your letters on the mat. 

Cover Design with Heat Resistant Transfer Tape

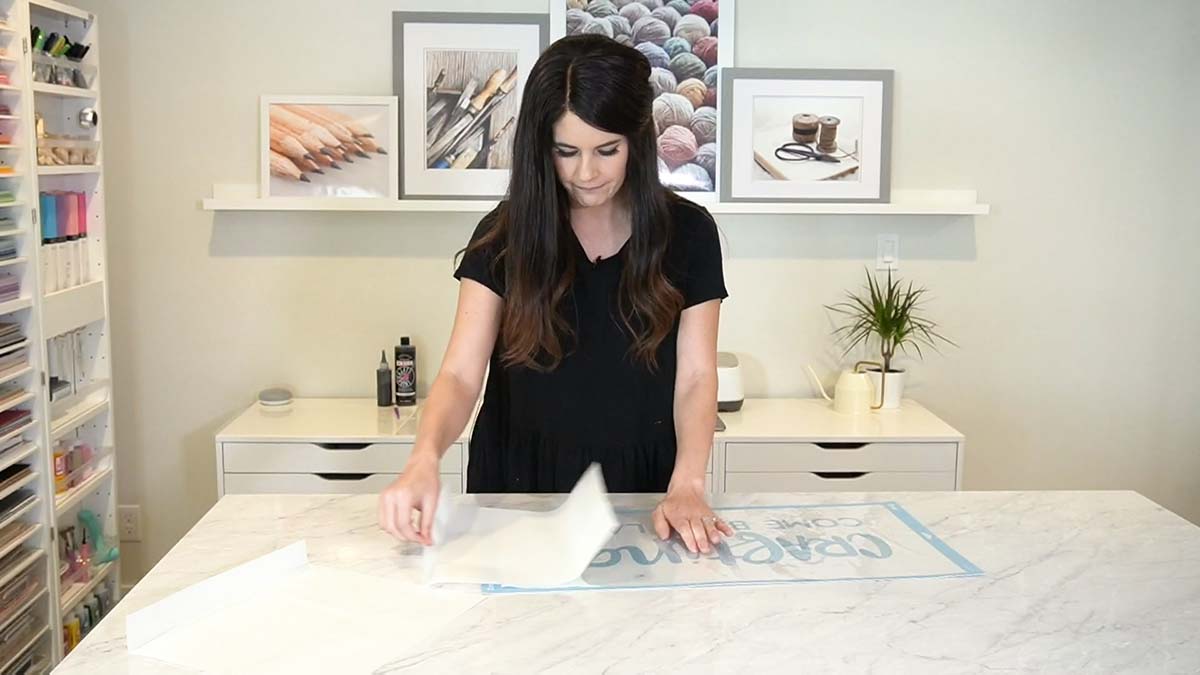
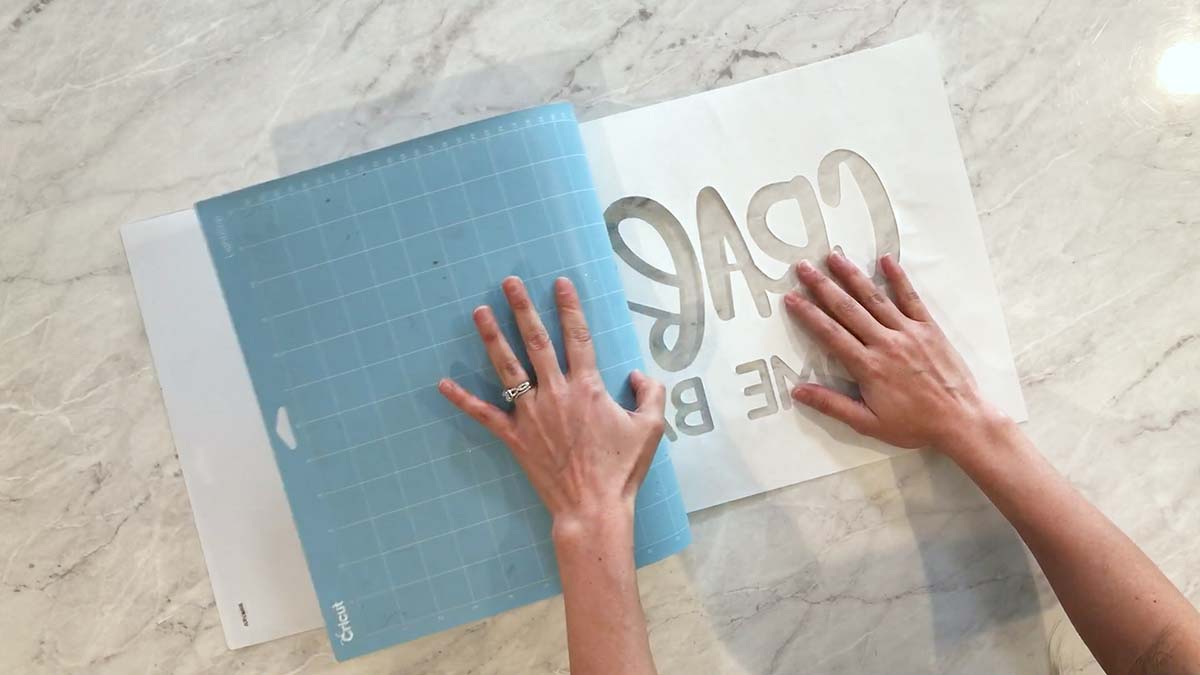
Before you grab your regular transfer tape, note that you need HEAT RESISTANT transfer tape. Regular transfer tape will melt and ruin your project. With your freezer paper still on your cutting mat, cover the design using the tape. Since I used 12×12 sheets, I slightly overlapped the two sheets to cover my entire design.

Once your tape is on the design, peel it off of your cutting mat. I like to roll my mat off of my design to ensure my project stays nice and flat.  

Use heat to melt design onto mat

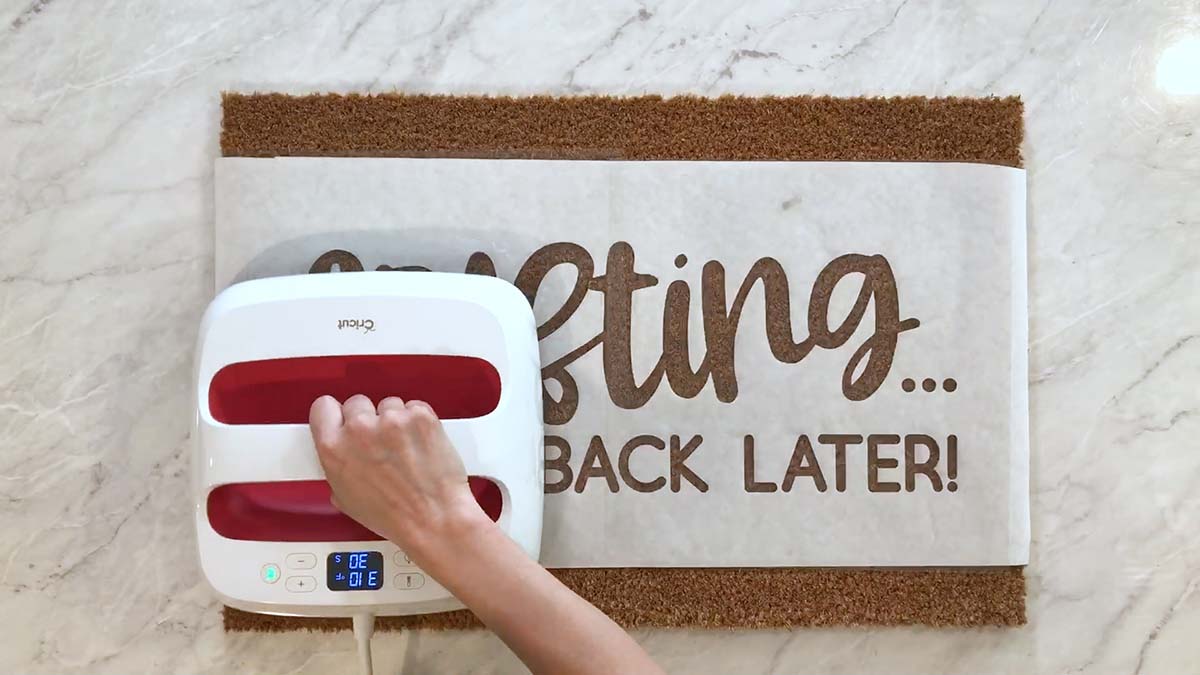
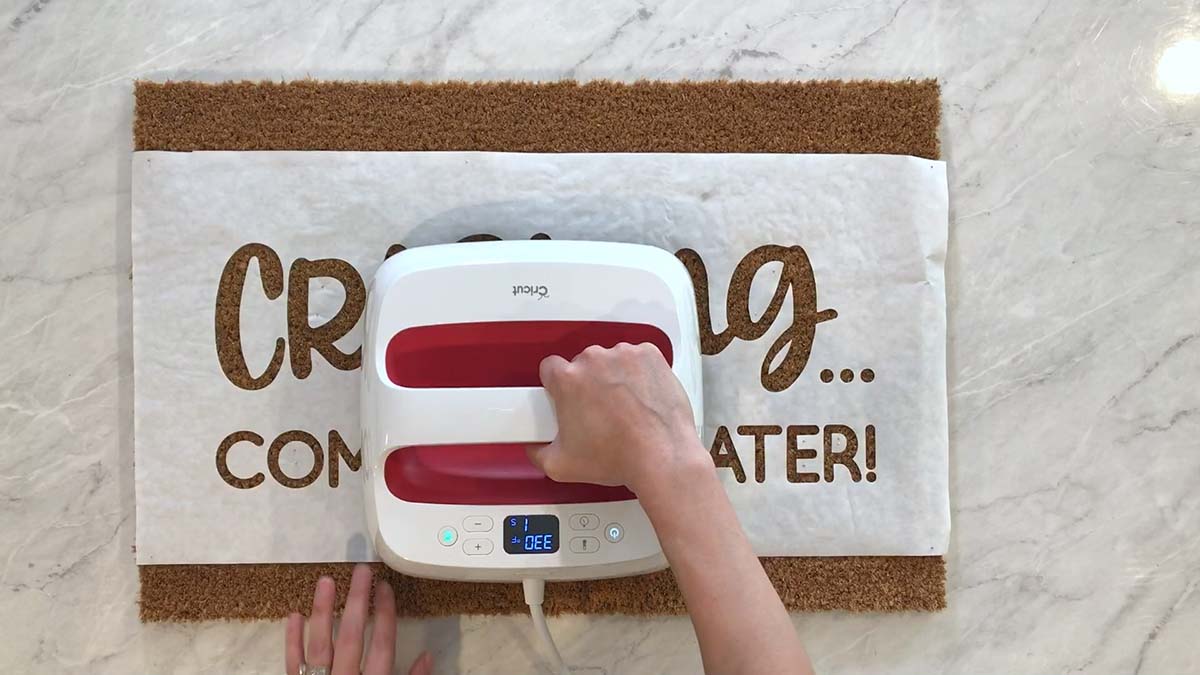
Using your EasyPress or iron, apply heat to your design to melt the wax on the freezer paper. I don’t have exact settings, but I ended up boosting my EasyPress up to 330 degrees Fahrenheit and pressing for 30 second increments.    

Peel away the heat resistant transfer tape

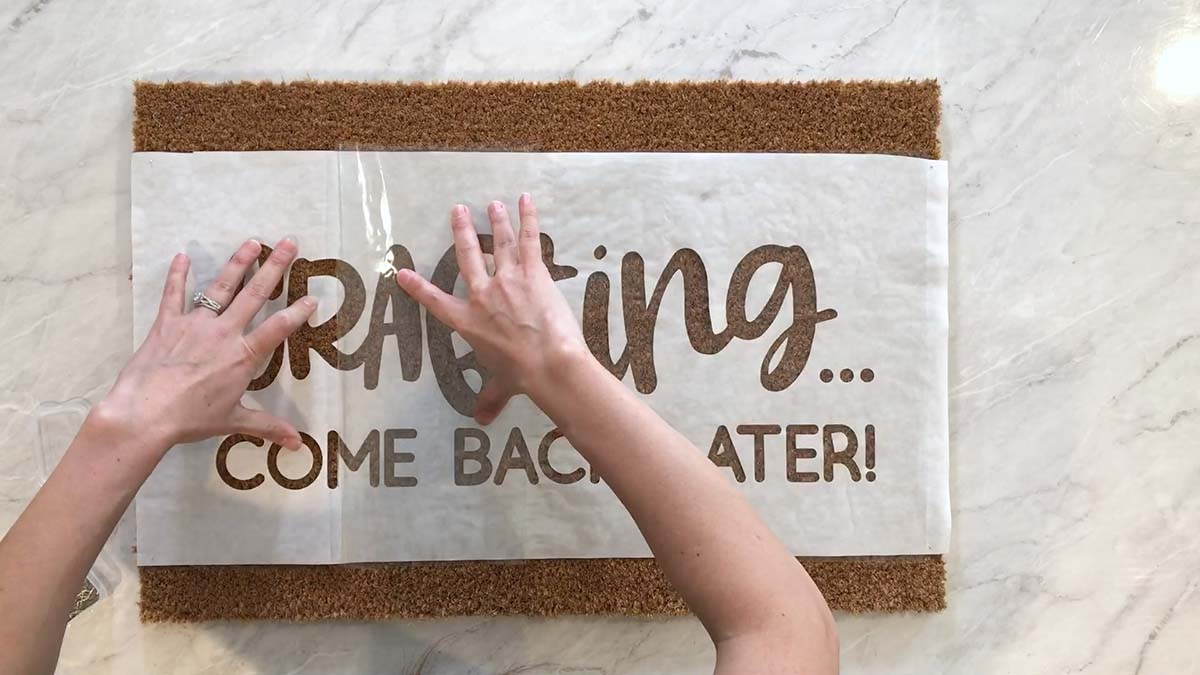
Slowly peel away your heat resistant transfer tape. Do NOT worry if your design is not completely adhered. If you click on the photo below, you will see in my YouTube video that mine is still moving around a lot at this point! We will repress it once more before we paint!  

Secure design with 1/2″ sewing pins

Now that the tape is removed, use pins to secure any loose areas of your design. I pin the insides of my letters and any areas that I feel like will lift when I apply my paint.

Repress once more now that you have removed your tape and have added your pins. You will notice that the wax will melt a lot quicker and your paper will really grip on to your doormat.

Using a squeeze bottle, paint in your stencil 

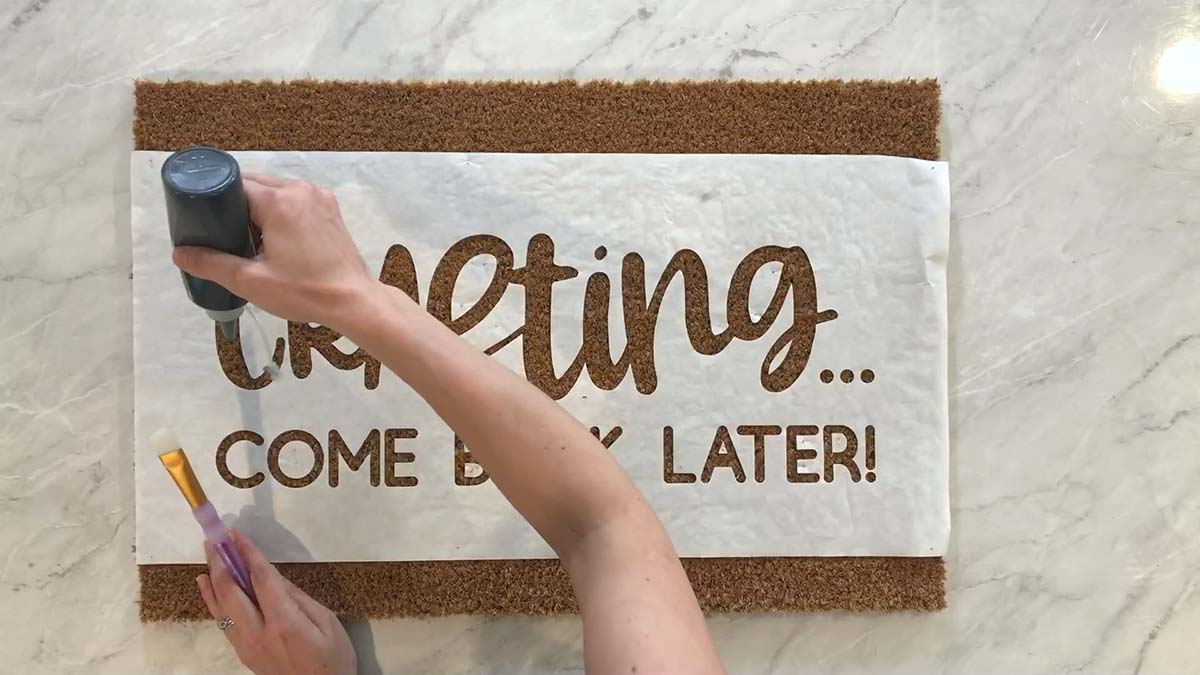
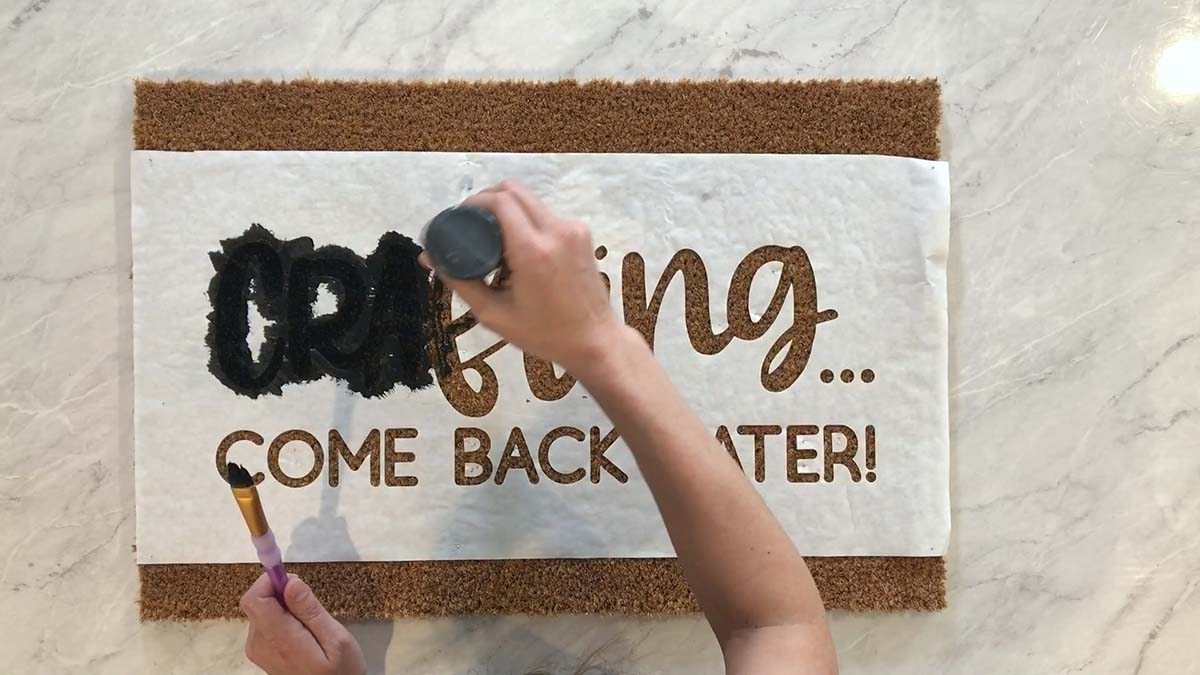
Fill a squeeze bottle with permanent paint and generously fill in your stencil. Spread and even it out using a paint brush. Don’t worry, it won’t bleed! The wax on the other side of your freezer paper will prevent the paint from seeping through. 

Remove stencil with tweezers

I am an impatient crafter, so I do not wait for the paint to dry before removing my stencil! I do prefer removing the stencil while it is still wet to prevent the paint from chipping. Using tweezers, I remove the insides and toss the stencil with the paint covered pins into the trash. Once the insides are removed, I remove the rest of the freezer paper and pins. 

Sealing your mat

Some people recommend sealing their doormats with a matte clear sealer. I personally have not sealed my mats and they have held up great in the Utah elements.   

Additional Resources

lf you want to see the entire tutorial, check it out below! 

Artwork on Doormat

Looking for the design used on this project, check out this video! It is a design from Silhouette America’s Design Store that you can purchase here. If you are unfamiliar with how to use images from the Design Store with your Cricut, the video tutorial will walk you through that process. You’ll love all of the designs!

Ready to try it out?

Here are the links to the products used in this tutorial!

Looking for a discount code to use on Cricut’s shop? Since my code changes each quarter, make sure you join my Facebook Group to get the most up to date code! The code will save you 10% and give you free shipping on orders over $50! Not on Facebook? No problem, send me an email to Karley@karleyhall.com or leave a comment below!

Have Questions or want to connect!?

Happy Crafting, Karley

Hello

I’m Karley

Welcome to my blog! A place where I can share my love for all things crafting with you! If you are obsessed with your Cricut… I’m sorry to inform you that your obsession will only get worse while you’re here! I will teach you everything you need to know to get up and crafting with your Cricut. I am here to help! To reach me, use any of the social links below! 

Have specific Cricut questions?  Join Our Facebook Group!